 This is an archive version of the document. To get the most up-to-date information, see the current version.
Step 2. Choose Microsoft Windows Server
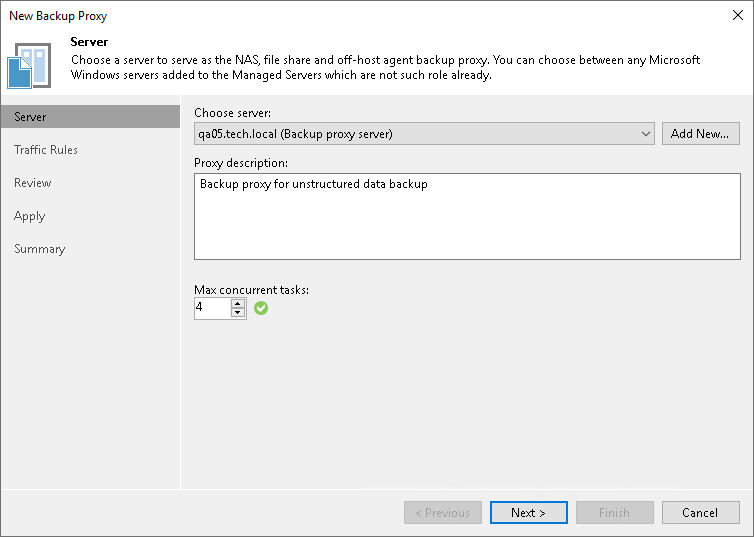
At the Server step of the wizard, specify server settings for the file proxy.
- From the Choose server list, select a Microsoft Windows server that you want to use as a file proxy.
The list of servers contains only those managed servers that are added to the backup infrastructure. If the server is not added to the backup infrastructure yet, you can click Add New to open the New Windows Server wizard. For more information, see Adding Microsoft Windows Servers.
- In the Proxy description field, provide a description for future reference. The default description contains information about the user who added the file proxy, date and time when the file proxy was added.
- In the Max concurrent tasks field, specify the number of tasks that the file proxy can process in parallel.
If the number of parallel tasks reaches this value, the file proxy will not start a new task until one of current tasks completes. Veeam Backup & Replication creates one task per every source file share. The recommended number of concurrent tasks is calculated automatically based on the amount of available resources. File proxies with multi-core CPUs can handle more concurrent tasks.
For example, for a 4-core CPU, it is recommended that you specify a maximum of 4 concurrent tasks, for an 8-core CPU — 8 concurrent tasks. When defining the number of concurrent tasks, keep in mind network traffic throughput in the infrastructure.
