This is an archive version of the document. To get the most up-to-date information, see the current version.
Step 8. Change VM Name and UUID
The Name step of the wizard is available if you have chosen to change the location and settings for recovered VMs.
You can change a name of each restored VM and select whether you want to preserve its UUID or change it. It is recommended that you specify a new name and generate a new UUID for a VM to prevent conflicts if the original VM still resides in the production environment. The name and ID change is not required if the original VM no longer exists, for example, it was permanently deleted.
To change a VM name:
- Select a VM in the list and click Name. To apply changes in bulk, select several VMs and click Name.
- In the Change Name section, enter a new name explicitly or specify a change name rule by adding a prefix and/or suffix to the original VM name.
You can also change VM names directly in the list:
- Select a VM in the list.
- Click the New Name field and enter the name to be assigned to the recovered VM.
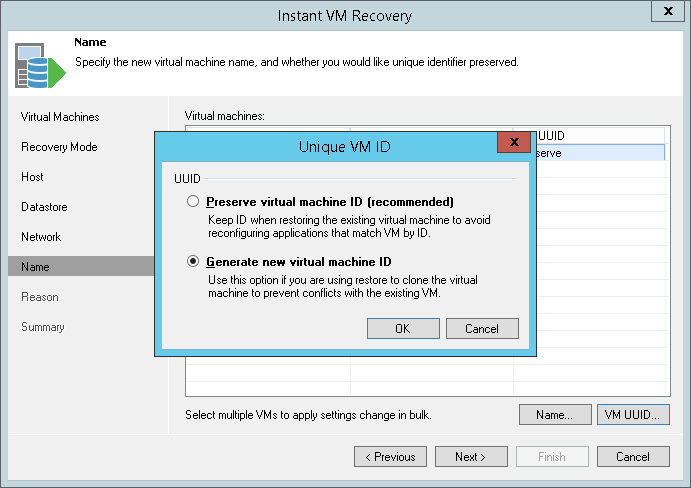
You can specify how Veeam Backup & Replication must handle unique identifiers of the recovered VM. By default, a recovered VM is identified with the same UUIDs as the original VM. If necessary, you can assign a new UUID to the recovered VM.
To view or change VM identification settings:
- Select one or more VMs in the list and click VM UUID.
- Select to preserve the VM ID or generate a new VM ID.