 This is an archive version of the document. To get the most up-to-date information, see the current version.
Restoring vCloud Director VMs and vApps
You can perform the following tasks using the VMs tab of Self-Service Backup Portal:
- Search and browse VMs and vApps
- Restore VMs and vApps
- Restore VM disks
- Delete VMs
You can restore vCloud Director VMs to the original (production) vApp.
To restore a VM:
- On the VMs tab, select the necessary VM backup in the list of VMs. To quickly find the necessary VM, use the search field at the top of the window.
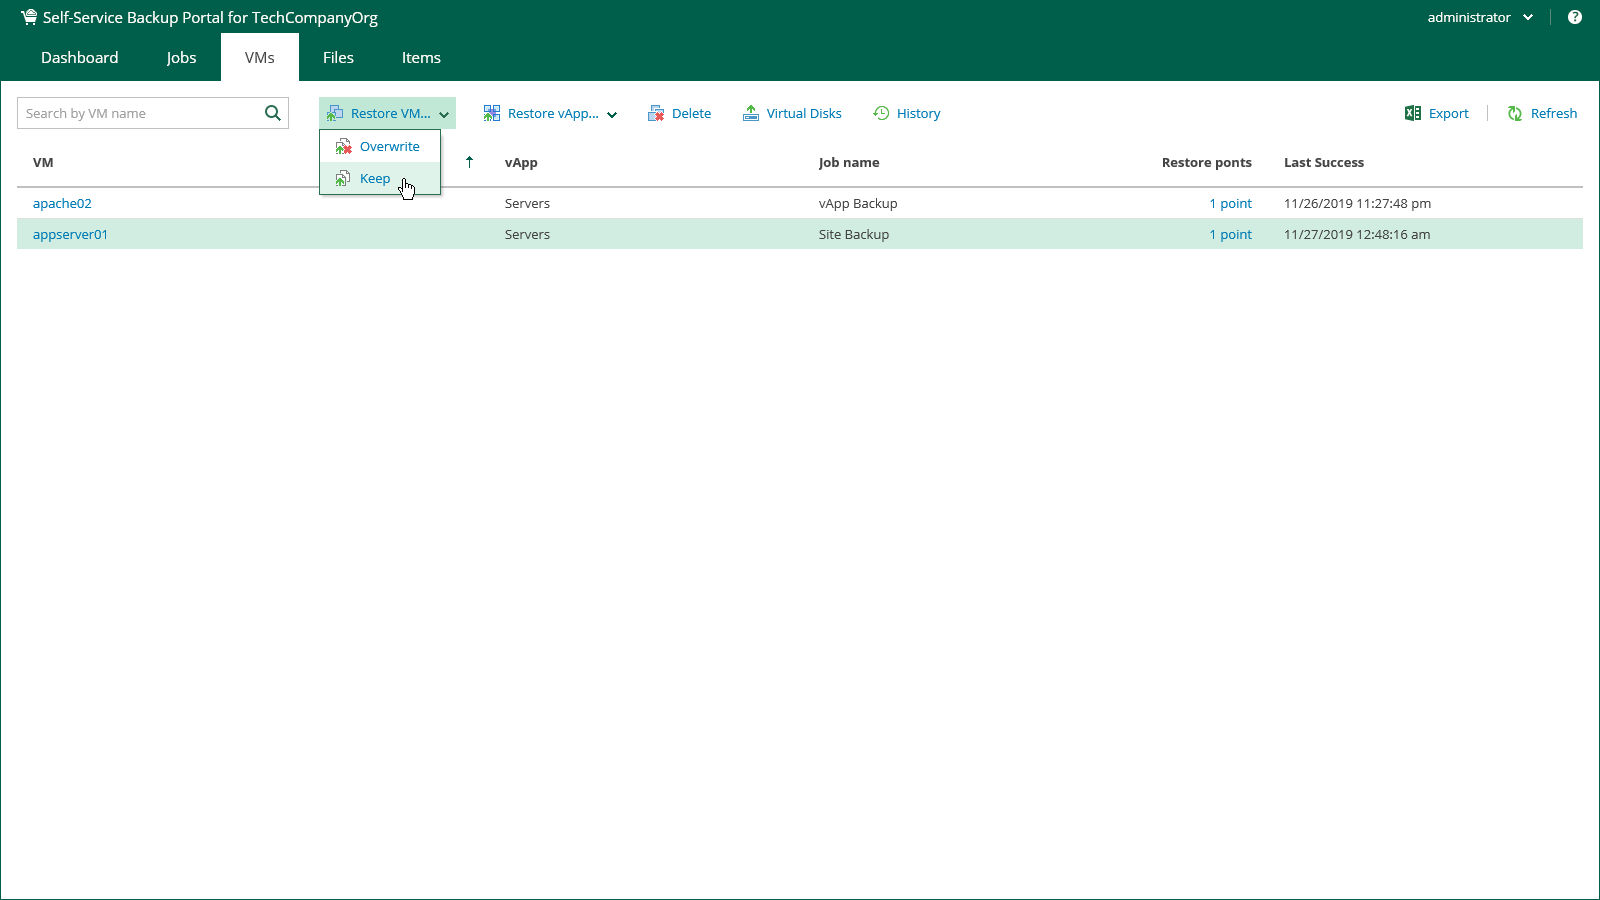
- Click Restore VM and select the option you need:
- Select Overwrite to restore the VM from the backup to the original vApp, replacing the production VM.
In this case, the restored VM hard disks are assigned the storage policies of the original VM hard disks.
- Select Keep to keep both VMs in the original vApp. The VM from the backup will be located next to the original production VM and will have the same name with the _restored suffix.
In this case, the restored VM hard disks are assigned the storage policy of the VM.
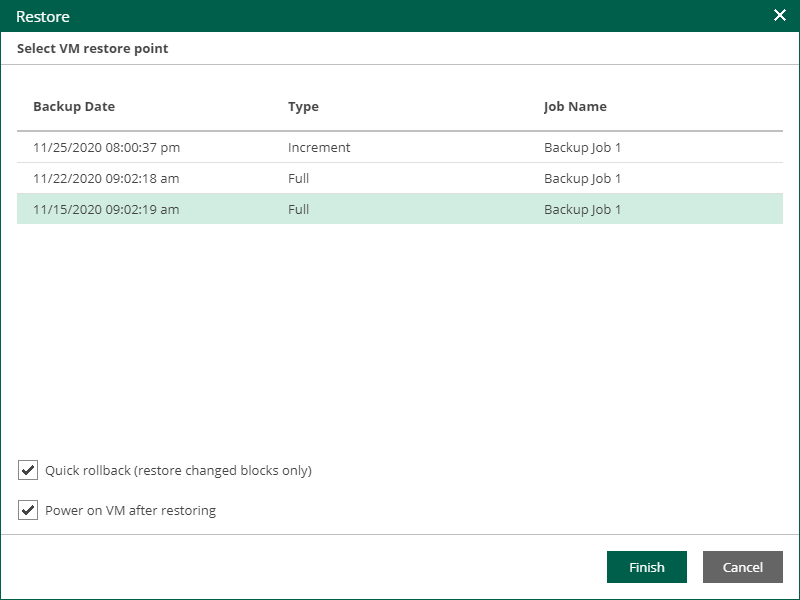
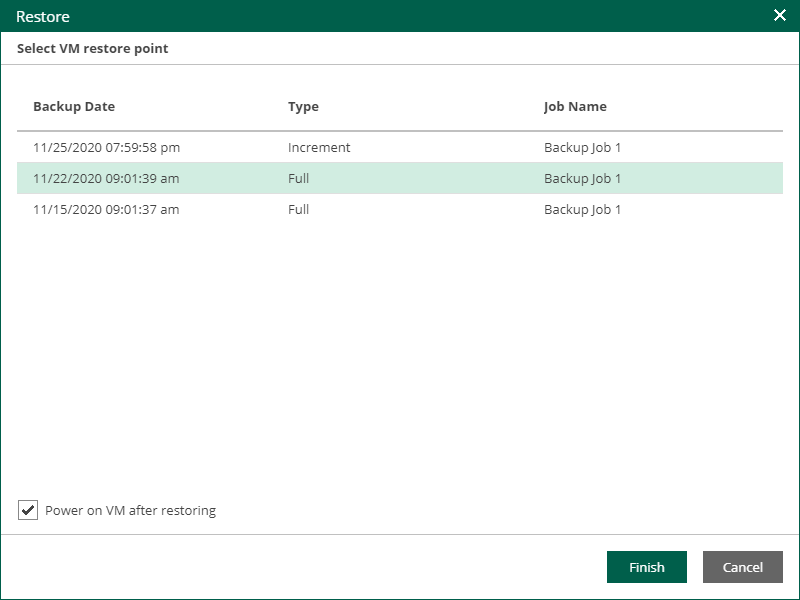
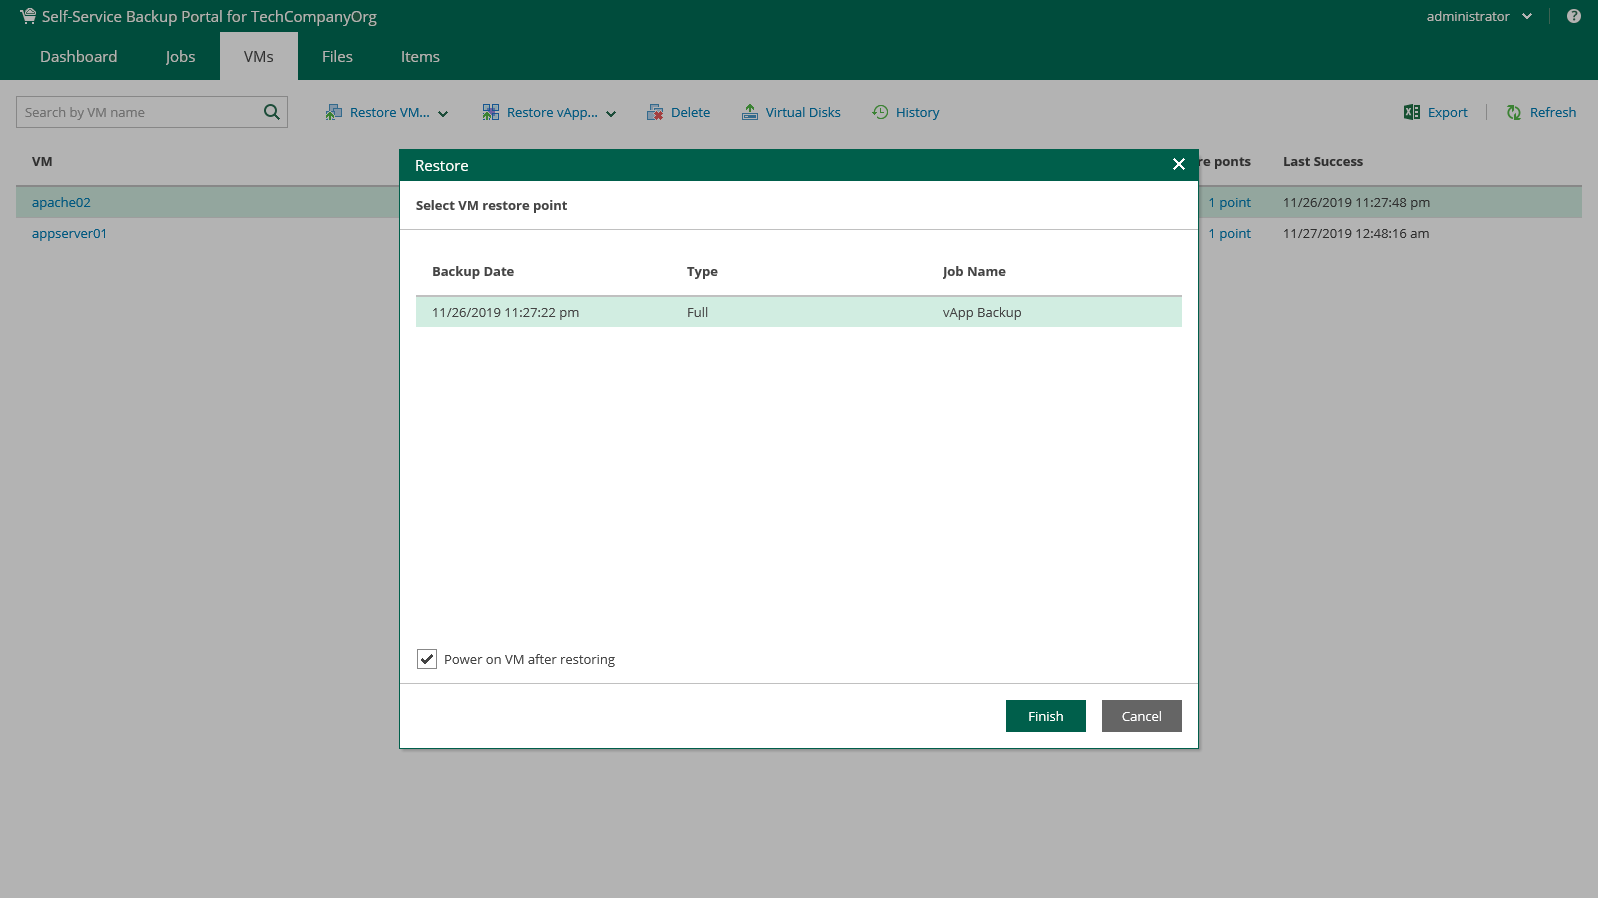
- Select the restore point that will be used to restore the VM.
- Additionally, you can select to Power on VM after restoring or use the Quick rollback option. For VMware VMs, you can also select to Restore VM tags.
- After you click Restore, you will get a message notifying you about the operation effect: the VM from the backup will replace the production VM if it is present in the original location. Click Proceed or Cancel the operation.
You can view the VM restore progress in the Machines tab after you click View history.
|
Restore of a standalone VM to the original location with the Keep option selected will result in an unpredictable behavior and possible failure of the restore job. |
Similar steps can be taken to restore a vApp:
- On the VMs tab, select the necessary vApp backup. To quickly find the necessary vApp, use the search field at the top of the window.
- For the selected backup, click Restore vApp and select the option you need:
- Select Overwrite if you want to restore the vApp from the backup to the original vDC, replacing the production vApp.
- Select Keep if you want to keep the original vApp in the original vDC. The vApp from the backup will be located next to the original production vApp and will have the same name with the _restored suffix. Names of VMs in the vApp will remain the same.
- Select the restore point that will be used to restore the vApp.
- Additionally, you can select to Power on VM after restoring.
- After you click Restore, you will get a message notifying you about the operation effect — remember that with the Overwrite option selected, the existing vApp and all its VMs will be replaced with the vApp from the backup. Click Proceed or Cancel the operation.
|
Restore job of a vApp with a standalone VM will return an ordinary and not standalone VM. |
You can restore individual virtual disks from backups of vCloud Director VMs:
- On the VMs tab, select the backup of the VM whose disks you want to restore. To quickly find the necessary VM, use the search field at the top of the window.
- Click Virtual Disks.
- Follow the steps of the Virtual Disk Restore wizard. For details, see Performing Virtual Disk Restore.

Once you select a VM click the Delete button. If you are sure that you want to delete the selected VM press Yes in the appeared Delete VM window.
If the selected VM is the last one in its vApp, then it is deleted from the backup with its vApp. If this vApp is the last one in its backup, then the whole backup is deleted. In other cases, only the selected VM is deleted.
If you delete a vApp, all VMs will be deleted from the backup.
When you remove data for deleted VMs from per-VM backup chains, it does not mark the space as available but deletes backup files since they contain data for 1 VM only.
When you remove data for deleted VMs from regular backup chains, it does not free up space on the backup repository. It marks the space as available to be overwritten, and this space is overwritten during subsequent job sessions or the backup file compact operation.