This is an archive version of the document. To get the most up-to-date information, see the current version.
Step 6. Specify Backup Storage Settings
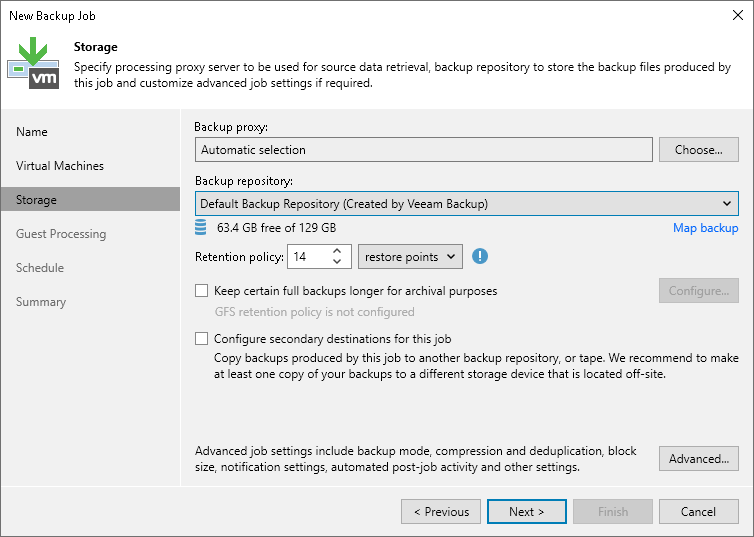
At the Storage step of the wizard, select backup infrastructure components for the job — backup proxy and backup repository, and specify backup storage settings.
- Click Choose next to the Backup proxy field to select a backup proxy.
- If you choose Automatic selection, Veeam Backup & Replication will detect backup proxies that have access to the source datastore and automatically assign an optimal backup proxy to process VMs in the job.
Veeam Backup & Replication assigns backup proxies to VMs included in the backup job one by one. Before processing a new VM in the VM list, Veeam Backup & Replication checks available backup proxies. If more than one backup proxy is available, Veeam Backup & Replication analyzes transport modes that the backup proxies can use to retrieve VM data and the current workload on the backup proxies to select the most appropriate one for VM processing.
- If you choose Use the selected backup proxy servers specified below, you can explicitly select backup proxies that the job must use. It is recommended that you select at least two backup proxies to ensure that the backup job starts if one of the proxies fails or loses its connectivity to the source datastore.
- From the Backup repository list, select a backup repository where the created backup files must be stored. When you select a backup repository, Veeam Backup & Replication automatically checks how much free space is available in the backup repository.
- You can map the job to a specific backup stored in the backup repository. Backup job mapping can be helpful if you have moved backup files to a new backup repository and want to point the job to existing backups in this new backup repository. You can also use backup job mapping if the configuration database got corrupted and you need to reconfigure backup jobs.
To map the job to a backup, click the Map backup link and select the backup in the backup repository. Backups can be easily identified by job names. To find the backup, you can also use the search field at the bottom of the window.
- In the Retention Policy field, specify retention policy settings for restore points:
- If you want to keep the last N restore points, select restore points from the drop-down list. Then specify the number of restore points.
- If you want to keep all restore points created during the last N days, select days from the drop-down list. Then specify the number of days.
When the specified number is exceeded, the earliest restore point is removed from the backup chain or merged with the next closest restore point. For more information, see Short-Term Retention Policy.
- If you want to ignore the retention policy for some full backups and store them for long-term archiving, select the Keep some periodic full backups longer for archival purposes check box. Then click the Configure button and specify the Grand-Father-Son (GFS) retention policy. For details, see Specify GFS Retention Policy.
- If you want to archive backup files created with the backup job to a secondary destination (backup repository or tape), select the Configure secondary destination for this job check box. With this option enabled, the New Backup Job wizard will include an additional step — Secondary Target. At the Secondary Target step of the wizard, you can link the backup job to the backup copy job or backup to tape backup job.
You can enable this option only if a backup copy job or backup to tape job is already configured on the backup server.