 This is an archive version of the document. To get the most up-to-date information, see the current version.
Connecting Tape Devices
To deploy a tape device, you must perform the following steps:
- Choose a machine that will act as the tape server. You can choose between the following options:
- Use the Veeam backup server as the tape server. This variant is sufficient for small environments with low traffic workloads.
- Deploy a dedicated tape server. As a tape server, you can use any Microsoft Windows server, physical or virtual, accessible by Veeam Backup & Replication. A dedicated tape server is recommended for installations with intense data transferring. A dedicated tape server allows you to manage remote tape libraries.
- Connect the tape device to the machine that will perform the role of the tape server. You can connect the tape device in two ways:
- Directly over Fibre Channel (FC), Serial Attached SCSI (SAS), SCSI
- Remotely with iSCSI (you can use Microsoft iSCSI initiator to establish the connection).
- Install an appropriate device driver on the tape server.
If multiple driver installation modes are supported for your storage device, make sure the driver is installed in the mode that allows for multiple open handles from a host to a drive to exist at the same time.
For example, if installing a driver for IBM System Storage TS3100 Tape Library or TS3200 Tape Library, you should use the install_nonexclusive.exe installer as described in the product Readme.
Please refer to your storage system manufacturer recommendations on choosing the appropriate setup option.
- If the medium changer driver is not available, check that the tape device uses native SCSI commands.
Open the Tape Infrastructure view, expand the Libraries node and select the needed library. Click Properties on the ribbon. You can also right-click the necessary library in the working area and select Properties. Select the Use native SCSI commands instead of Windows driver check box.
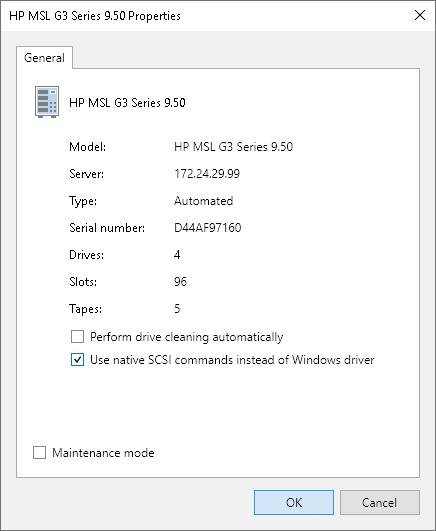
|
Only media changers can use SCSI commands. Tape drives must use native OEM drivers. |
- Add the tape server to Veeam Backup & Replication. See Adding Tape Servers for details. Veeam Backup & Replication will automatically scan connected tape devices and display all discovered tape libraries and tape drives under the Libraries node in the Tape Infrastructure view. Afterward, the auto-discovery process will be performed periodically every 3 minutes.
You can connect a number of tape devices to each tape server. The connected tape devices will appear as list under the Libraries node in the Tape Infrastructure view.
Veeam Backup & Replication allows deploying a number of tape servers. However, if you have a number of Veeam backup servers, you cannot connect one tape server to several Veeam backup servers simultaneously.
|
If you have a number of Veeam backup servers, you can easily reconnect a tape server to another Veeam backup server without reconfiguring the tape device: Veeam backup server will recognize the library settings automatically. Note that when you reconnect the tape server, the tape jobs will not run with another Veeam backup server unless you copy the configuration. |
Reconnecting Tape Devices to Another Tape Server
You can reconnect your tape devices to another tape server. For example, you can reconnect the tape devices from the Veeam backup server to a dedicated tape server. To do this, choose a tape server and perform steps for connecting tape devices above. When you add the new tape server to Veeam Backup & Replication, Veeam Backup & Replication will recognize the tape devices and all tape device settings.