 This is an archive version of the document. To get the most up-to-date information, see the current version.
Configuring Delivery Schedules
In Veeam ONE Web Client, you can schedule automatic delivery for dashboards and reports. You can choose to receive dashboards and reports by email, save dashboards and reports to a local folder or network share. Note that you can only schedule delivery for saved reports (that is, reports in the My Reports folder and its subfolders).
To schedule delivery for dashboards and reports:
- Open Veeam ONE Web Client.
- At the top right corner of the Veeam ONE Web Client window, click Configuration.
- In the configuration menu on the left, click Scheduling.
- At the top of the list, click Add.
Veeam ONE Web Client will launch the Add Schedule wizard.
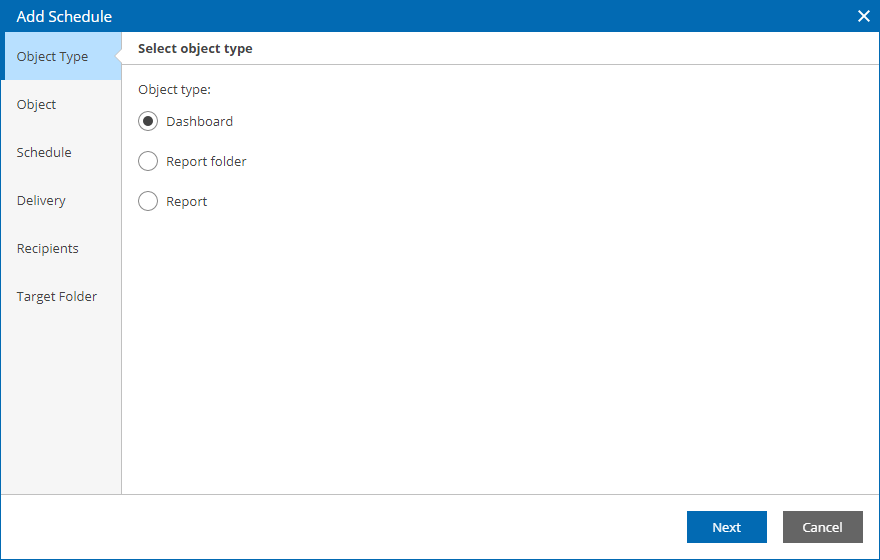
- At the Object Type step of the wizard, specify the type of object for which you want to enable scheduled delivery: dashboard, report or report folder.
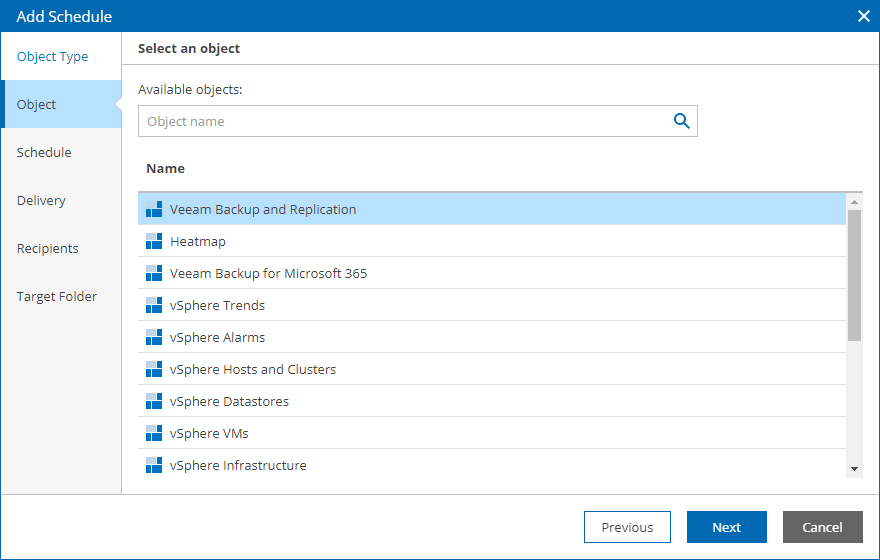
- At the Object step of the wizard, select the dashboard, report or report folder for which you want to enable scheduled delivery.
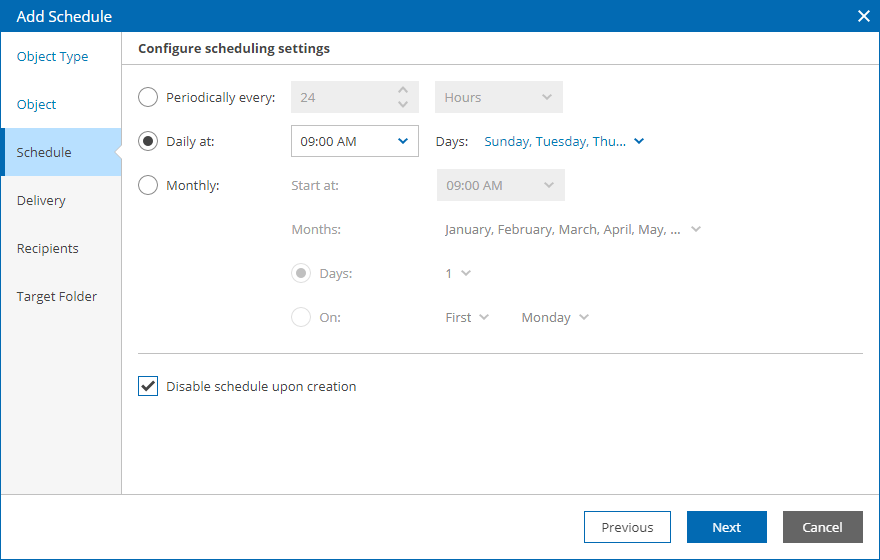
- At the Schedule step of the wizard, define a schedule according to which the object must be generated and delivered.
- To generate and deliver the object repeatedly, with a specific time interval, select the Periodically every option and define the necessary interval.
- To generate and deliver the object at specific time of day, select the Daily at option and specify the time and days of week on which the object must be delivered.
- To generate and deliver the object on a monthly basis, select the Monthly option and choose the necessary months, dates or weekdays.
- To configure a schedule without enabling it, select the Disable schedule when created check box.
If you select this check box, you will need to enable the schedule later. For details, see Managing Delivery Schedules.
- At the Delivery step of the wizard, define object delivering options:
- Select the Send by email check box to send objects by email.
If this option is selected, the Recipients step will become available in the wizard.
If you want to send objects by email, make sure you specified SMTP settings in Veeam ONE Client. For details, see section Configure SMTP Server Settings of the Veeam ONE Deployment Guide.
- Select the Save to a folder check box to save objects to a network share or a local folder on a machine where Veeam ONE Server component runs.
With this option selected, the Add Schedule wizard will include an additional Target Folder step.
- [For scheduling a single report or a report folder] In the Report format list, choose the format in which the report must be saved. You can choose one of the following formats: Adobe PDF, MS Word, MS Excel, CSV (comma delimited), XML. For details, see Specifying Report Format.

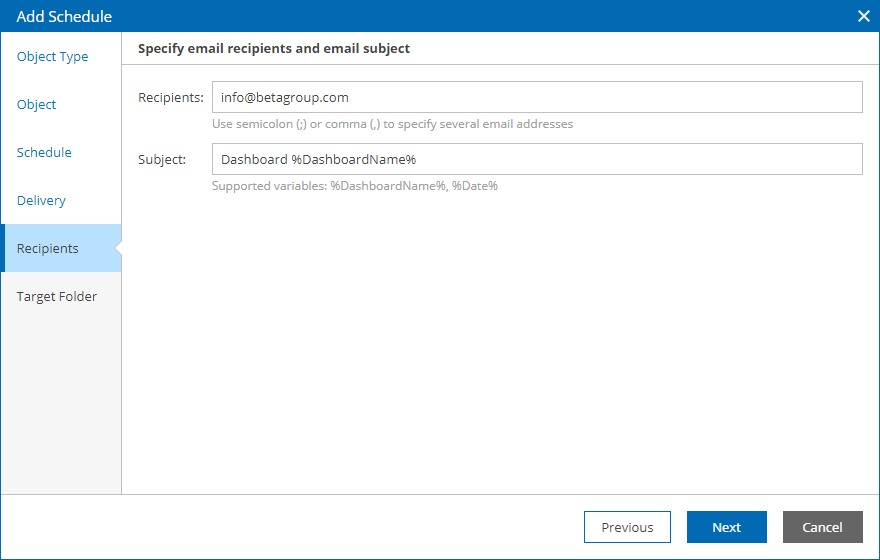
- At the Recipients step of the wizard, configure object delivery by email:
- In the Recipients field, specify the recipient email address.
If you want to send generated objects to multiple recipients, separate email addresses with a semicolon (;) or comma (,).
- In the Subject field, specify an email subject title.
You can use the %ReportName% %DashboardName% and %Date% variables in the subject line — Veeam ONE will substitute these variables with the name of a delivered report, dashboard and the current date.
- [For report folder schedule] If you want to send several reports from the folder in a single email, select the Send multiple reports in a single email check box and specify the maximum number of reports to include in a single email. If the number of reports in the folder exceeds the specified maximum, Veeam ONE Web Client will send several emails.
- [For dashboard schedule] In the Select the dashboard delivery format section, select the format for the delivered dashboard.
You can choose to send the dashboard as an attached .PNG image or embed the dashboard in the email body.
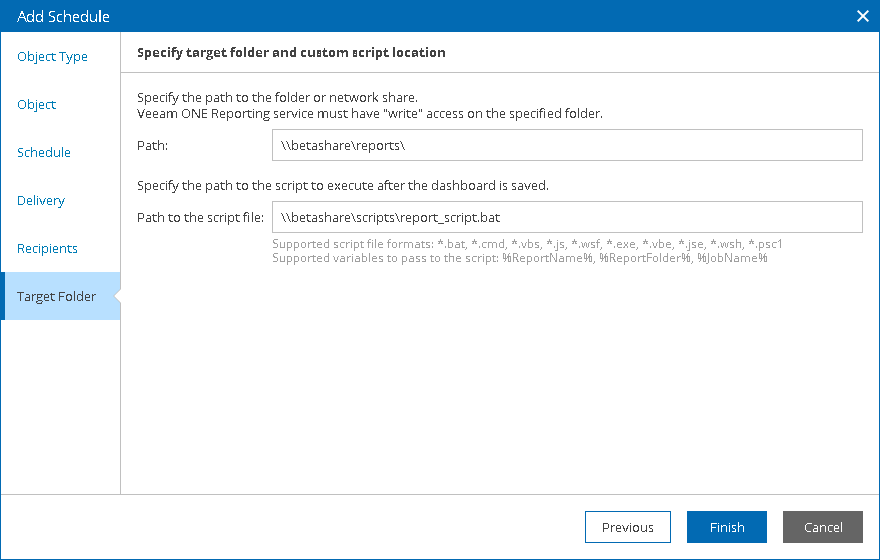
- At the Target Folder step of the wizard, configure automated delivery to a local folder or a network share:
- In the Path field, specify a path to a local folder or network share.
The path must refer to an existing folder. Veeam ONE will check if the specified folder exists and if the account under which Veeam ONE Reporting service runs has write permissions on the folder. If the folder cannot be accessed, Veeam ONE Web Client will display a warning message.
- To run a custom script after the dashboard is delivered to the target folder, in the Path to the script file field, specify a path to the script file.
Running a custom script allows you to perform further actions after the dashboard is generated. For script examples, see Appendix. Scheduling Script Examples.
- Click Finish.
If you want to configure multiple schedules, repeat steps 4–11 for each new schedule you want to add.
The following table describes file formats available for scheduled reports.
File Format | Report Scheduling |
|---|---|
Adobe PDF | Yes |
MS Word | Yes |
MS Excel | Yes |
CSV (comma delimited) | Requires integration with an SSRS server |
XML | Requires integration with an SSRS server |
To save reports in CSV or XML format, you must configure an SRSS server. For details, see Configuring SSRS Server Settings.