Step 3.1 Install Master Agent
To perform discovery of client computers, you must install and configure a Veeam Service Provider Console master agent on a Microsoft Windows machine in the client infrastructure. The master agent is responsible for performing various types of tasks during the discovery and installation procedures, such as collecting information about discovered computers, installing Veeam Service Provider Console management agents on client computers, downloading the Veeam backup agent setup file and uploading it to client computers, and so on.
The machine on which you plan to install the master agent must meet the following requirements:
- It must have a connection to the Internet (required to download the Veeam backup agent setup file from the Veeam Installation Server)
- It must be part of an AD domain to which client computers belong
To install the master agent:
- Download the agent setup file:
- Log in to Veeam Service Provider Console.
- In the menu on the left, click Discovery.
- Open the Discovered Computers tab and navigate to Computers.
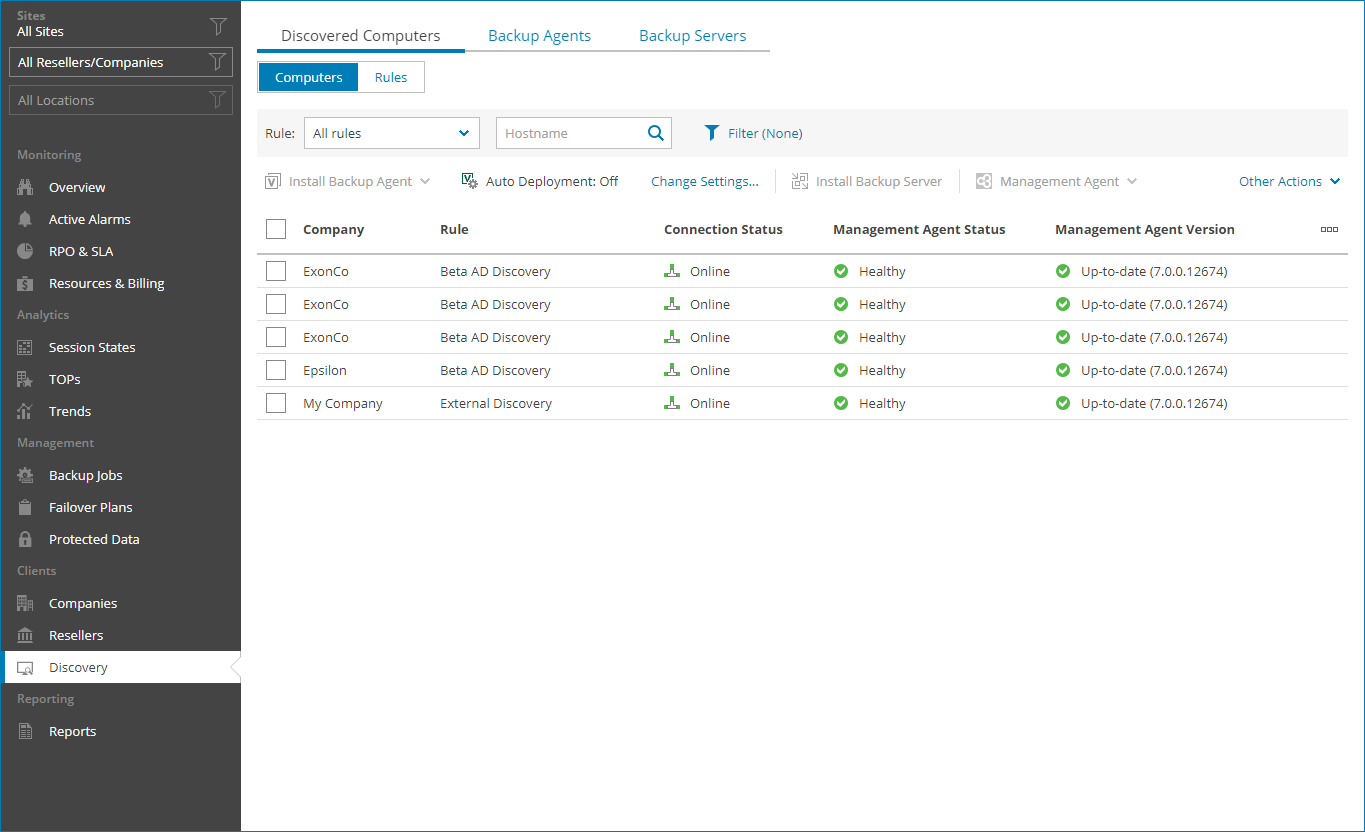
- At the top of the computers list, click Download Agent select Windows.
- In the Download Management Agent window, specify management agent settings:
- In the Company and Location lists, select an active company and company location to which you want to assign the management agent. Selected company name and location name will be added to the agent setup file name.
- In the OS version list, select the necessary operating system version (x32, x64).
- In the Token expiry period field, specify specify time period for which you want to verify the management agent. After the specified period expires, you will have to verify the agent manually.
- Click Download.
The setup file will be saved to the default download location on your computer. Copy the setup file to a location that can be accessed from a client computer.
- Log in as an Administrator to a client computer that will host the master agent.
- Double-click the downloaded agent setup file, and follow the steps of the setup wizard to install the master agent.
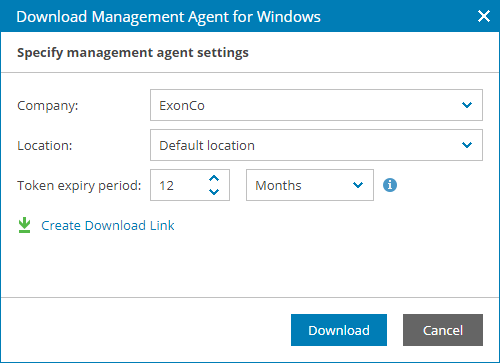
- When the agent installation completes, in the icon tray, right-click the master agent icon and select Agent Settings.
- In the Management Agent Settings window, specify settings that the agent must use to connect to Veeam Service Provider Console:
- In the Cloud gateway field, type a FQDN or IP address of a cloud gateway.
If for trial purposes you deployed all Veeam Service Provider Console components on the same machine, specify an address of this machine.
- In the Port field, specify the port on the cloud gateway that is used to transfer data to Veeam Service Provider Console.
The default port is 6180.
- In the Tag field, specify the tag for the managed computer.
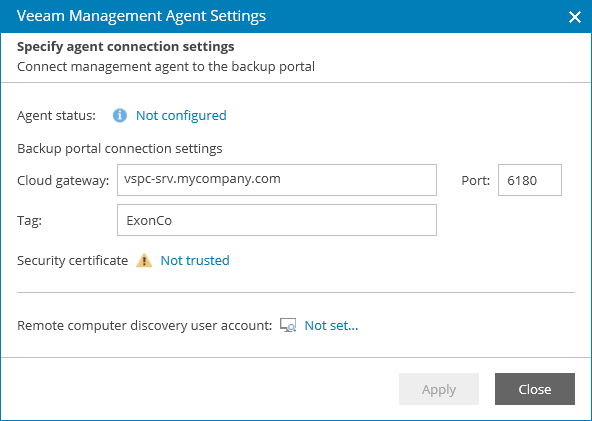
- Click a link in the Remote computer discovery user account section.
- In the Discovery Account window, specify credentials for an account that the master agent will use to connect to client computers during the discovery and installation procedures.
The account must have local Administrator permissions on client computers where you plan to install Veeam backup agents.
- Apply changes. In the displayed window, click Yes to restart the master agent.
When the master agent connects to Veeam Service Provider Console, the agent icon in the icon tray must turn blue.
Validation
Check that the master agent established connection to Veeam Service Provider Console:
- Log in to Veeam Service Provider Console.
- In the menu on the left, click Discovery.
- Open the Discovered Computers tab and navigate to Computers.
Make sure that the list of discovered computers displays a machine where the master agent is installed.