 This is an archive version of the document. To get the most up-to-date information, see the current version.
Installing Veeam Backup for AWS from AWS Marketplace
Veeam Backup for AWS is installed on a single EC2 instance. The EC2 instance is created during the product installation.
To install Veeam Backup for AWS from AWS Marketplace:
- Log in to AWS Marketplace using credentials of an AWS account in which you plan to install Veeam Backup for AWS.
You can install Veeam Backup for AWS in the production site — in the AWS account where resources that you plan to back up reside. It is recommended, however, that you use a separate AWS account for Veeam Backup for AWS installation. In this case, if a disaster strikes in the production site, you will still be able to access Veeam Backup for AWS and perform recovery operations.
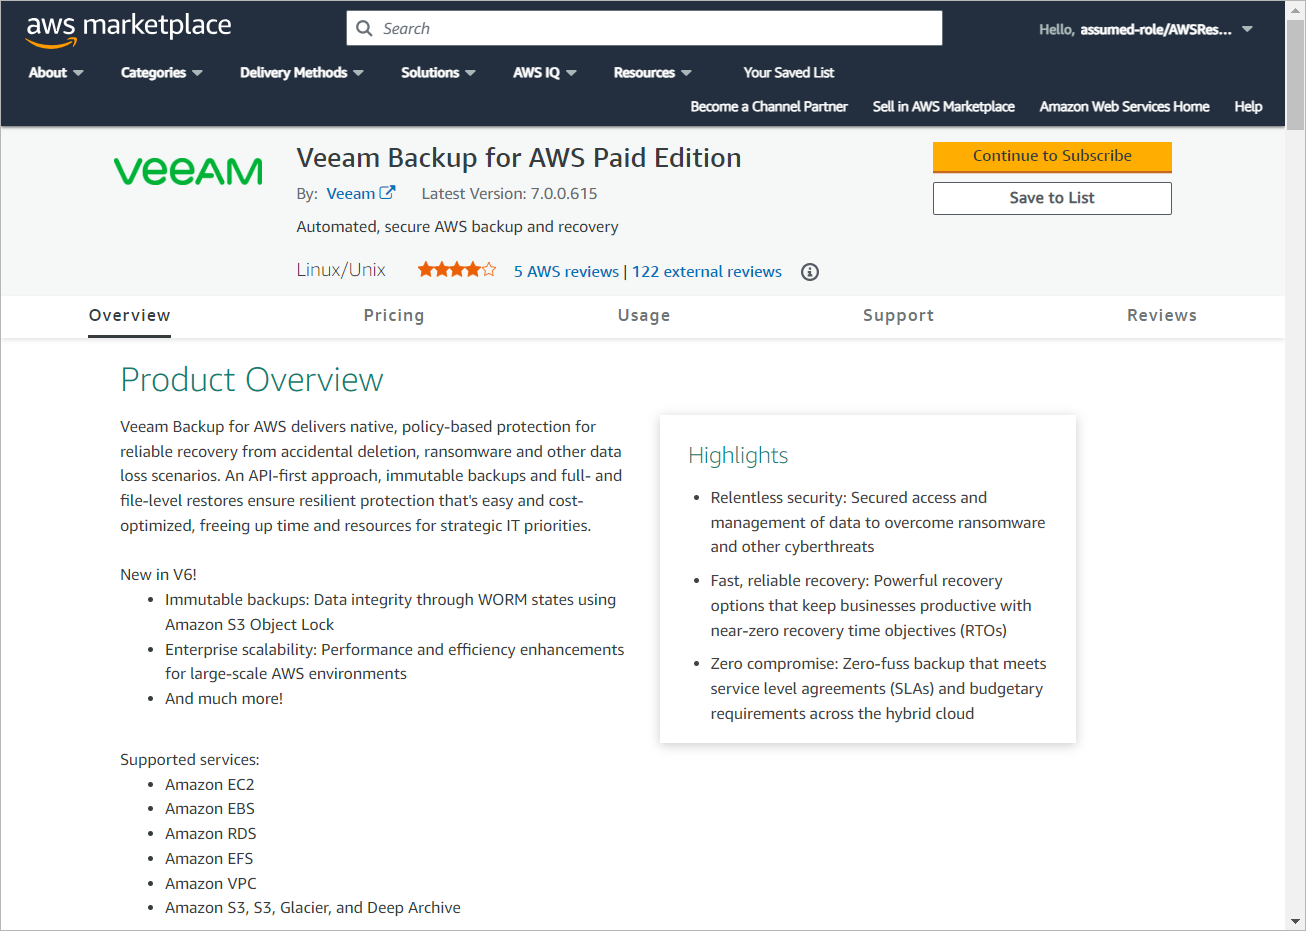
- Open the Veeam Backup for AWS overview page for the necessary product edition:
For more information on product editions, see Licensing.
- Click Continue to Subscribe.
- On the Subscribe to this software page, read the product license agreement and click Continue to Configuration.
To view the license agreement, expand the details in the Terms and Conditions section and click End User License Agreement.

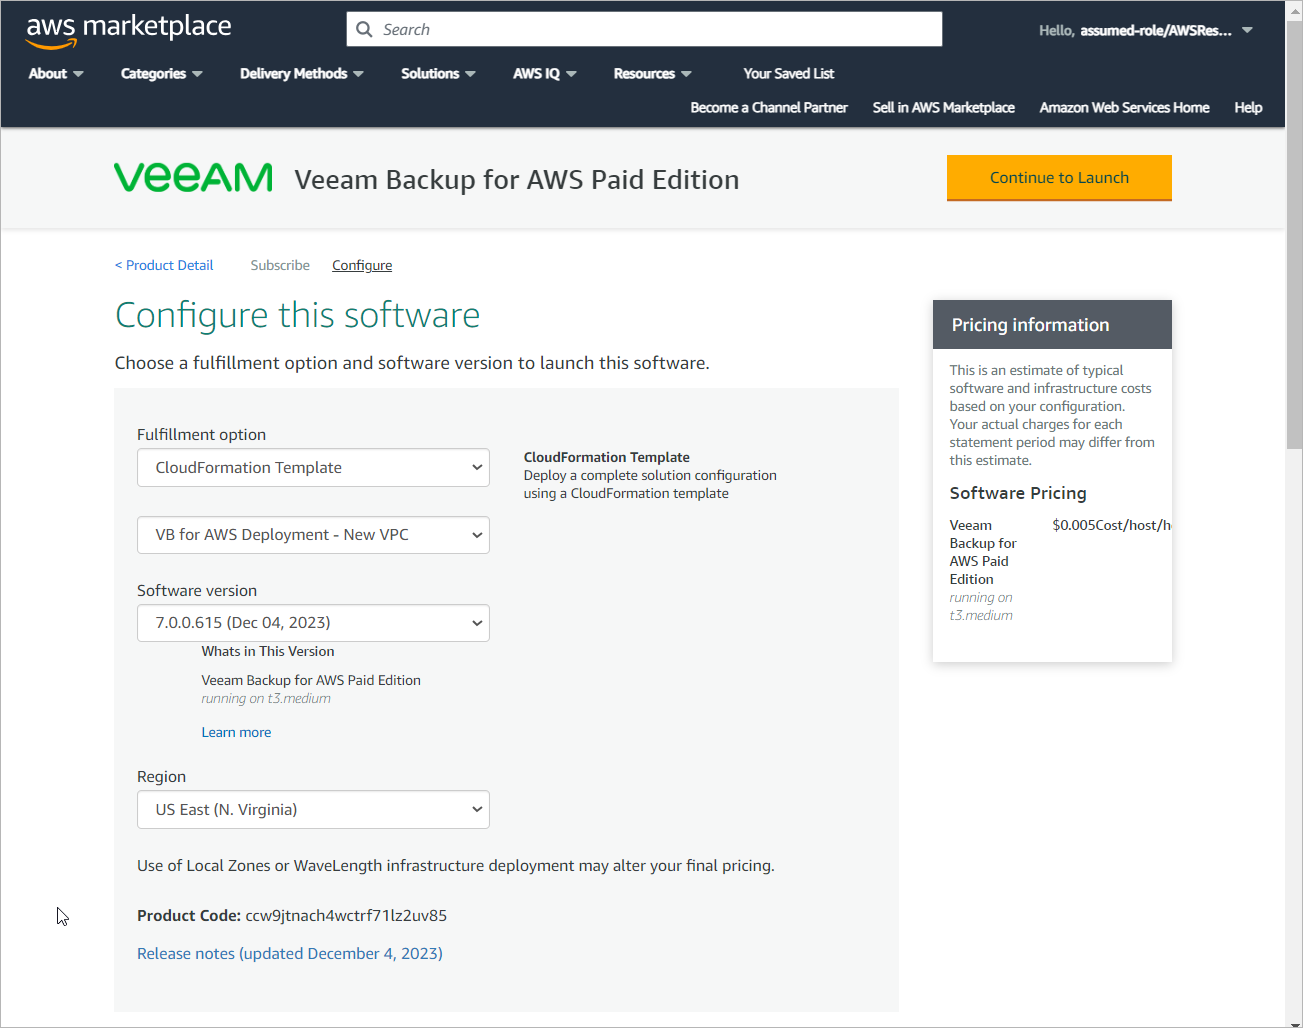
- On the Configure this software page, configure installation settings:
- From the Delivery Method drop-down list, choose whether you want to connect the EC2 instance running Veeam Backup for AWS to an existing Amazon VPC and subnet, or to create a new Amazon VPC and subnet for the instance.
- VB for AWS Deployment - Existing VPC — select this option if you want to use an existing Amazon VPC and subnet.
- VB for AWS Deployment - New VPC — select this option if you want to create a new Amazon VPC and subnet.
For more information on Amazon VPCs and subnets, see AWS Documentation.
- From the Software Version drop-down list, select the latest version of Veeam Backup for AWS.
- From the Region drop-down list, select an AWS Region in which the EC2 instance running Veeam Backup for AWS will reside.
For more information on AWS Regions, see AWS Documentation.
- Click Continue to Launch.
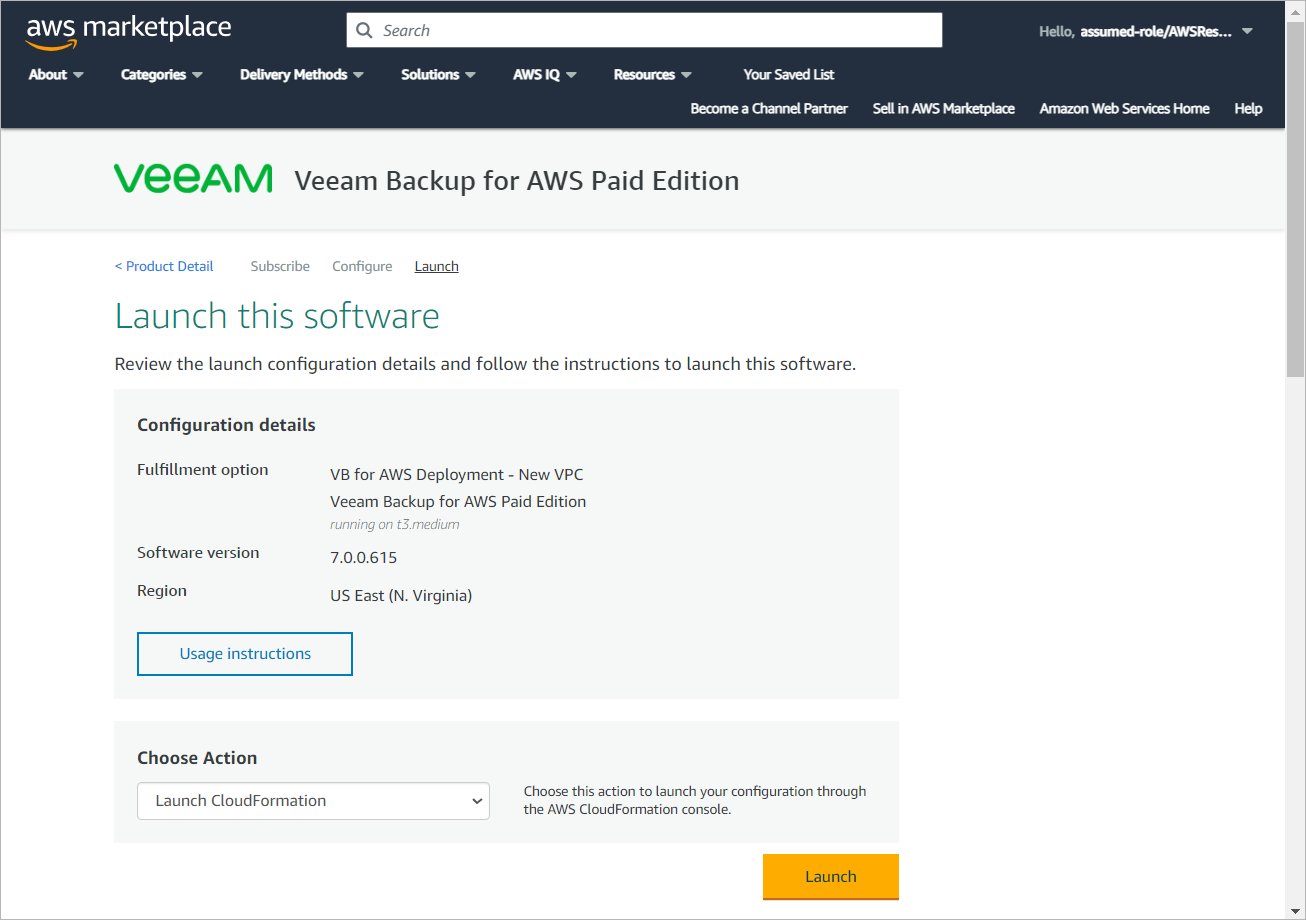
- On the Launch this software page, do the following:
- In the Configuration Details section, review the product installation settings.
- From the Choose Action drop-down list, select Launch CloudFormation.
- Click Launch. The Create stack wizard will open.
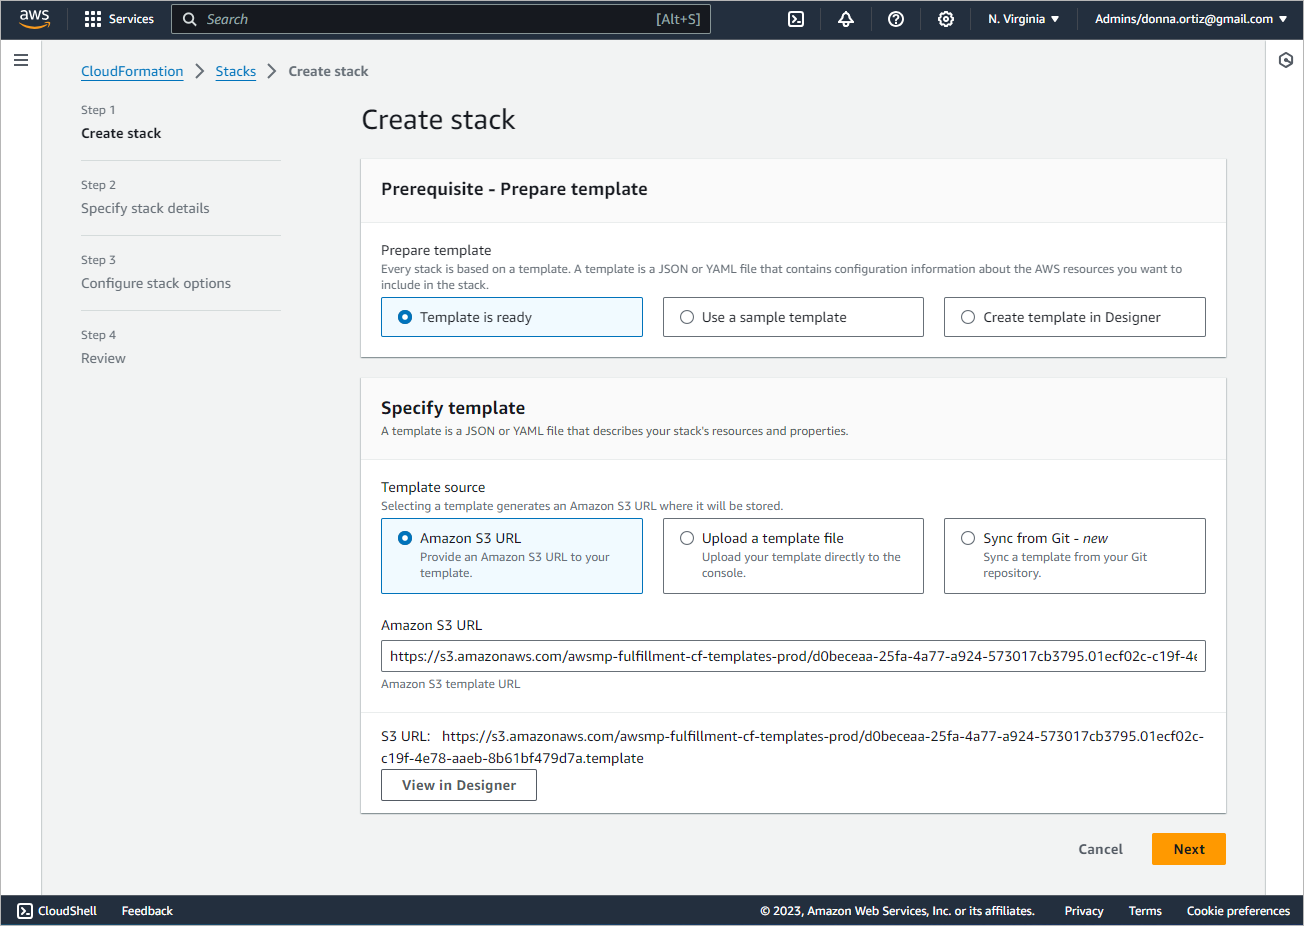
Veeam Backup for AWS is installed using AWS CloudFormation stacks. In AWS CloudFormation, a stack is a collection of AWS services and resources that you can manage as a single unit. You can create a stack in an AWS account, use resources included in the stack to run an application, or delete a stack if you no longer need it. For more information on AWS CloudFormation stacks, see AWS Documentation.
In the Create stack wizard, you will create a stack for Veeam Backup for AWS.
- At the Specify template step of the wizard, the stack template settings are preconfigured by Veeam Backup for AWS and cannot be changed.
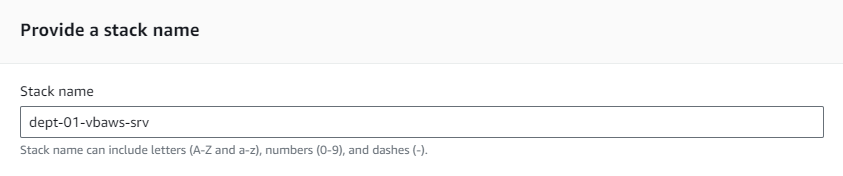
- In the Stack name field, specify a name for the new stack.
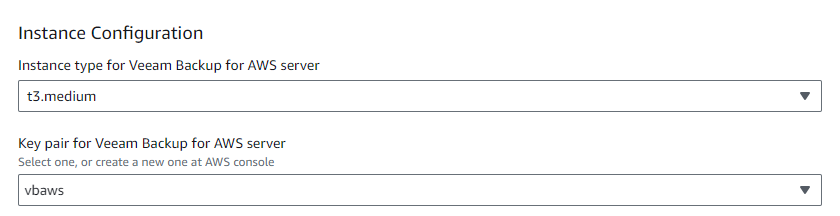
- In the Instance Configuration section, do the following:
- Select the EC2 instance type for the backup appliance.
The recommended EC2 instance type is t3.medium.
- Select a key pair that will be used to authenticate against the backup appliance.
For a key pair to be displayed in the Key pair for Veeam Backup for AWS server list, it must be created in the Amazon EC2 console. To learn how to create key pairs, see AWS Documentation.
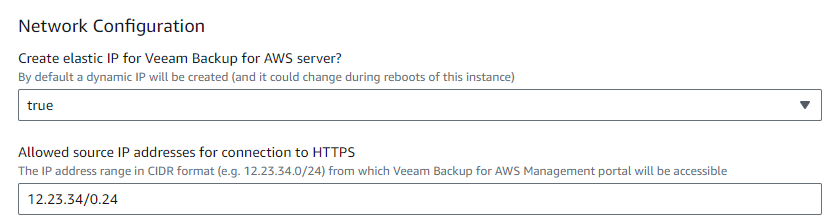
- Select true if you want to create an Elastic IP address for the backup appliance.
For more information on Elastic IP addresses, see AWS Documentation.
- Specify the IPv4 address ranges from which Veeam Backup for AWS Web UI will be accessible.
Make sure the IPv4 address of the local machine from which you plan to access Veeam Backup for AWS lies within the specified IPv4 range.
The IPv4 address ranges must be specified in the CIDR notation (for example, 12.23.34.0/24). To let all IPv4 addresses access Veeam Backup for AWS, you can specify 0.0.0.0/0 . Note that allowing access from all IPv4 addresses is unsafe and thus not recommended in production environments.
Based on the specified IPv4 ranges, AWS CloudFormation will create a security group for Veeam Backup for AWS with an inbound rule for HTTPS traffic. By default, port 443 is open for the inbound HTTPS traffic. If you plan to change the security group for Veeam Backup for AWS upon the product installation, you will need to manually add inbound rules to the new security group and make sure this security group allows access to AWS services listed in the AWS Services section.
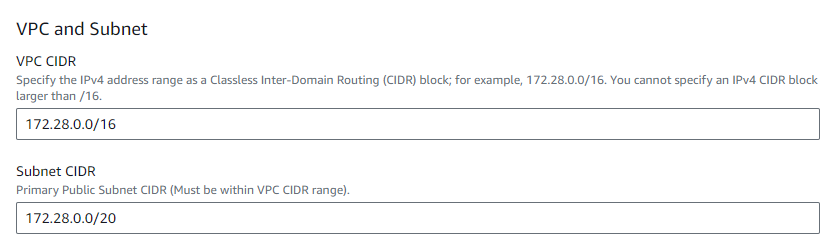
- In the VPC and Subnet section, specify an Amazon VPC and subnet to which the backup appliance will be connected.
Depending on the option selected at step 5a, you can either select an existing Amazon VPC and subnet, or specify IPv4 address ranges in the CIDR notation for the new Amazon VPC and subnet.
Important |
Consider the following:
To learn how to enable internet access for Amazon VPCs and subnets, see AWS Documentation. |
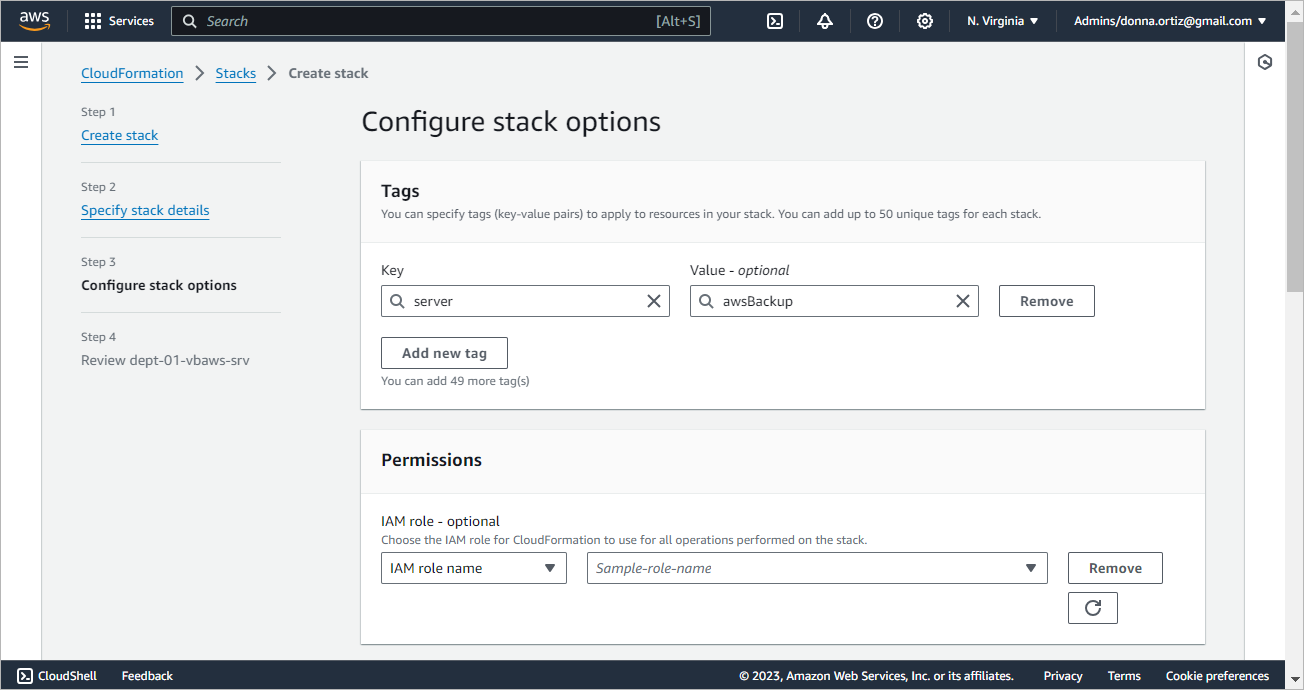
- At the Configure stack options step of the wizard, specify AWS tags, IAM role permissions and other additional settings for the stack.
For more information on available stack options, see AWS Documentation.
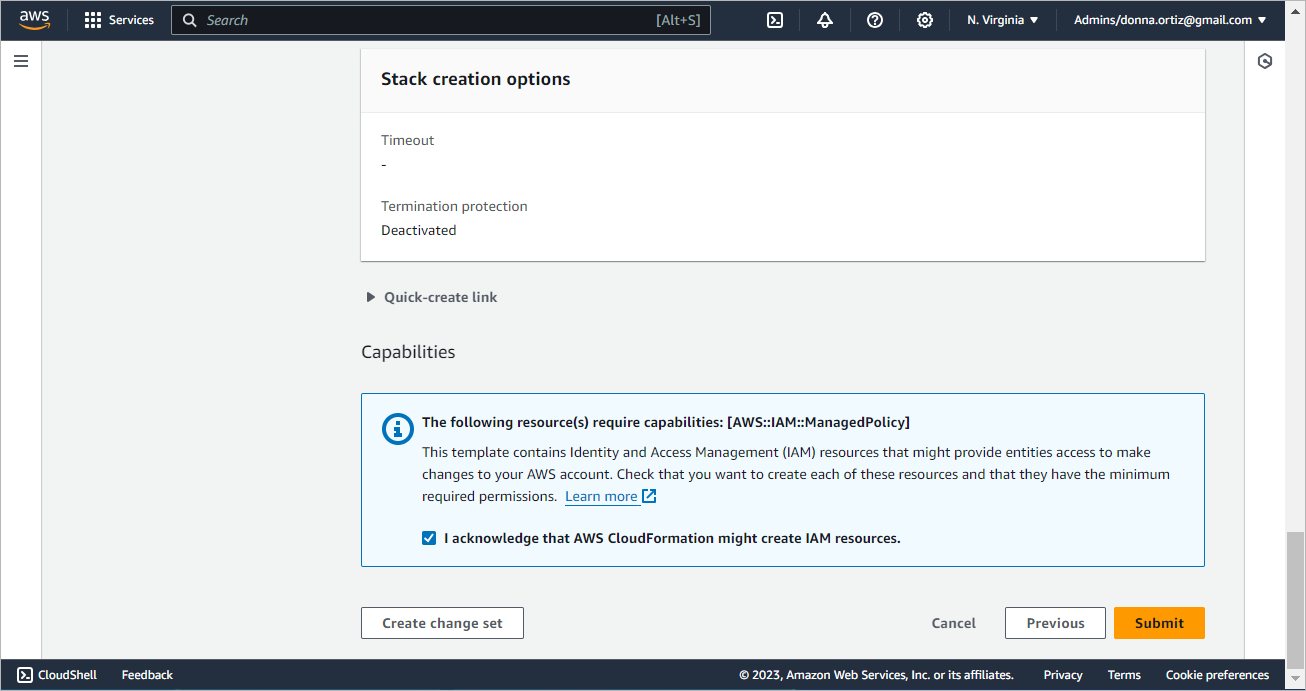
- At the Review step of the wizard, do the following:
- Review the configured settings.
- Select the I acknowledge that AWS CloudFormation might create IAM resources check box.
- Click Submit.
Right after installation, you must accept license agreements and create a default user. To learn how to do that, see After You Install.