This is an archive version of the document. To get the most up-to-date information, see the current version.
Creating Snapshots Manually
Veeam Backup for Google Cloud allows you to manually create snapshots of VM instances. Each snapshot is saved to the same region in which the protected VM instance resides.
Note |
Veeam Backup for Google Cloud does not include snapshots created manually in the snapshot chain and does not apply the configured retention policy settings to these snapshots. This means that the snapshots are kept in your Google Cloud environment unless you remove them manually, as described in section Removing Backups and Snapshots. |
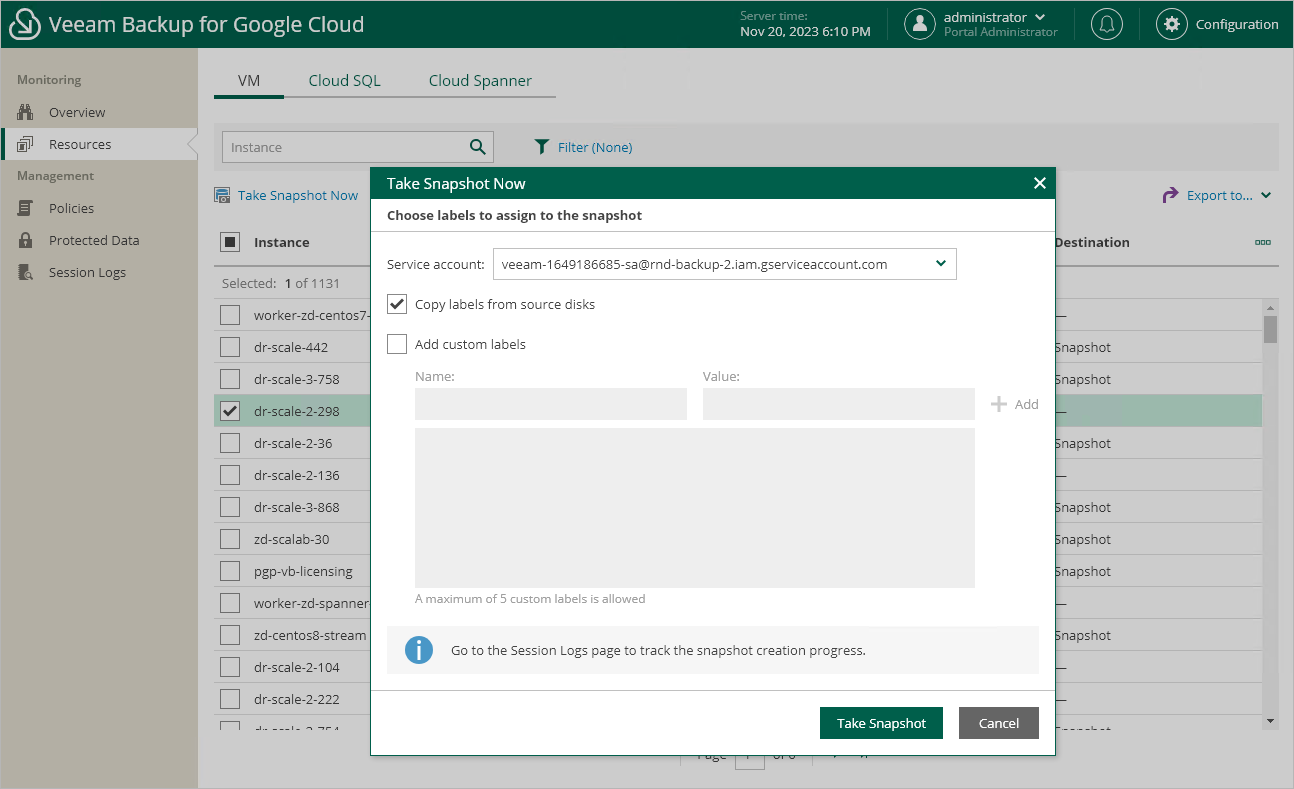
To manually create a cloud-native snapshot of a VM instance, do the following:
- Navigate to Resources > VM.
- Select the necessary instance and click Take Snapshot Now.
For a VM instance to be displayed in the list of available instances, it must reside in any of the regions added to a backup policy as described in section Creating Backup Policies.
- In the Take Snapshot Now window, choose whether you want to assign labels to the created snapshot:
- To assign already existing labels from the source persistent disk attached to the selected VM instance, select the Copy labels from source disks check box.
- To assign your own custom labels, select the Add custom labels check box and specify the labels explicitly. To do that, use the Name and Value fields to specify a key and a value for the new custom label, and then click Add.
To save changes made to the snapshot settings, click Take Snapshot.