This is an archive version of the document. To get the most up-to-date information, see the current version.
Installing and Updating License
After you install Veeam Backup for Microsoft Office 365, you will be prompted to provide a product license. You can dismiss this step and continue using the product without any license installed. In this case, you will have Community Edition mode that allows you to process up to 10 user accounts, up to 1 TB of Microsoft SharePoint data and up to 10 teams in all organizations. Community Edition mode is not limited in time and does not have limitations in terms of program functionality.
Installing Fully-Functional License
You can purchase and install a fully-functional license if you plan to back up more than 10 user accounts, more than 1 TB of Microsoft SharePoint data or more than 10 teams. For more information about available license types in Veeam Backup for Microsoft Office 365, see Licensing and License Types.
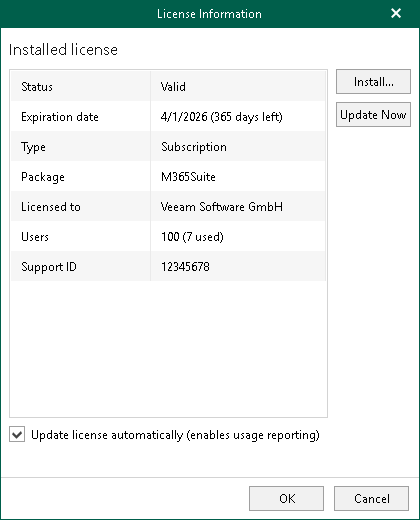
The number of user accounts that you will be able to back up depends on the purchase agreement with Veeam sales representatives. You can see how many accounts are available in the Users row of the License Information window.
To install a license, do the following:
- In the main menu, click License.
- In the License Information window, click Install and specify the path to the .lic file.
Updating License
You can update an existing license, for example, if you want to extend the number of supported user accounts that you need to back up.
To update an existing license, click Update Now and wait until Veeam Backup for Microsoft Office 365 downloads and installs the license.
To automatically update your current license, select the Update license automatically check box.
Note |
To use the Update license automatically option, make sure to open the required port to access the Veeam auto-update server. For more information, see Used Ports. |