 This document is not maintained any longer.
Step 2. Configure Network Hub
Right after deployment, the Veeam PN virtual appliance is impersonalized. To set up the network hub, you must customize the appliance — configure the network hub settings on it.
To configure initial settings for the network hub:
- In VMware vSphere Web Client, navigate to the Summary tab and get an IP address of the appliance.
- In a web browser, access the network hub portal by the following address: https://<applianceIP>, where <applianceIP> is the IP address of the deployed appliance.
When you access the network hub portal in the web browser, the browser will display a warning notifying that the connection is untrusted. Ignore the warning and agree to proceed to the portal.
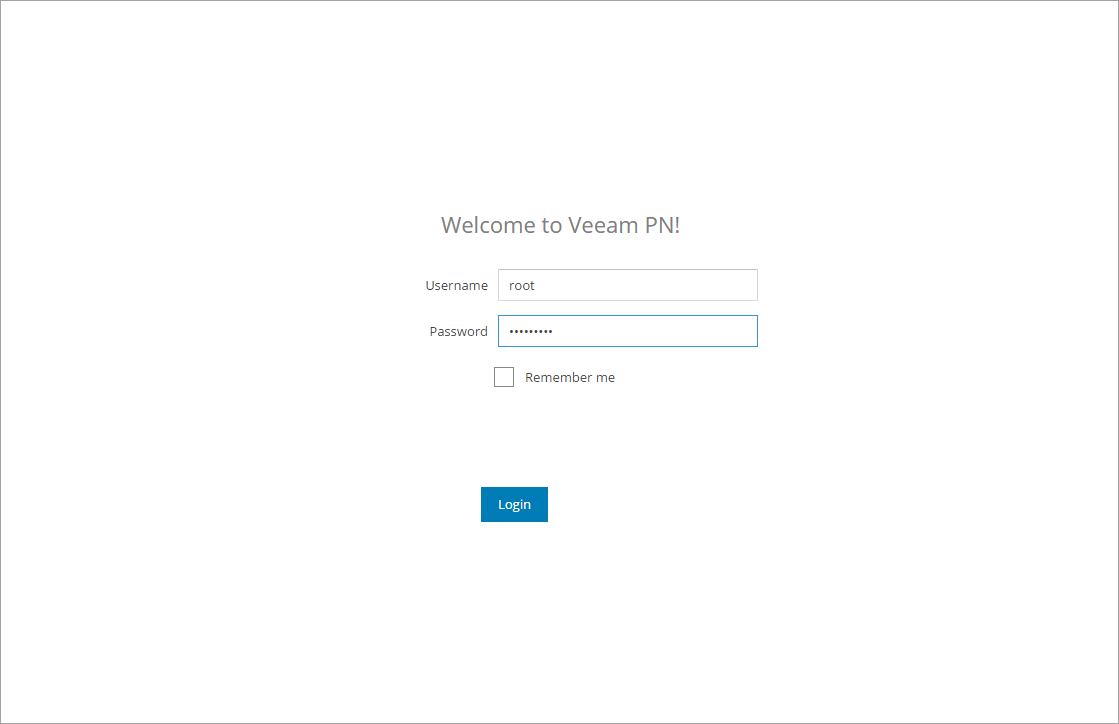
- At the Welcome to Veeam PN screen of the portal, log in to the network hub portal under the in-built Administrator account. The Administrator account has the following credentials:
- Username: root
- Password: VeeamPN
Click Login.
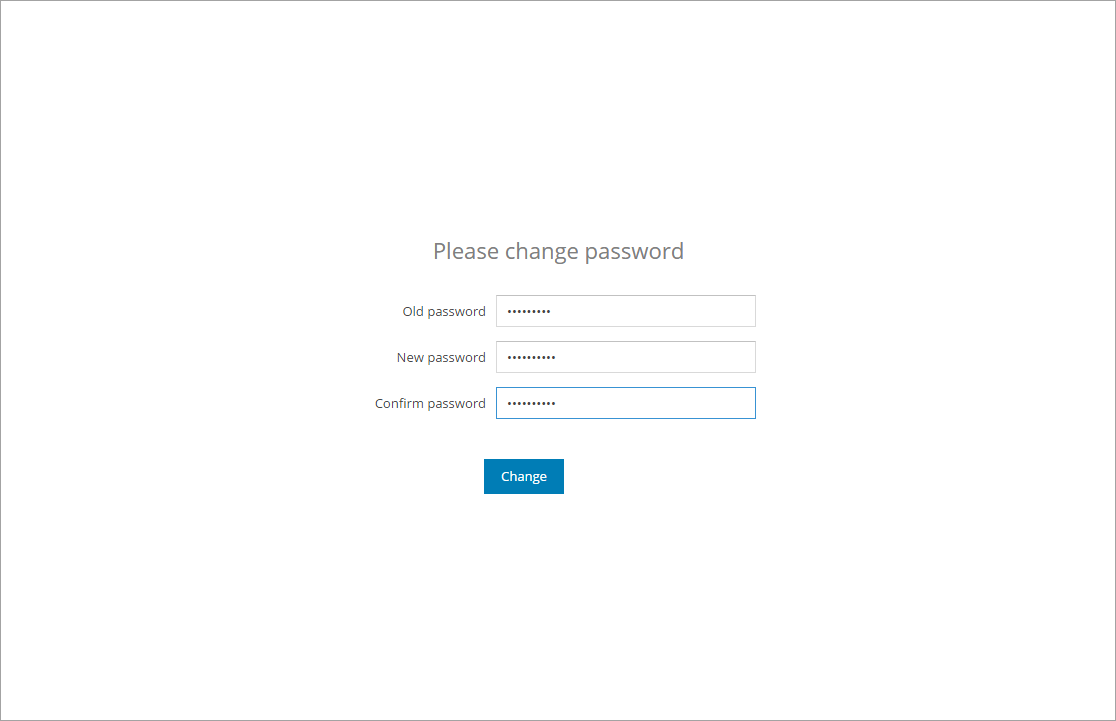
- After you log in to the portal for the first time, Veeam PN will offer you to change the password for the built-in account. On the displayed screen, enter the old and new password and click Change.
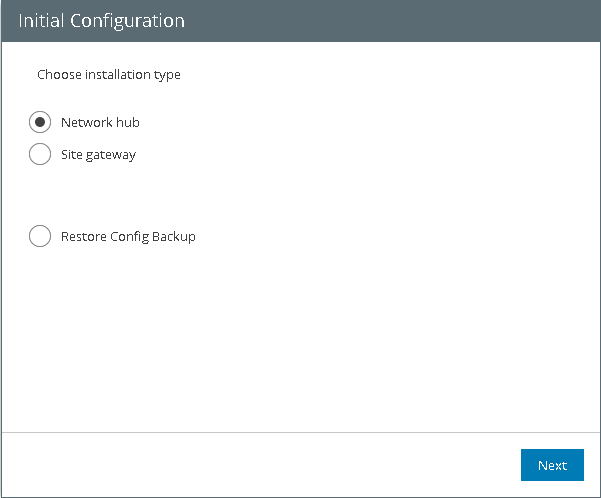
- At the first step of the Initial Configuration wizard, select Network hub.
- Click Next.
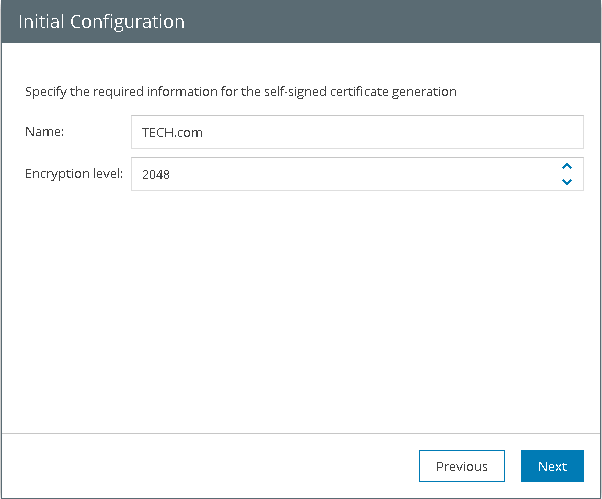
- Veeam PN uses a self-signed SSL certificate to ensure secure data communication in the VPN. Specify the certificate key length.
- Click Next.
Note |
By default, Veeam PN generates a 2048-bit certificate. If you select a key of a greater size, the process of certificate generation may take a long time. |
- Veeam PN will generate a self-signed SSL certificate with the specified parameters. After the certificate is generated, click OK, then click Next to proceed to the network hub setup.

- Specify VPN settings for the network hub:
- In the Network hub public IP or DNS name field, specify an IP address or full DNS name for the network hub. The IP address or DNS name must be public and accessible from all networks that you add to the VPN, and by all remote users who must have access to the VPN.
- Select the Enable site-to-site VPN check box if you want to implement the site-to-site VPN scenario. In the Protocol field, specify the protocol that must be used for communication between VPN components: UDP or TCP. In the Port field, specify a port on which the network hub must listen for site gateway connections. By default, port 1194 is used.
- Select the Enable point-to-site VPN check box if you want to implement the point-to-site VPN scenario. In the Protocol field, specify the protocol that must be used for communication between VPN components: UDP or TCP. In the Port field, specify a port on which the network hub must listen for standalone computer connections. By default, port 6179 is used.
Note |
It is recommended that you use the UDP protocol. While TCP guarantees delivery of data packets, UDP ensures faster data transmission since it does not require any data flow control. |
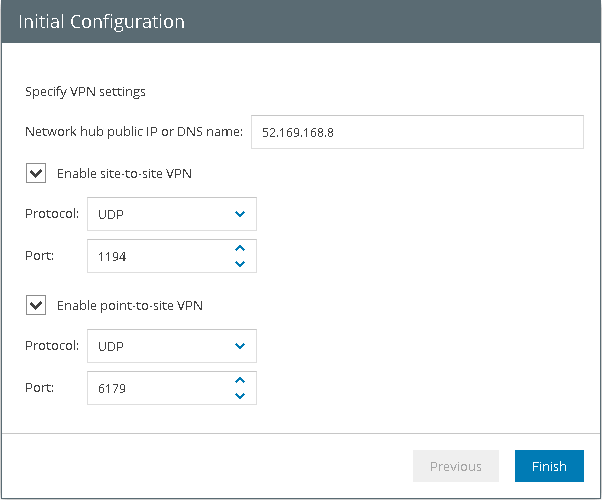
- Click Finish.