---
title: "Step 1. Specify Email Server Settings"
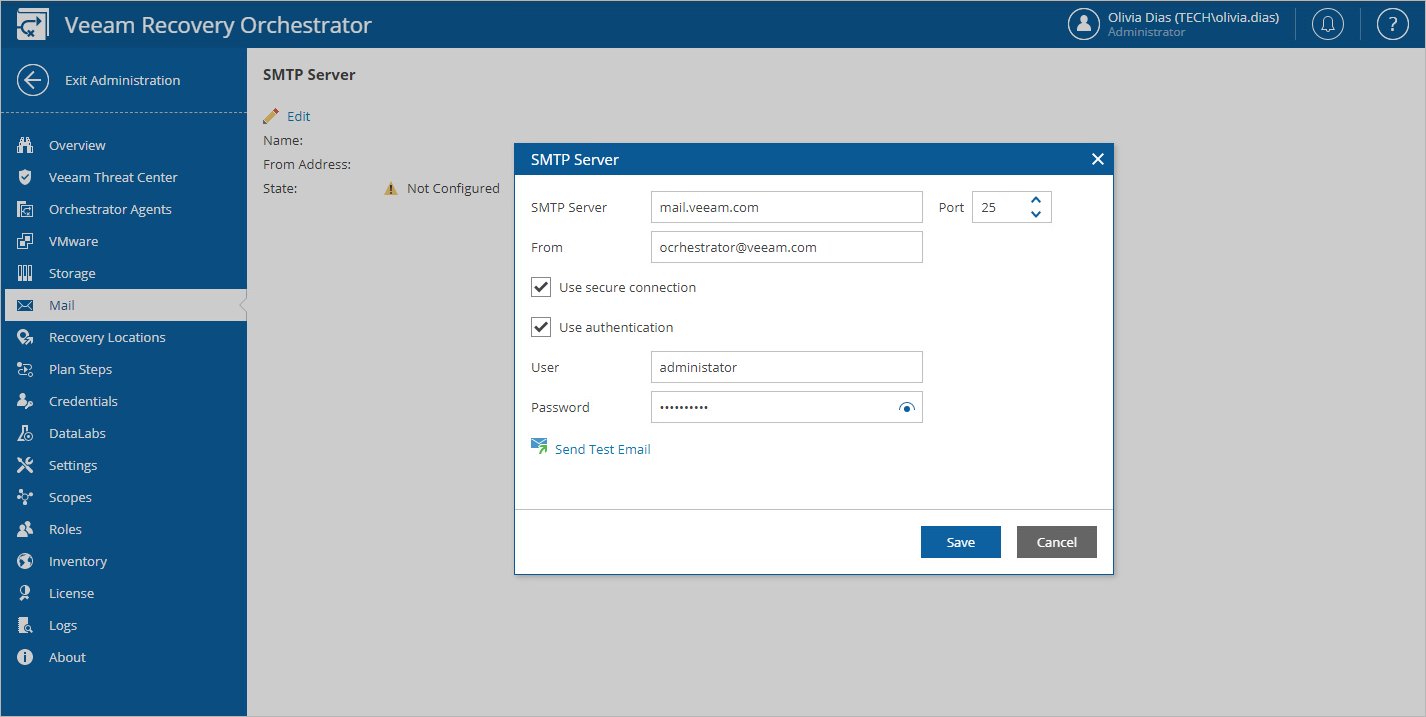
description: "To connect an SMTP server that will be used for sending email notifications: Switch to the Administration page. Navigate to Mail. Click the link next to the Mail service field and configure email server settings."
canonical: "https://helpcenter.veeam.com/docs/vro/userguide/specify_smtp_settings.html"
breadcrumb: "User Guide > Configuring Veeam Recovery Orchestrator > Configuring General Settings > Step 1. Specify Email Server Settings"
dateModified: "2026-08-26"
---
# Step 1. Specify Email Server Settings
To connect an SMTP server that will be used for sending email notifications:
1. Switch to the **Administration** page.
2. Navigate to **Mail**.
3. Click the link next to the **Mail service** field and configure [email server settings](#configuring_settings).
4. In the **From** field, enter an email address of the notification sender. This email address will be displayed in the **From** field of notifications.
5. In the **Sender name** field, specify the name of the notification sender.
6. Click **Save**.
::: tip
Orchestrator allows you to send a test message to check whether you have configured all settings correctly. To do that, click **Send test email**. A test message will be sent to the specified email address.
:::
## Configuring Email Server Settings
To configure email server settings, choose whether you want to employ [Basic (SMTP)](#basic) or [Modern (OAuth 2.0)](#modern) authentication for your email service.
### Using Basic Authentication
To employ the Basic authentication to connect to your email server, in the **Email Server Settings** window:
1. From the **Authentication type** drop-down list, select *Basic*.
2. In the **SMTP server** field, enter a DNS name or an IPv4 address of the SMTP server. All email notifications (including test messages) will be sent by this SMTP server.
3. In the **Port** field, change the SMTP communication port if required. The default SMTP port is 25.
4. From the **Encryption protocol** drop-down list, select a protocol that will be used for data transfer.
5. If your SMTP server requires authentication, select the **Requires authentication** check box, and specify authentication credentials in the **Username** and **Password** fields.
### Using Modern Authentication
To employ the Modern authentication to connect to your email service:
1. From the **Authentication type** drop-down list, select *Modern*.
2. In the **Email Server Settings** window, copy the URL from the **Redirect URL** field.
3. For Orchestrator to be able to use OAuth 2.0 to access Google Cloud or Microsoft Azure APIs, register a new client application either in the [Google Cloud Console](https://developers.google.com/workspace/guides/create-credentials#oauth-client-id) or in the [Microsoft Azure portal](https://learn.microsoft.com/en-us/entra/identity-platform/quickstart-register-app).
When registering the application, make sure that the redirect URL specified for the application matches the URL copied from the Orchestrator Web UI.
::: important
- Due to Google Cloud technical limitations, the Google email service does not support redirect URLs of backup appliances deployed in the US East (N.Virginia) region.
- If you plan to use a client application registered in a Google Cloud project with a [Testing publishing status](https://support.google.com/cloud/answer/15549945?sjid=9344565301248032133-EU#publishing-status&zippy=%2Ctesting%2Cinternal), keep in mind that authorization will be required every seven days from the time of consent.
- If you plan to use a client application registered in the Microsoft Azure portal, you must grant it the *Mail.Send* Microsoft Graph application permission and the following Microsoft Graph delegated permissions: *email*, *offline_access*, *openid*, *User.Read*. For more information on Microsoft Graph permissions, see [Microsoft Docs](https://learn.microsoft.com/en-us/graph/permissions-reference).
:::
4. Back to the Orchestrator Web UI, do the following in the **Email Server Settings** window:
1. Use the **Mail service** drop-down list to choose whether the service that you want to use to send email notifications is a *Google Cloud* or *Microsoft Azure* email service.
2. In the **Application client ID** and **Client secret** fields, provide the Client ID and Client secret created for the application as described in [Google Cloud documentation](https://developers.google.com/workspace/guides/create-credentials#oauth-client-id) or [Microsoft Docs](https://learn.microsoft.com/en-us/entra/identity-platform/quickstart-register-app#add-a-client-secret).
3. [Applies only if you have selected the **Microsoft Azure** option] In the **Tenant ID** field, provide the ID of a Microsoft Entra ID tenant in which the application has been registered.
4. Click **Authorize**. You will be redirected to the authorization page. Sign in using a Google or Microsoft Azure account to validate the configured settings.
[](images/smtp_settings.png){.toggle scale=55}