 This is an archive version of the document. To get the most up-to-date information, see the current version.
Step 3. Configure Off-Host Backup Proxy
You can deploy an off-host backup proxy to remove unwanted overhead on the production Hyper-V host. In this case, the off-host backup proxy will retrieve VM data from the source datastore, process it and transfer to the destination.
To configure the backup proxy, you must add a server and assign the role of the backup proxy to that server. For details on how to do this, perform the following steps.
Before You Begin
Check the following prerequisites:
- You must assign the off-host backup proxy role to a physical machine. For evaluation purposes, you can assign the off-host backup proxy role to a VM. For details, see System Requirements in the Veeam Backup & Replication User Guide.
- The version of the Microsoft Hyper-V host and off-host backup proxy must be the same.
- The source Microsoft Hyper-V host and off-host backup proxy must be connected to the shared storage through SAN.
- The off-host backup proxy must have access to the backup server, backup repository and source and target datastores.
- To create and manage volume shadow copies on the shared storage, you must install and properly configure a VSS hardware provider that supports transportable shadow copies on the off-host proxy and the Microsoft Hyper-V host.
Typically, when configuring a VSS hardware provider, you need to specify a server controlling the LUN and disk array credentials to provide access to the array.
- If you plan to perform off-host backup for a Hyper-V cluster with CSV, make sure you deploy an off-host backup proxy on a host that is not a part of a Hyper-V cluster. Otherwise, the cluster will fail during backup or replication.
- File and printer sharing must be enabled in network connection settings of the added Microsoft Windows machine. On this server, Veeam Backup & Replication deploys the required components. Without sharing enabled, Veeam Backup & Replication fails to deploy these components.
Adding Server
To add a server, do the following:
- In the inventory pane of the Backup Infrastructure view, right-click the Managed Servers node and select Add Server.
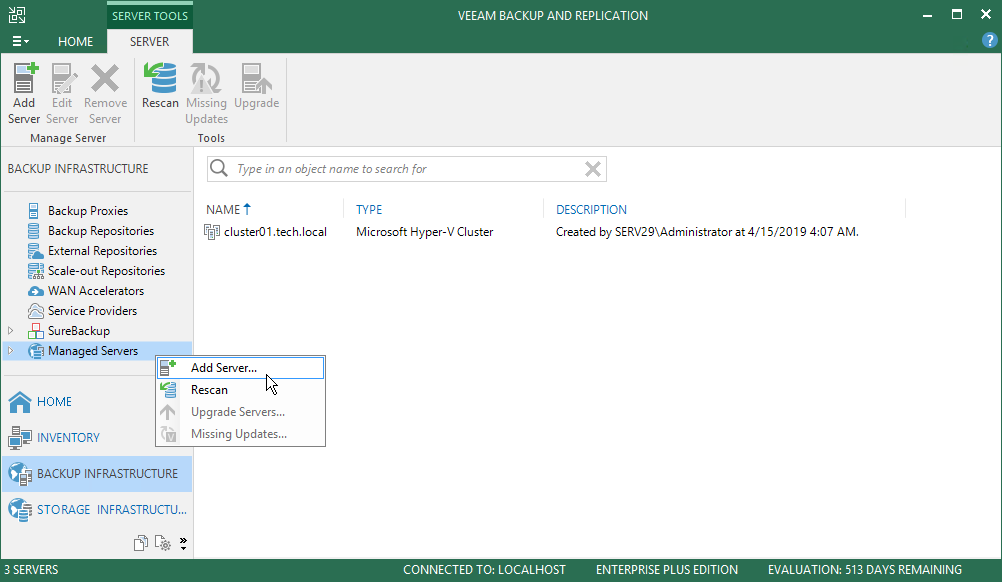
- In the Add Server window, click Microsoft Windows to launch the New Windows Server wizard.
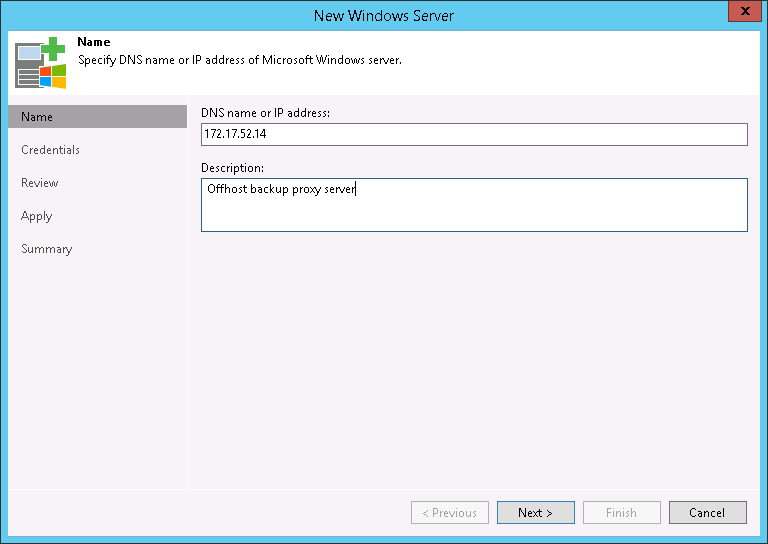
- At the Name step of the wizard, specify the DNS name or IP address of the server that will perform the role of the backup proxy.
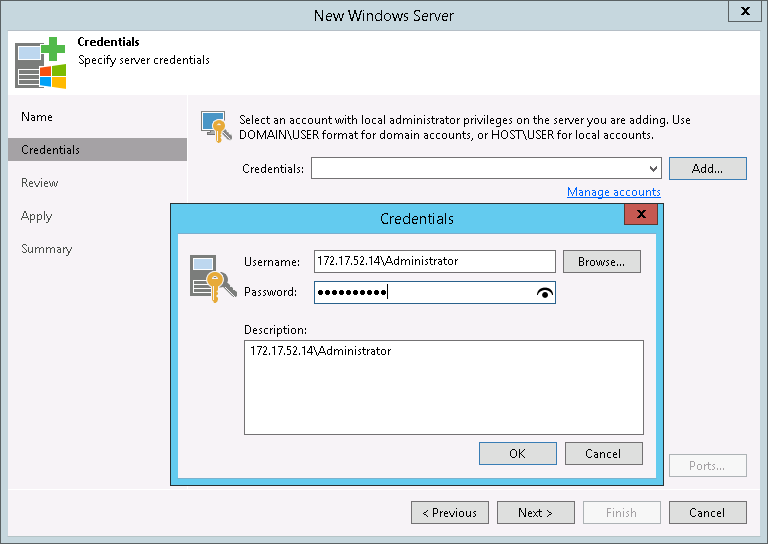
- At the Credentials step of the wizard, specify credentials for the user account with Administrator permissions on the added server.
To add the account, do the following:
- Click Add.
- Specify the username and password used to connect to the added server.
- Click OK.
- Follow the next steps of the wizard. At the Summary step of the wizard, click Finish.
- Open the Backup Infrastructure view and click the Managed Servers node. The added server must be available in the working area.
Assigning Backup Proxy Role to Added Server
To assign the role of the backup proxy:
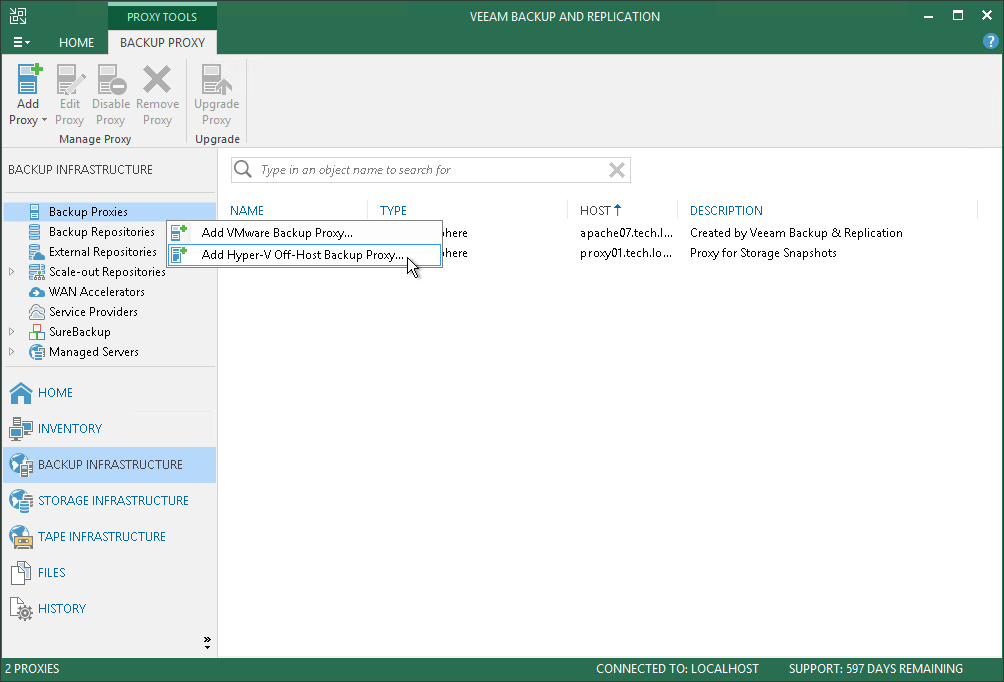
- In the inventory pane of the Backup Infrastructure view, right-click the Backup Proxies node and select Add Hyper-V Off-Host Backup Proxy.
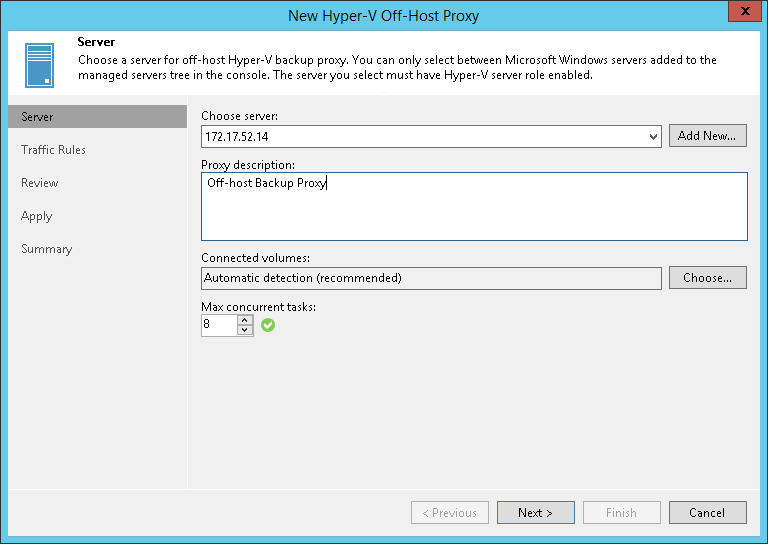
- At the Server step of the wizard, do the following:
- In the Choose server list, select the server that you have added.
- In the Connected volumes field, leave the Automatic detection option selected.
Veeam Backup & Replication will detect all volumes to which the configured off-host backup proxy has access.
- At the Traffic Rules step of the wizard, keep the default settings.
Network traffic throttling rules help you manage bandwidth usage and minimize impact of data protection and disaster recovery tasks on network performance. Setting up traffic throttling is not described in this guide. For details, see Network Traffic Management in the Veeam Backup & Replication User Guide, section .
- At the Summary step of the wizard, check the backup proxy settings and click Finish.
- Open the Backup Infrastructure view and click the Backup Proxies node. The added off-host backup proxy must be available in the working area.
Reference
For details on the backup proxy, see the Off-Host Backup Proxy section in the Veeam Backup & Replication User Guide.