 This is an archive version of the document. To get the most up-to-date information, see the current version.
After You Install
When installation completes, do the following:
- Perform logoff/logon on the server where VES is installed to initialize the Veeam Virtualization Extensions Users local group that will be used to accommodate the service account. Also add any other accounts to this group for users who will need to access the Veeam UI to configure Hyper-V monitoring.
- Confirm installation of the Veeam UI and Virtualization Extensions Service.
- In Windows Server 2012 and later, open Start > All Apps and find Veeam Management Pack for System Center.
- In earlier Windows versions, open Start > All Programs > Veeam > Veeam Management Pack for System Center.
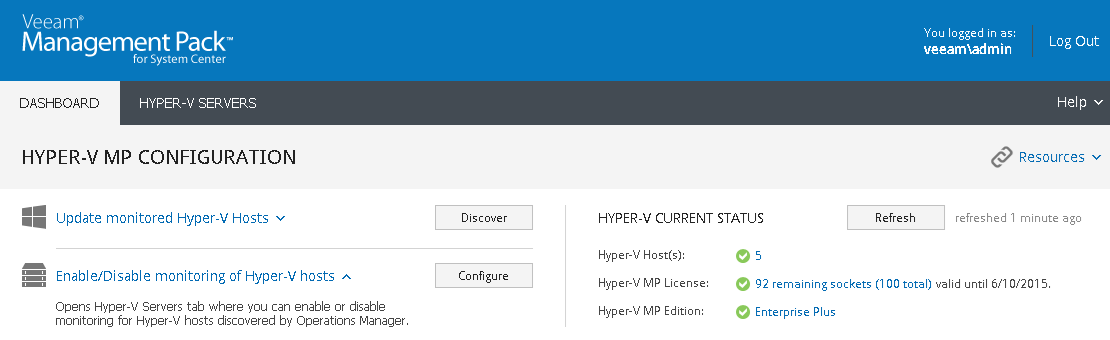
The web interface should open in the default browser. Enter valid credentials and you will see the Veeam UI as shown below.

As soon as the Virtualization Extensions Service discovers Hyper-V clusters and hosts, the Hyper-V current status section will display the number of monitored Hyper-V hosts and number of remaining license sockets.
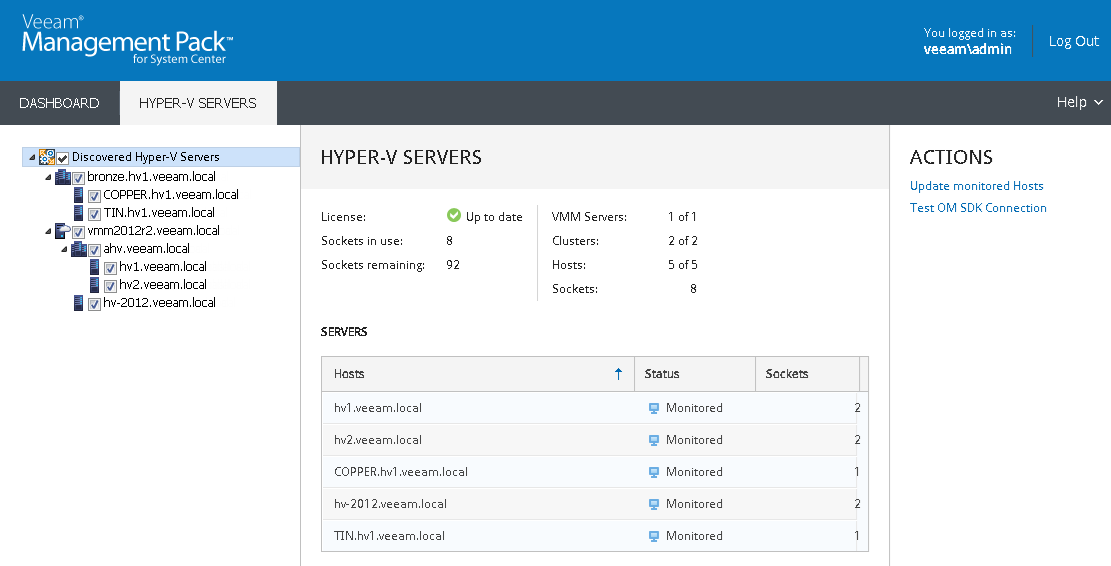
Open the Hyper-V Servers tab to move to the page, where each Hyper-V host discovered with the Veeam Virtualization Extensions Service will be shown under the Discovered Hyper-V Servers tree.
|
If you do not see Hyper-V hosts displayed in the Veeam UI, it may be because discovery is still running. Ensure that Ops Mgr agents on all Hyper-V hosts have Proxy enabled. Use the Update Monitored Hosts link in the Actions pane to refresh the view. See the Troubleshooting section of this document for more details. |
If you have chosen the option of including SCVMM in your environment, you will see the SCVMM server as a container for Hyper-V hosts and clusters in the Veeam UI. For optional SCVMM configuration, see Appendix A.