 This is an archive version of the document. To get the most up-to-date information, see the current version.
Creating Veeam Agent Backup Jobs
Veeam Backup & Replication lets you create a Veeam Agent backup job targeted at a cloud repository. You can use the Veeam backup console to create Veeam Agent backup jobs of the following types:
- Veeam Agent backup job managed by the backup server
- Backup policy, or Veeam Agent backup job managed by Veeam Agent
Before you configure a Veeam Agent backup job, you must deploy Veeam Agent on computers whose data you want to back up. To learn more, see the Working with Protection Groups section in the Veeam Agent Management Guide.
|
Consider the following:
|
To create a Veeam Agent backup job:
- On the Home tab, click Backup Job and select Windows computer or Linux computer.
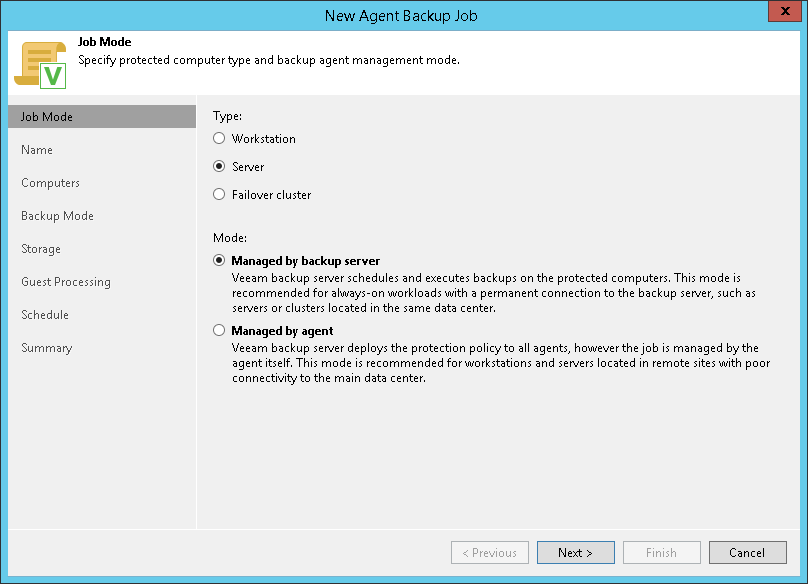
- At the Job Mode step of the New Agent Backup Job wizard, specify protection settings for the backup job:
- In the Type field, select the type of protected computers whose data you want to back up with Veeam Agents: Workstation, Server or Failover cluster.
|
The Failover cluster option is not available for backup jobs that include Linux computers. |
- If you selected the Server option in the Type field, in the Mode field, select the job mode:
- Managed by backup server — select this option if you want to configure the Veeam Agent backup job managed by the backup server. The backup job will run on the backup server in the similar way as a regular job for VM data backup.
- Managed by agent — select this option if you want to configure the backup policy. The backup policy acts as a saved template that describes configuration of individual Veeam Agent backup jobs that run on protected computers.
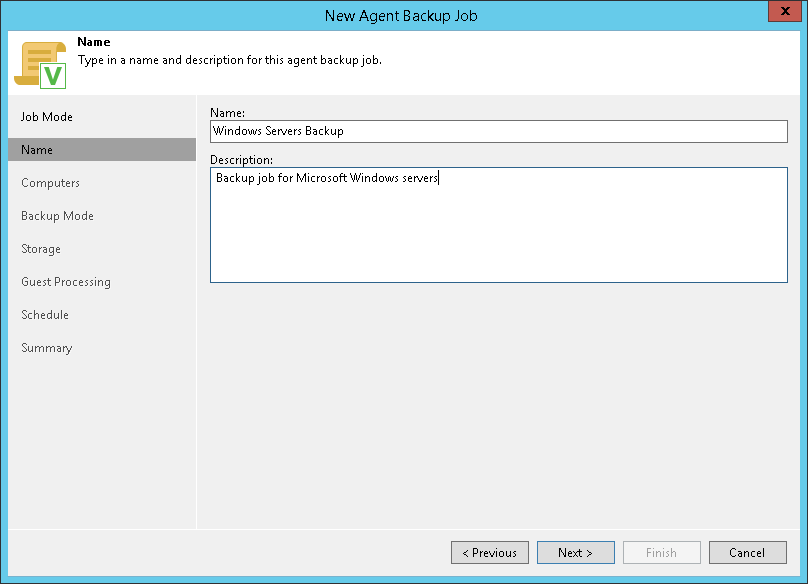
- At the Name step of the wizard, specify a name and description for the backup job.
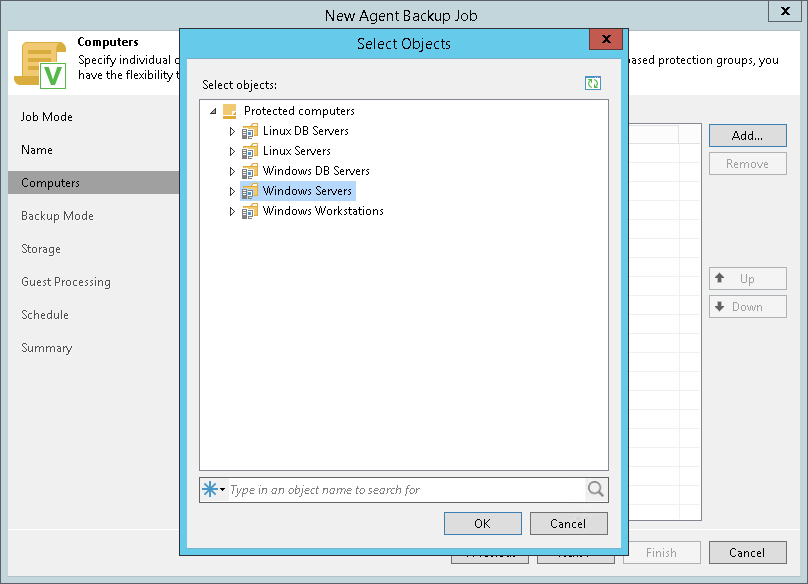
- At the Computers step of the wizard, click Add and select one or more protection groups or individual computers whose data you want to back up. To quickly find the necessary object, use the search field at the bottom of the Select Objects window.
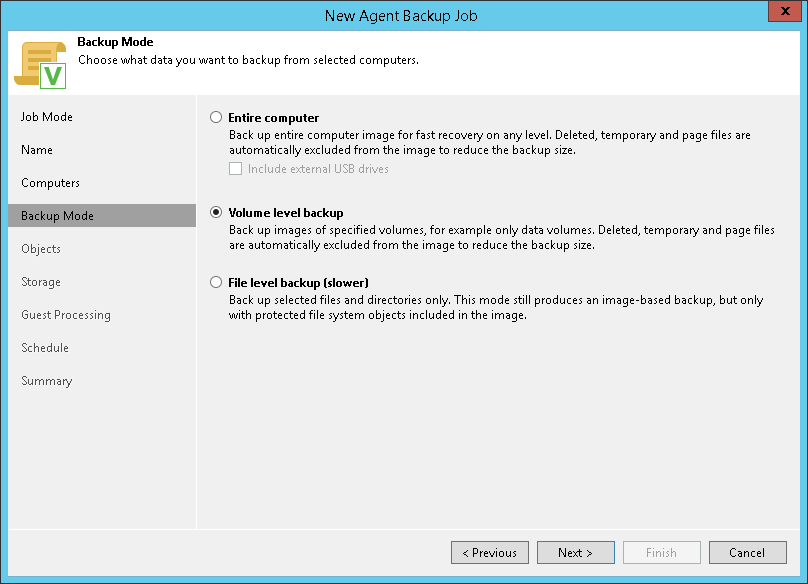
- At the Backup Mode step of the wizard, select the backup mode. You can select one of the following options:
- Entire computer — select this option if you want to create a backup of the entire computer image. When you restore data from such backup, you will be able to recover the entire computer image as well as data on specific computer volumes: files, folders, application data and so on.
- Volume level backup — select this option if you want to create a backup of specific computer volumes, for example, all volumes except the system one. When you restore data from such backup, you will be able to recover data on these volumes only: files, folders, application data and so on.
- File level backup — select this option if you want to create a backup of individual folders on your computer.
- If you chose the Volume level backup or File level backup option at the Backup Mode step of the wizard, at the Objects step of the wizard, specify the backup scope for the Veeam Agent backup job:
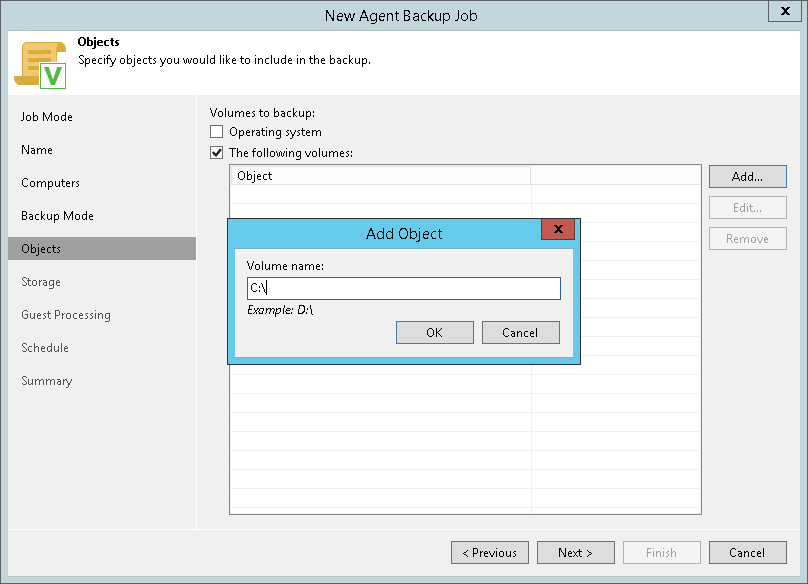
- For volume-level backup, specify what volumes you want to include in the backup. You can include in the backup operating system data or specific volumes.
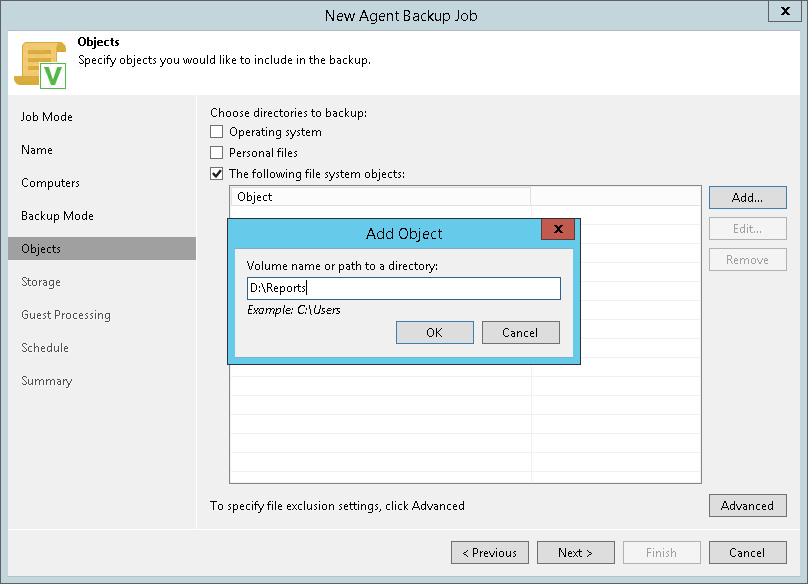
- For file-level backup, specify what folders with files or entire volumes you want to include in the backup. You can include in the backup operating system data, personal files or specific folders or volumes.
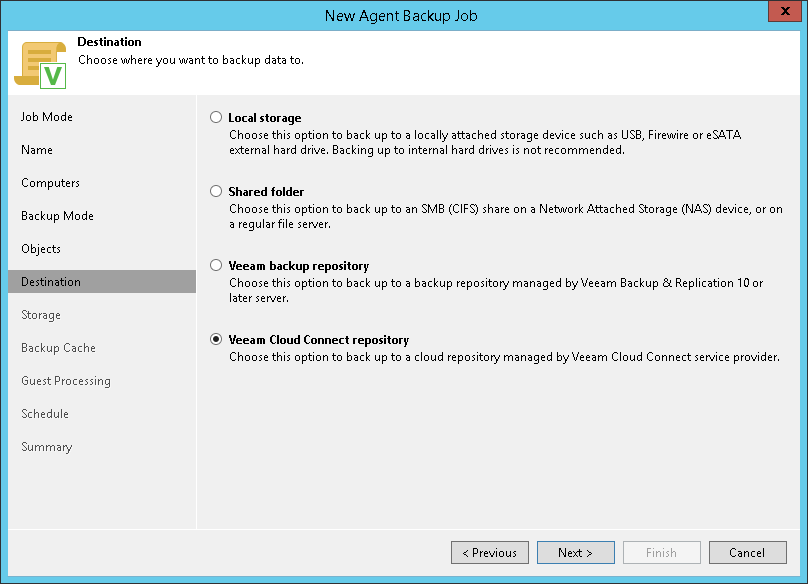
- [For a backup policy] If you selected the Managed by agent option at the Job Mode step of the wizard, at the Destination step of the wizard, select the Veeam Cloud Connect repository option.
|
If you selected the Managed by backup server option at the Job Mode step of the wizard, this step will not be displayed. You will immediately proceed to the Storage step of the wizard. |
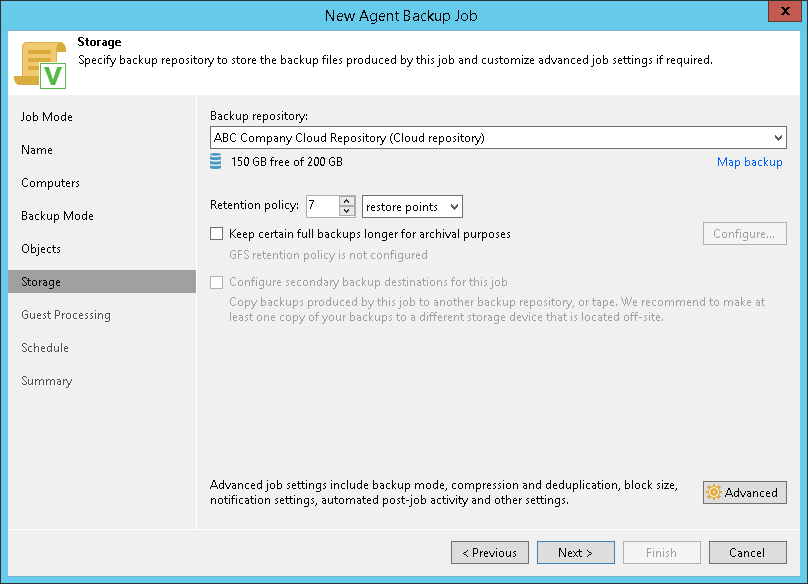
- At the Storage step of the wizard, from the Backup repository list, select the cloud repository to which you plan to store backup files.
- Specify how many restore points you want to keep on the cloud repository:
- For a backup job managed by the backup server, in the Retention policy field, specify the number of restore points or the number of days for which you want to store backup files on the cloud repository. If you want to use the GFS (Grandfather-Father-Son) retention scheme, you can also specify how weekly, monthly and yearly full backups must be retained.
- For a backup policy, in the Restore points to keep on disk field, specify the number of restore points for which you want to store backup files on the cloud repository.
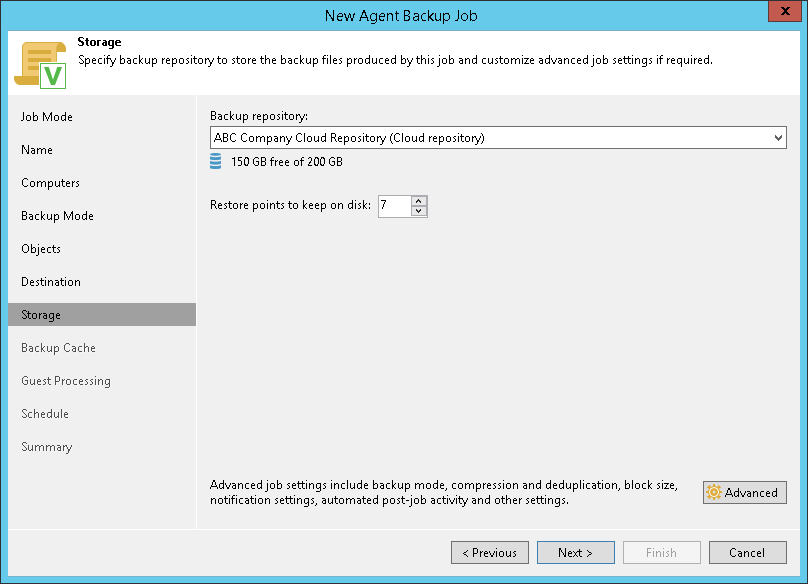
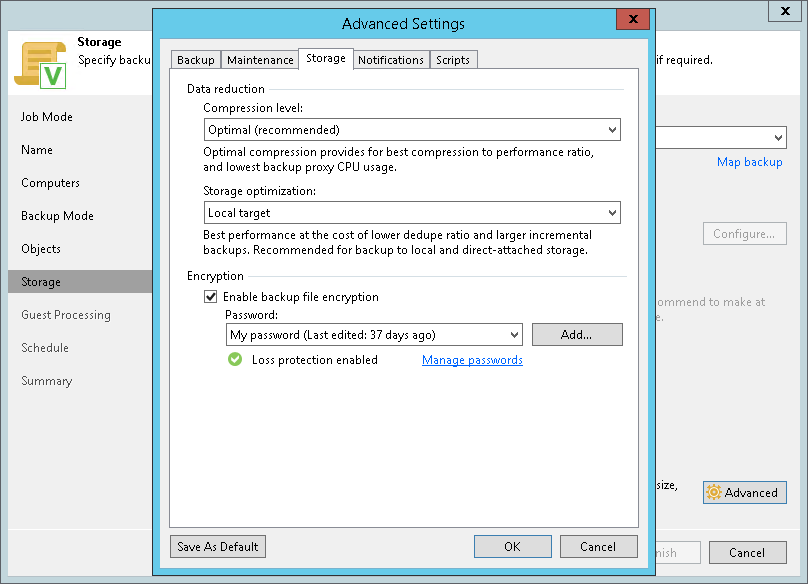
- Click Advanced.
- To encrypt the resulting backup file on the cloud repository, on the Storage tab, select the Enable backup file encryption check box. From the Password field, select a password that you want to use to encrypt the backup file. If you have not created a password beforehand, click Add or use the Manage passwords link to specify a new password.
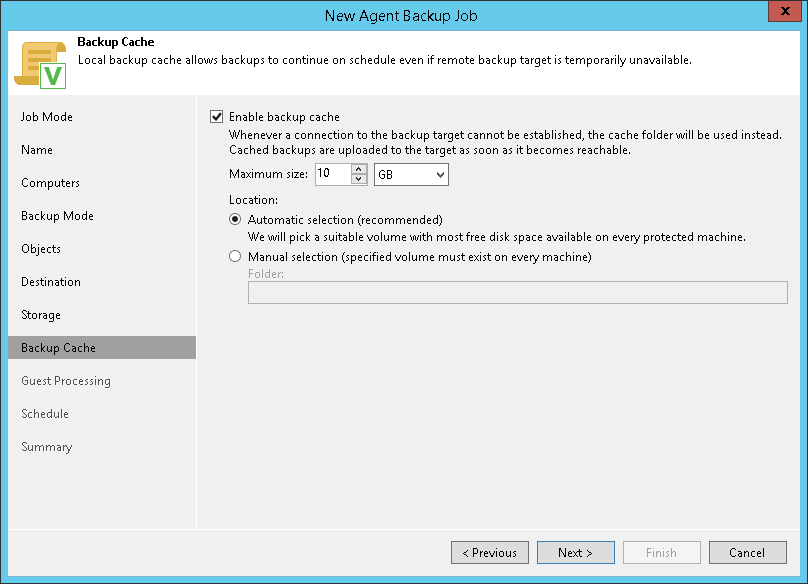
- [For a backup policy] If you want to enable the backup cache for the backup policy, at the Backup Cache step of the wizard, specify backup cache settings.
|
If you selected the Managed by backup server option at the Job Mode step of the wizard, this step will not be displayed. You will immediately proceed to the next step of the wizard. |
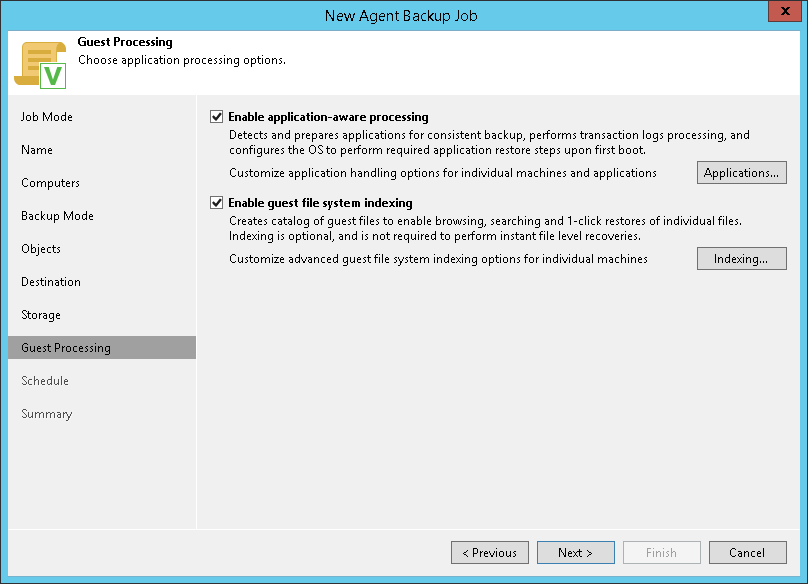
- If you selected the Server or Failover cluster option at the Job Mode step of the wizard, you can enable application-aware processing settings at the Guest Processing step of the wizard. Available guest OS processing settings differ for backup jobs that process Microsoft Windows machines and backup jobs for Linux machines.
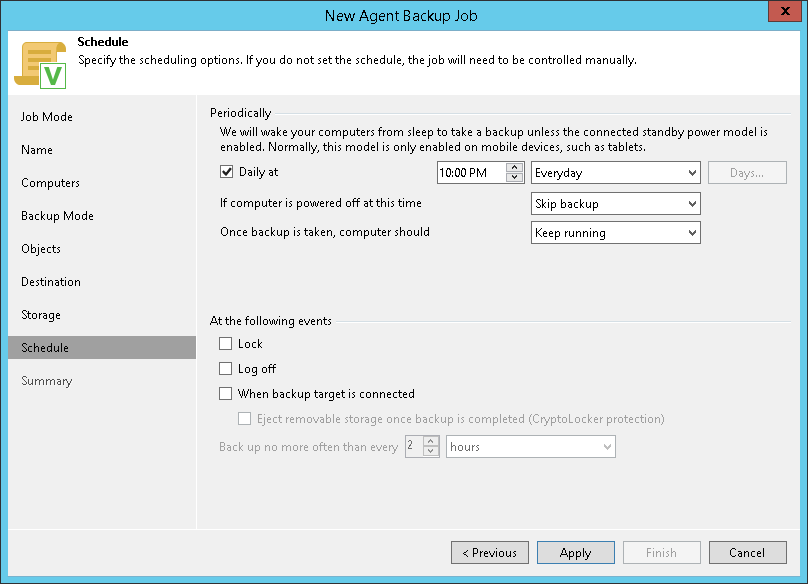
- At the Schedule step of the wizard, specify the schedule according to which you want to perform backup:
- For a backup job managed by the backup server, select the Run the job automatically check box and specify the necessary scheduling settings for the job. If you do not select this check box, you will have to run the backup job manually to create a backup file in the cloud.

- For a backup policy, you can specify time and days when the backup job must start as well as settings for events that trigger the backup job launch.
- At the Summary step of the wizard, select the Run the job when I click Finish check box if you want to start the created job right after you complete working with the wizard.
- Click Finish.