 This is an archive version of the document. To get the most up-to-date information, see the current version.
Configuring SSO for Azure AD
To configure SSO authentication with Azure AD:
- Log in to Veeam Service Provider Console.
For details, see Accessing Veeam Service Provider Console.
- At the top right corner of the Veeam Service Provider Console window, click Configuration.
- In the configuration menu on the left, click Security.
- On the SIngle Sign-On tab, click New and select Custom from the drop-down list.
The identity provider configuration wizard will open.
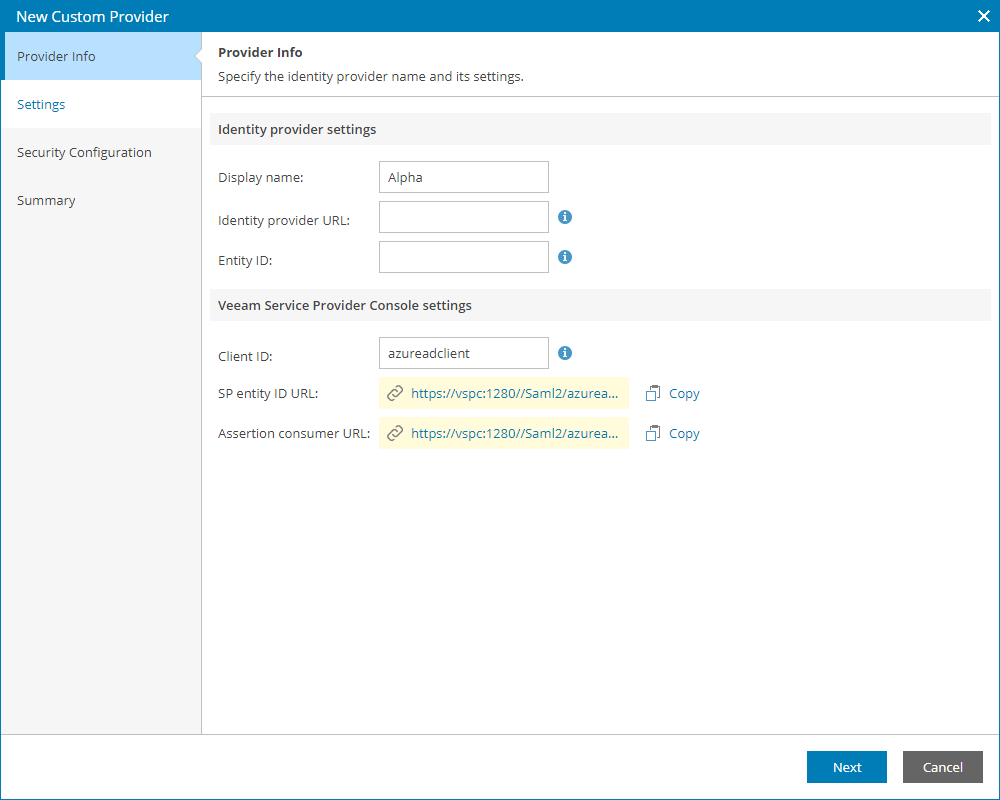
- In the Display name field, specify the IdP name that will be displayed in the IdP list on the Single Sing-On tab.
- Click Create SP entity ID link to generate entity ID URL based on the Client ID value.
Save the link locally.
If you apply changes to Client ID value after link generation, click New link.
- Click Create Assertion consumer link to generate assertion consumer service URL based on the Client ID value.
Save the link locally.
If you apply changes to Client ID value after link generation, click New link.
- Access Azure AD web portal.
- Navigate to the Enterprise Applications tab.
- In the menu on the left, select All applications.
- At the top of the list, click New application.
- In the Browse Azure AD Gallery window, click Create your own application.
- In the Create your own application side window, specify the name of the integration with Veeam Service Provider Console and select Integrate any other application you don't find in the gallery (Non-gallery).
- In Veeam Service Provider Console, insert the application name into the Client ID field.
- In Azure AD, open the created application.
- In the menu on the left, click Single sign-on and select SAML.
The SAML-based Sign-on page will open.
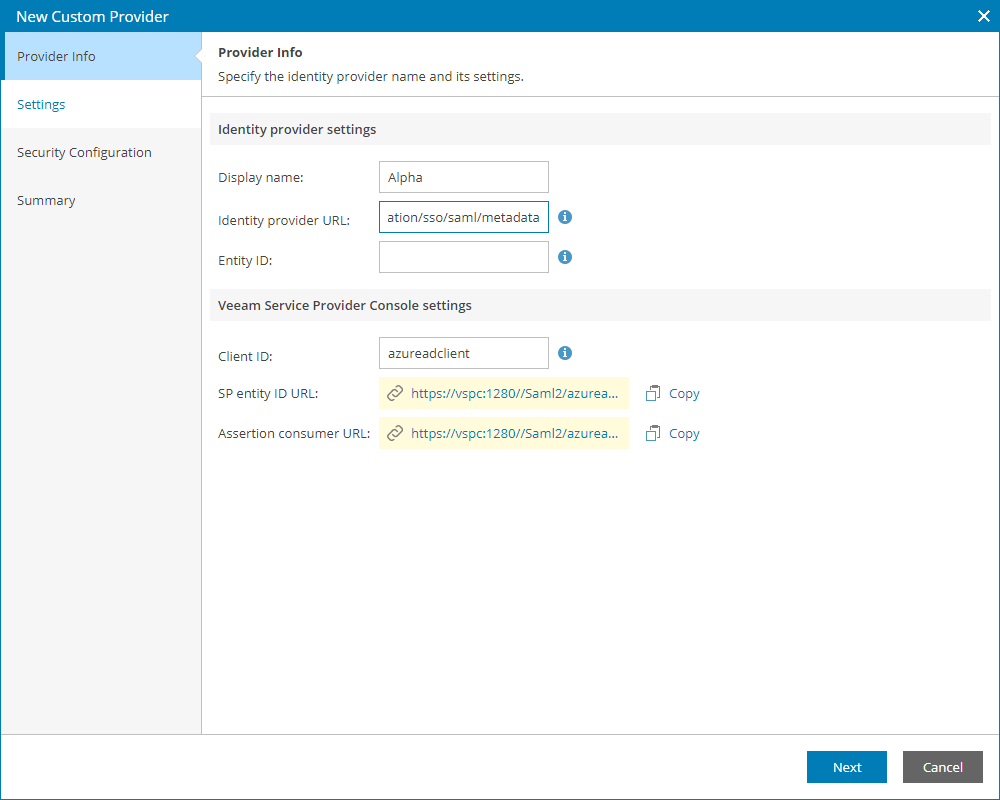
- Copy the App Federation Metadata URL link.
- In Veeam Service Provider Console, insert the URL into the Identity Provider URL field.
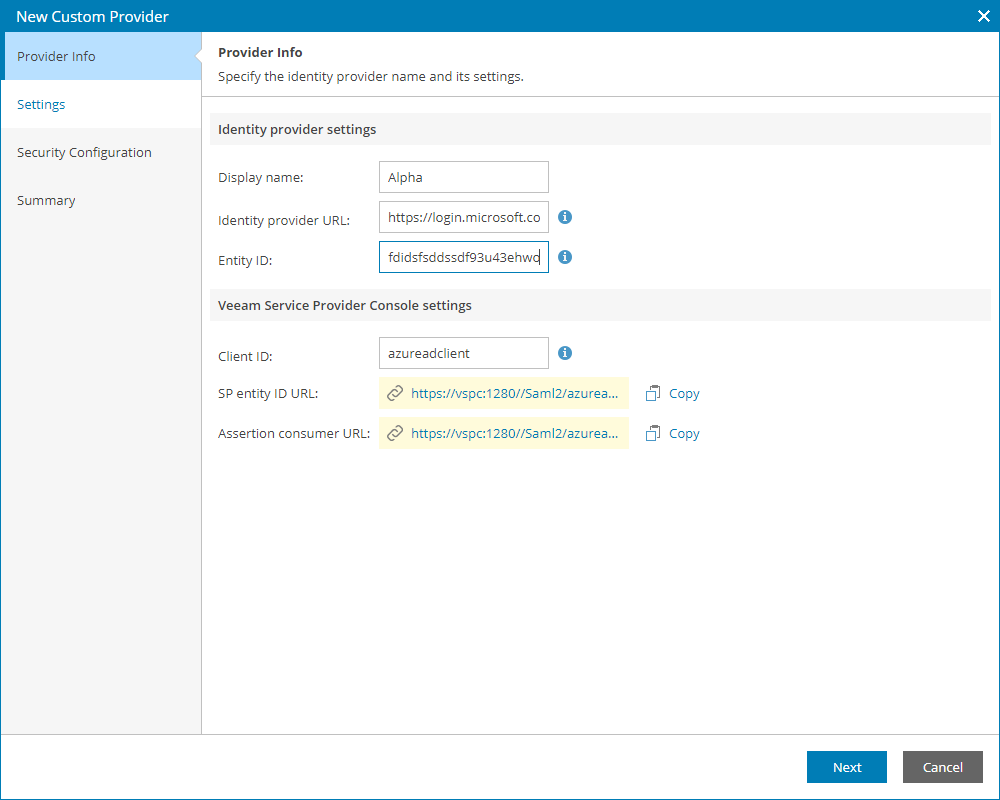
- In Azure AD, from the Set up ... widget, copy the Microsoft Entra Identifier link.
- In Veeam Service Provider Console, paste the link into the Entity ID field.
- In Azure AD, in the top right corner of the Basic SAML Configuration widget, click Edit.
- In the Identifier (Entity ID) section, insert the URL generated in the SP entity ID URL field at step 5 into the empty field.
- Select the Default check box next to the new URL and delete the old URL.
- In the Reply URL (Assertion Consumer URL) section, insert the URL generated in the Assertion consumer URL field at step 5 into the empty field.
- Select the Default check box next to the new URL and delete the old URL.
- Click Save.
- Follow steps 6-8 described in the Adding Identity Providers section.
- In Azure AD, at the top of the SAML-based Sign-on page, click Upload metadata file and upload the XML file obtained after IdP configuration.
- Follow steps 9-10 described in the Adding Identity Providers section.
- In Azure AD, navigate to the Users and groups tab and add users that will have access to Veeam Service Provider Console.