Veeam Help Center Help Center
Veeam Plug-in for Proxmox VE 2
User Guide
Archive
Search for "" in this document
Search
Veeam Plug-in for Proxmox VE 2
User Guide
  • Overview
    • Solution Architecture
    • VM Backup
      • Backup Chain
        • Changed Block Tracking
        • Backup Retention
      • Backup Methods
        • Forever Forward Incremental Backup
        • Forward Incremental Backup
      • Active Full Backup
      • Synthetic Full Backup
    • VM Restore
      • Entire VM Restore
      • File-Level Recovery
    • Retention Policies
  • Planning and Preparation
    • System Requirements
    • Considerations and Limitations
    • Account Permissions
    • Ports
  • Licensing
  • Deployment
    • Upgrading to Veeam Plug-in for Proxmox VE 2
  • Configuring Veeam Plug-in for Proxmox VE
    • Configuring Backup Repositories
    • Connecting Proxmox VE Server
      • Adding Proxmox VE Server to Backup Infrastructure
        • Step 1. Launch New Proxmox VE Server Wizard
        • Step 2. Specify Domain Name or IP Address of Proxmox VE server
        • Step 3. Enter Credentials
        • Step 4. Configure Storage Settings
        • Step 5. Apply Settings
        • Step 6. Finish Working with Wizard
      • Editing Proxmox VE Server Properties
      • Rescanning Proxmox VE Server
      • Removing Proxmox VE Server
    • Managing Workers
      • Adding Workers
        • Before You Begin
        • Step 1. Launch New Proxmox Worker
        • Step 2. Specify Worker VM Settings
        • Step 3. Configure Network Settings
        • Step 4. Finish Working with Wizard
      • Testing Workers
      • Enabling and Disabling Workers
      • Editing Workers
      • Disabling Automatic Worker Updates
      • Removing Workers
    • Configuring General Settings
      • Configuring Email Settings
      • Configuring Notification Settings
  • Performing Backup
    • Creating Backup Jobs
      • Before You Begin
      • Step 1. Launch New Backup Job Wizard
      • Step 2. Specify Job Name and Description
      • Step 3. Configure Backup Source Settings
      • Step 4. Configure Backup Destination Settings
        • Configuring GFS Policy Schedules
        • Configuring Advanced Settings
          • How Health Check Works
      • Step 5. Specify Job Scheduling Options
      • Step 6. Finish Working with Wizard
    • Starting and Stopping Backup Jobs
    • Retrying Jobs
    • Editing Backup Job Settings
    • Analyzing Performance Bottlenecks
    • Cloning Backup Jobs
    • Enabling and Disabling Backup Jobs
    • Deleting Backup Jobs
    • Creating Active Full Backups
    • Creating VeeamZIP Backups
  • Managing Backups
    • Viewing Backup Properties
    • Verifying Backups
    • Exporting Backups
    • Copying Backups
    • Copying Backups to Tapes
    • Deleting Backups
  • Performing Restore
    • Performing VM Restore
      • Step 1. Launch Entire VM Restore Wizard
      • Step 2. Select Restore Point
      • Step 3. Choose Restore Mode
      • Step 4. Specify Target Host
      • Step 5. Select Storage
      • Step 6. Specify VM Name
      • Step 7. Configure Network Settings
      • Step 8. Specify Restore Reason
      • Step 9. Finish Working with Wizard
    • Performing Instant VM Recovery
    • Publishing Disks
    • Performing File-Level Restore
    • Performing Application Item Restore
    • Exporting Disks
    • Performing VM Restore to Amazon Web Services
    • Performing VM Restore to Microsoft Azure
    • Performing VM Restore to Google Cloud
  • Getting Technical Support
  • Appendix. Configuring Multiple Networks
Download PDF
>User Guide>Getting Technical Support

Getting Technical Support

In this article

    If you have any questions or issues with Veeam Plug-in for Proxmox VE, you can search for a resolution on Veeam R&D Forums or submit a support case in the Veeam Customer Support Portal.

    When you submit a support case, it is recommended that you provide the Veeam Customer Support Team with the following information:

    • Version information for the product and its infrastructure components
    • The error message or an accurate description of the problem you are facing
    • Log files

    Viewing Product Details

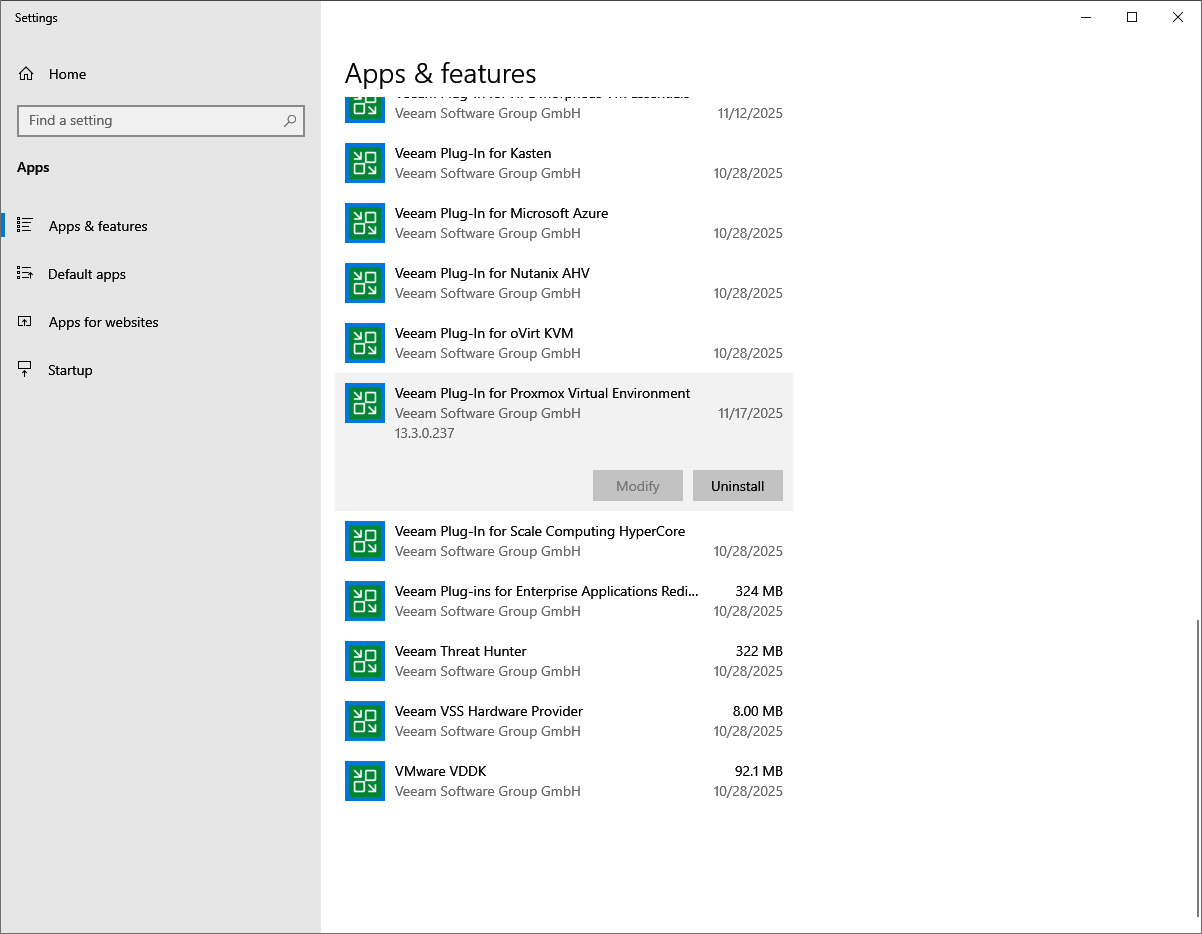
    To view the product details, do the following:

    1. On the server running the Veeam Backup & Replication console, navigate to Settings > Apps & features.

    Alternatively, open the Control Panel window and navigate to Programs > Programs and Features.

    1. In the program list, check the version of Veeam Plug-In for Proxmox Virtual Environment.

    Viewing Product Details 

    Downloading Logs

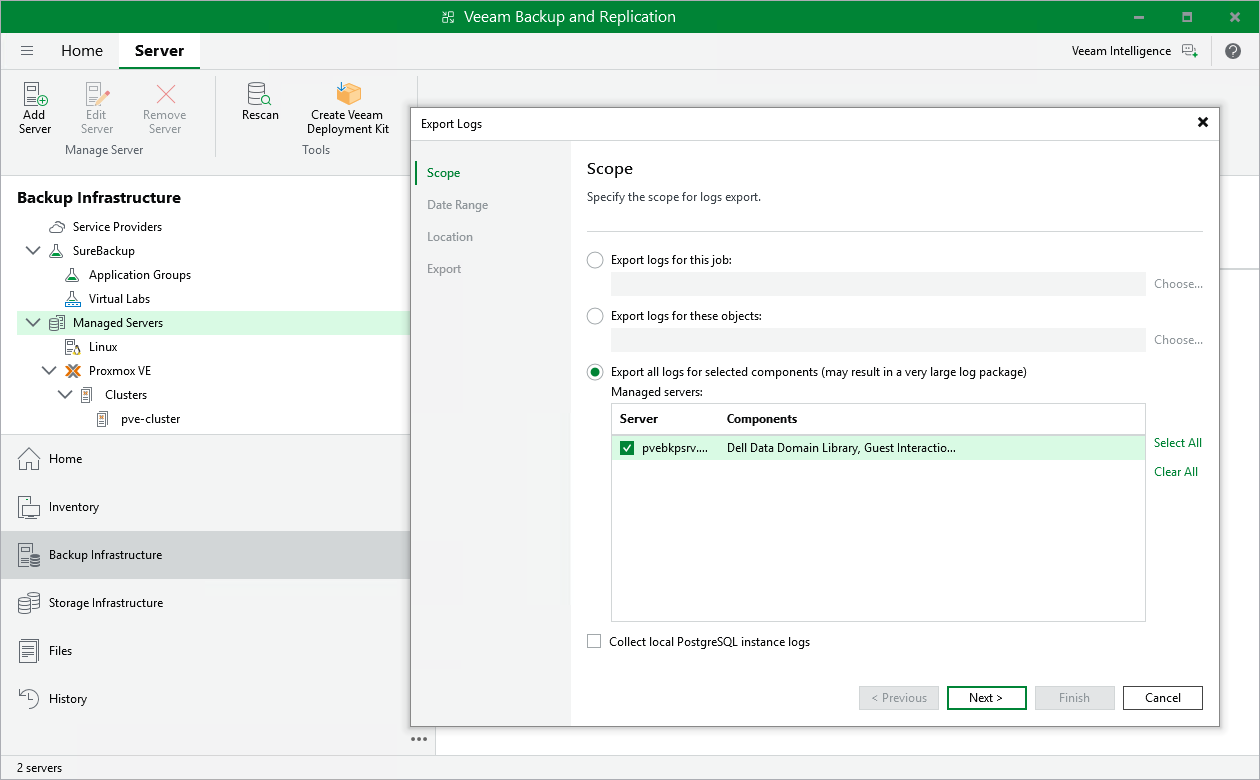
    To download the product logs, do the following:

    1. From the main menu of the Veeam Backup & Replication console, select Help > Support Information.
    2. At the Scope step of the Export Logs wizard, select the Export all logs for selected components option. Then, in the Managed servers list, select the backup server.

    Complete the wizard as described in the Veeam Backup & Replication User Guide, section Exporting Logs.

    Exporting Logs Using Veeam Backup & Replication Console

    Page updated 8/20/2025

    Page content applies to build 13.2.0.457

    Send feedback
    Home | Products | Forums | Support | Contact Sales | EULA

    © Veeam® Software Privacy Notice | Veeam Uses AI | Cookie Notice

    View all results across Veeam Help Center
    Back to document search
    I want to report a typo

    There is a misspelling right here:


    I want to let the Veeam Documentation Team know about that.

    Submit report