This is an archive version of the document. To get the most up-to-date information, see the current version.
Step 6. Specify Recovery Verification Options and Tests
You must specify verification options for every VM from the jobs linked to the SureBackup job:
- Select a role that a VM performs
- Configure startup settings
- Select tests that must be performed for the VM
If all VMs in the linked job perform the same role, you can specify startup options and test settings for the whole job in bulk. If VMs have different roles, you can granularly specify startup options and test settings for each VM in the job.
- To specify startup options and select tests for the whole job, select the job in the list and click Edit on the right.
- To specify startup options and select tests for every VM in the job separately, select the job in the list and click Advanced on the right. Click Add and select the necessary VM in the Add Objects window. Select the added VM in the list, click Edit and specify settings as described below.
|
If you specify startup options and tests individually for a VM, Veeam Backup & Replication will apply these options and tests only. Options and tests specified at the level of the SureBackup job will be ignored for this VM. |
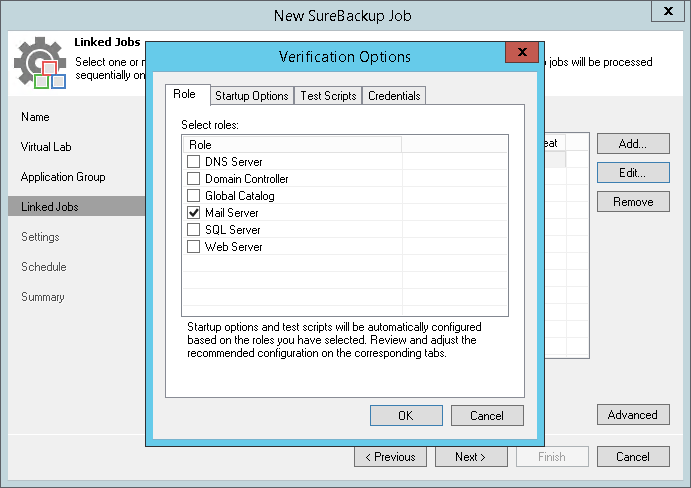
On the Role tab, select the role that the VM performs. Veeam Backup & Replication offers the following predefined roles for VMs:
- DNS Server
- Domain Controller
- Global Catalog
- Mail Server
- SQL Server
- Web Server
VM roles are described in XML files stored in the %Program Files%\Veeam\Backup and Replication\Backup\SbRoles folder on the backup server. You can add your own roles. To do this, you need to create a new XML file and specify role and test scripts settings in it. For more information, see Creating XML files with VM Roles Description.
After you select the necessary role, Veeam Backup & Replication will automatically configure startup options and provide predefined test scripts applicable for the chosen role. You can use these settings or specify custom ones on the Startup Options and Test Scripts tabs.
To verify VMs that perform roles other than those specified in the list, you will have to manually configure startup options and specify test scripts to be run against these VMs.
To specify VM startup settings:
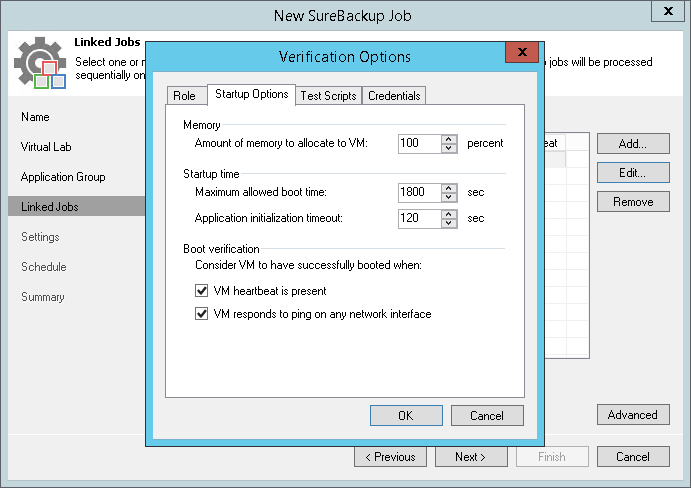
- Click the Startup Options tab.
- In the Memory section, specify the amount of memory that you want to pre-allocate to the VM on the system boot. The amount of pre-allocated memory is defined in percent. The percentage rate is calculated based on the system memory level available for the production VM. For example, if 1024 MB of RAM is allocated to the VM in the production and you specify 80% as a memory rate, 820 MB of RAM will be allocated to the verified VM on startup.
- In the Startup time section, specify the allowed boot time for the VM and timeout to initialize applications on the VM.
Be careful when specifying the Maximum allowed boot time value. Typically, a VM started by a SureBackup job requires more time to boot than a VM started in the production environment. If an application is not initialized within the specified interval of time, the recovery verification process fails with the timeout error. If such error occurs, you need to increase the Maximum allowed boot time value and start the job again.
- In the Boot verification section, specify when the VM must be considered to have been booted successfully:
- VM heartbeat is present. If you select this option, Veeam Backup & Replication will perform a heartbeat test for the verified VM.
- VM responds to ping on any network interface. If you select this option, Veeam Backup & Replication will perform a ping test for the verified VM.
If you enable both options, Veeam Backup & Replication will require that both tests are completed successfully: heartbeat test and ping test.
|
Veeam Backup & Replication performs a heartbeat test for VMs that have Hyper-V Integration Services installed. If Hyper-V Integration Services are not installed, the VM will be started but tests will not be performed. |
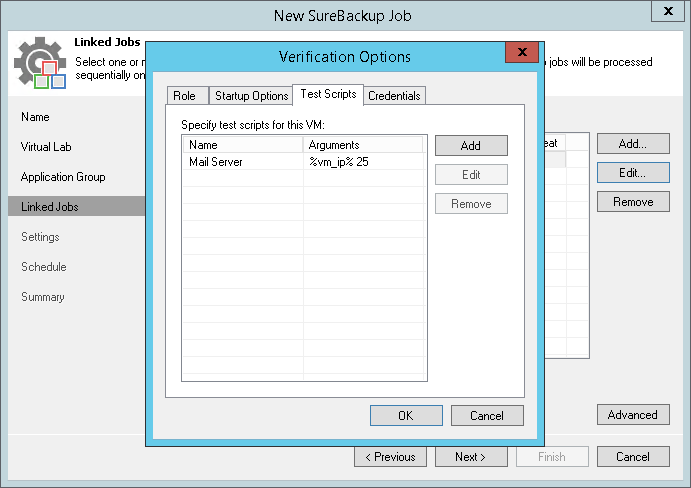
When you select a VM role, Veeam Backup & Replication automatically assigns a predefined script that must be run to verify applications inside the VM. If you want to verify a VM that has some other role not listed on the Role tab, do the following:
- Click the Test Scripts tab.
- Click Add.
- In the Test Scripts window, select Use the following test script.
- In the Name field, specify a name for the script.
- In the Path field, define a path to an executable script file that should be run to verify the VM.
- If you have your own custom script, define a path to it in the Path field.
- If you do not have a custom script, you can use Veeam’s standard utility, Veeam.Backup.ConnectionTester.exe, that probes application communication ports. The utility is located in the installation folder of Veeam Backup & Replication: %Program Files%\Veeam\Backup and Replication\Backup\Veeam.Backup.ConnectionTester.exe. Specify this path in the Path field.
- In the Arguments field, specify an IP address of the verified VM and the port that you want to probe (if the selected test probes the port). You can use the %vm_ip% variable to define the VM IP address or the %vm_fqdn% variable to define the VM fully qualified domain name.
For Microsoft SQL Server, you can also specify a path to the log file in the %log_path% argument. For more information, see Backup Recovery Verification Tests.
- Click OK to add the configured test.
To edit test settings, select the test in the list and click Edit. To delete a test, select it in the list and click Remove.
|
If a VM performs several roles and runs a number of applications, you can verify their work by adding several verification scripts. It is recommended that you specify the maximum startup timeout value and allocate the greatest amount of memory for such VMs. |
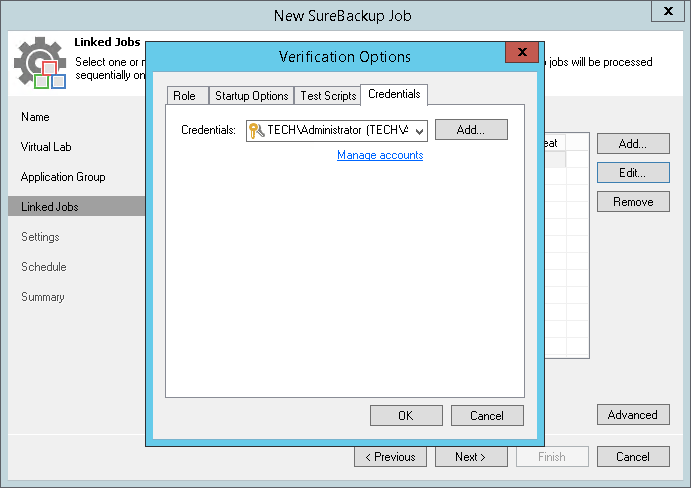
By default, to run the verification script Veeam Backup & Replication uses the account under which the Veeam Backup Service is running. If you need to run the script under some other account, you can specify credentials for this account in the SureBackup job settings.
- Click the Credentials tab.
- From the Credentials list, select credentials for the account under which you want to run the script.
If you have not set up credentials beforehand, click the Manage accounts link or click Add on the right to add the credentials. For more information, see Managing Credentials.