Creating Veeam Agent Backup Job
To back up physical machines, you must configure a Veeam Agent backup job in the Veeam Backup & Replication console. In Veeam Backup & Replication, you can create Veeam Agent backup jobs of the following types:
- Backup job
The backup job runs on the backup server, like VM backup jobs. The backup job is intended for computers that are connected to the backup server. This connection must not be interrupted.
- Backup policy
The backup policy describes configuration of individual Veeam Agent backup jobs that run on protected computers. The backup policy is intended for computers that are connected to the backup server. The connection may be interrupted for short periods of time. For example, when you move your laptop from one location to another. Veeam Backup & Replication uses the backup policy as a template and applies settings from the backup policy to Veeam Agents that run on computers specified in the backup policy.
In this guide, we do not detail backup policy. For more information, see Creating Veeam Agent Backup Policy.
Veeam Backup & Replication lets you create backup jobs for Microsoft Windows and Linux computers. In this section, you will learn how to create a Veeam Agent backup job for Microsoft Windows computes. For details on how to create back jobs for Linux computes, see the Creating Agent Backup Job for Linux Computers section in the Veeam Backup & Replication User Guide.
Before You Begin
Consider the following:
- You must have at least one protection group. For details, see Creating Protection Group.
- You can create Veeam Agent backups on a Veeam backup repository only. Other types of target locations are not supported.
- Veeam Agent for Microsoft Windows does not back up data to which symbolic links are targeted. It only backs up the path information that the symbolic links contain. After restore, identical symbolic links are created in the restore destination.
Creating Veeam Agent Backup Job
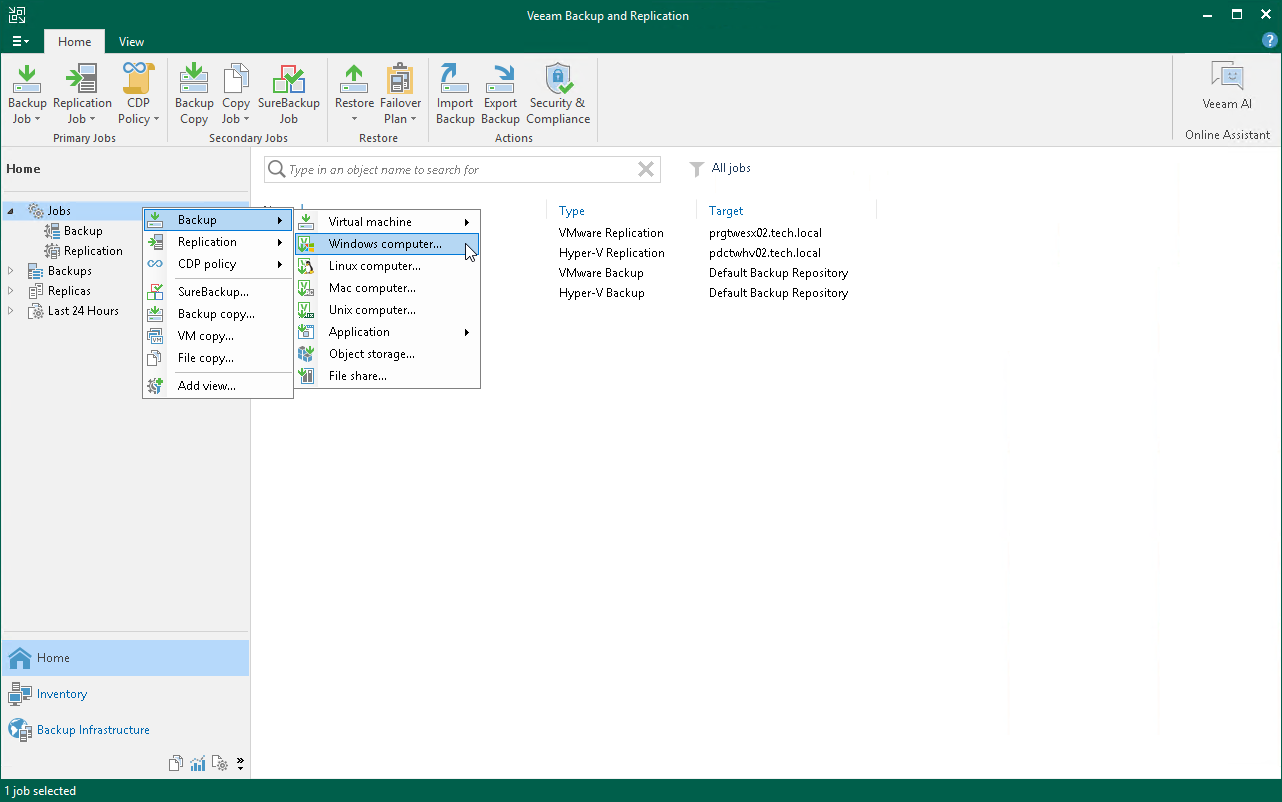
- Open the Home view.
- In the inventory pane of the Home view, right-click the Jobs node and select Backup > Windows computer to open the New Agent Backup Job wizard.
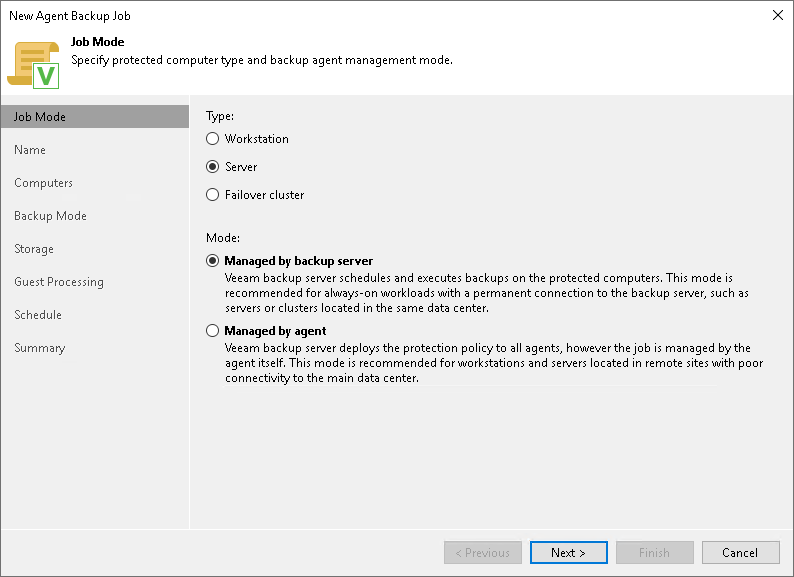
- At the Job Mode step of the wizard, specify protection settings for the backup job:
- In the Type list, select Server to add to the backup job standalone servers that have permanent connection to the backup server.
- In the Mode list, select Managed by backup server.
When you create a Veeam Agent backup job managed by the backup server, Veeam Backup & Replication saves the job settings in its database. Veeam Backup & Replication performs all management tasks for the Veeam Agent backup job: starts a job upon the defined schedule, allocates backup infrastructure resources and so on.

- At the Name step of the wizard, specify a name and description for the backup job.
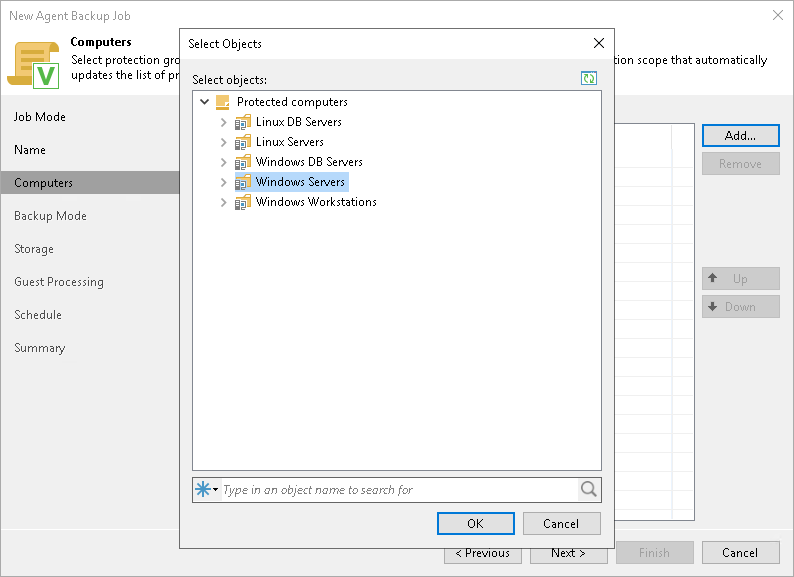
- At the Computers step of the wizard, click Add and select one or several protection groups or computers in the list. Click OK.

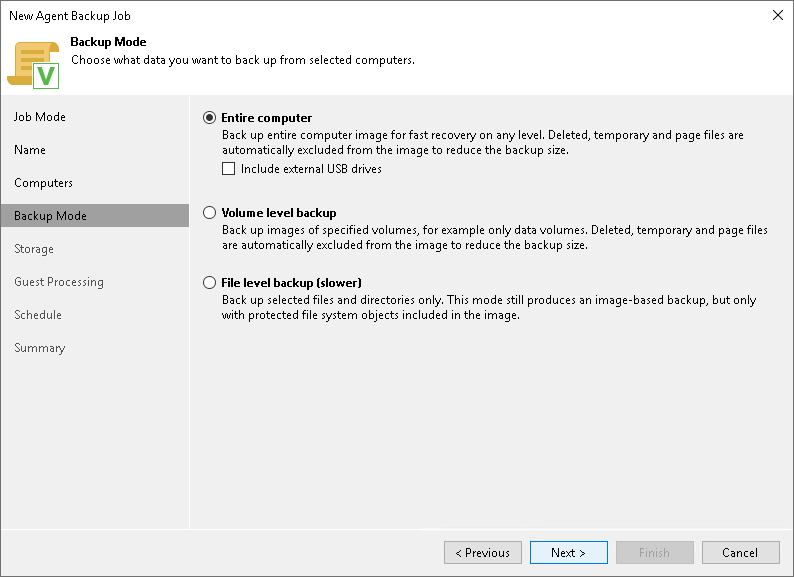
- At the Backup Mode step of the wizard, select Entire computer.
When you restore data from such a backup, you are able to recover the entire computer image as well as data on specific computer volumes: files, folders and application data.

- At the Storage step of the wizard, select the backup repository where you want to store your backups. For other settings, leave the default values.
- At the Guest Processing step of the wizard, leave the default settings.
- At the Schedule step of the wizard, define scheduling settings for the job.
- At the Summary step of the wizard, select the Run the job when I click Finish check box and click the Finish button.
- In the inventory pane of the Home view, expand the Last 24 Hours node to see the created job.
Reference
For more information on creating Veeam Agent backup jobs for Microsoft Windows computers, see the Creating Agent Backup Job for Windows Computers section in the Veeam Backup & Replication User Guide.
