Creating Replication Job
Before You Begin
Before you replicate a VM, consider the following:
- You must add all components needed for the replication process to the backup infrastructure. These components are source and target hosts, backup proxy and backup repository.
- [For VMware vSphere] Due to VMware vSphere limitations, if you change the size of VM disks on the source VM, Veeam Backup & Replication deletes all available restore points on the VM replica during the next replication job session. For more information, see this Veeam KB article.
- [For Microsoft Hyper-V] You cannot replicate VMs with shared VHDX and VHDS disks.
Creating Replication Job
To replicate a VM, do the following:
- Open the Home view.
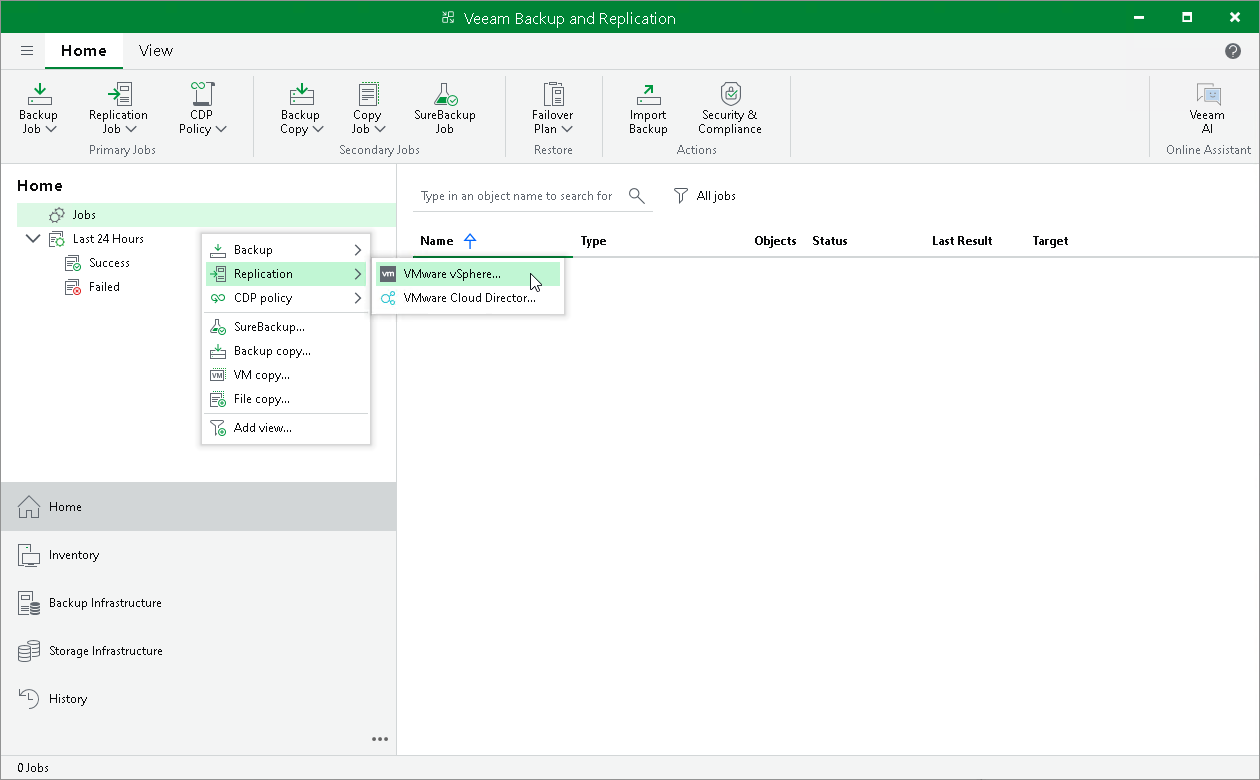
- In the inventory pane of the Home view, right-click the Jobs node and select Replication > Virtual machine > <platform> to launch the New Replication Job wizard.
- At the Name step of the wizard, specify a name and description for the replication job. For other settings, leave the default values.

- At the Virtual Machines step of the wizard, click Add. From the list, select VMs that you want to replicate.
You can also replicate VM containers. If you add a new VM to the container after the replication job is created, Veeam Backup & Replication automatically updates the job to include the new VM.

- [For VMware vSphere] At the Destination step of the wizard, do the following:
- Click Choose next to the Host or cluster field and select a host on which the VM replica must be registered.
- Click Choose next to the Resource pool field and select the target resource pool.
- Click Choose next to the VM folder field and select the folder in which the replica must be placed.
- Click Choose next to the Datastore field and select a datastore where VM replica files must be stored.

- [For Microsoft Hyper-V] At the Destination step of the wizard, do the following:
- Click Choose next to the Host or cluster field and select a host on which the VM replica must be registered.
- Click Choose next to the Path field and specify a path to a location where VM replica files should be stored.

- At the Job Settings step of the wizard, do the following:
- In the Repository for replica metadata list, select the backup repository where you want to store the metadata file.
- In the Replica name suffix field, specify the suffix that will be appended to the name of the original VM.
- In the Restore points to keep field, define the number of restore points to keep.
When this number is exceeded, the earliest restore point is removed.

- At the Data Transfer step of the wizard, leave the default settings.
- At the Guest Processing step of the wizard, leave the default settings if you do not need transactionally consistent replicas. Otherwise, select the Enable application-aware processing check box and specify credentials of a user account to connect to the VM guest OS. The user account must have Administrator permissions.
To specify advanced options for VSS processing, click Applications. Select a VM in the list and click Edit. In the opened window on the General tab, do the following:
- In the Applications section, select Try application processing, but ignore failures to continue the replication job even if VSS errors occur. If VSS processing fails, the created replica will not be transactionally consistent but crash consistent.
- In the Transaction logs section, check that the Process transaction logs with this job option is selected.

- At the Schedule step of the wizard, do the following:
- Select the Run the job automatically check box. If you do not select this check box, you will have to launch the job manually. For details, see Start Replication Job Manually.
- Select the schedule type: daily, monthly or periodically.
In the Periodically every field, you can select Continiously to run the job in a non-stop manner. A new session of the job will start as soon as the previous job session completes.
- Make sure the Retry failed VM processing check box is selected.

- At the Summary step of the wizard, select the Run the job when I click Finish check box and click the Finish button.
- In the inventory pane of the Home view, expand the Last 24 Hours node to see the created job.
- Open vSphere Client or Hyper-V Manager and make sure that the replica appeared on the target host.
Reference
For more information on replica creation, see the Creating Replication Jobs (VMware vSphere) and Creating Replication Jobs (Microsoft Hyper-V) sections in the Veeam Backup & Replication User Guide.