Creating Protection Group
In Veeam Backup & Replication, protection groups are logical containers that pool protected computers of a specific type into groups. For example, you can create a protection group for computers of the same type (laptops, workstations or servers) or computers running the same OS type to simplify their management.
You can add individual machines or Active Directory objects that include several machines to the protection group. In this section. you will learn how to create the protection group with Active Directory objects.
Before You Begin
Consider the following:
- Make sure that all computers added to the protection group are powered on and can be accessed over the network.
- If you add an Active Directory container to a protection group, it is not recommended to add a computer that exists in this container to another protection group.
Creating Protection Group
To create a protection group, do the following:
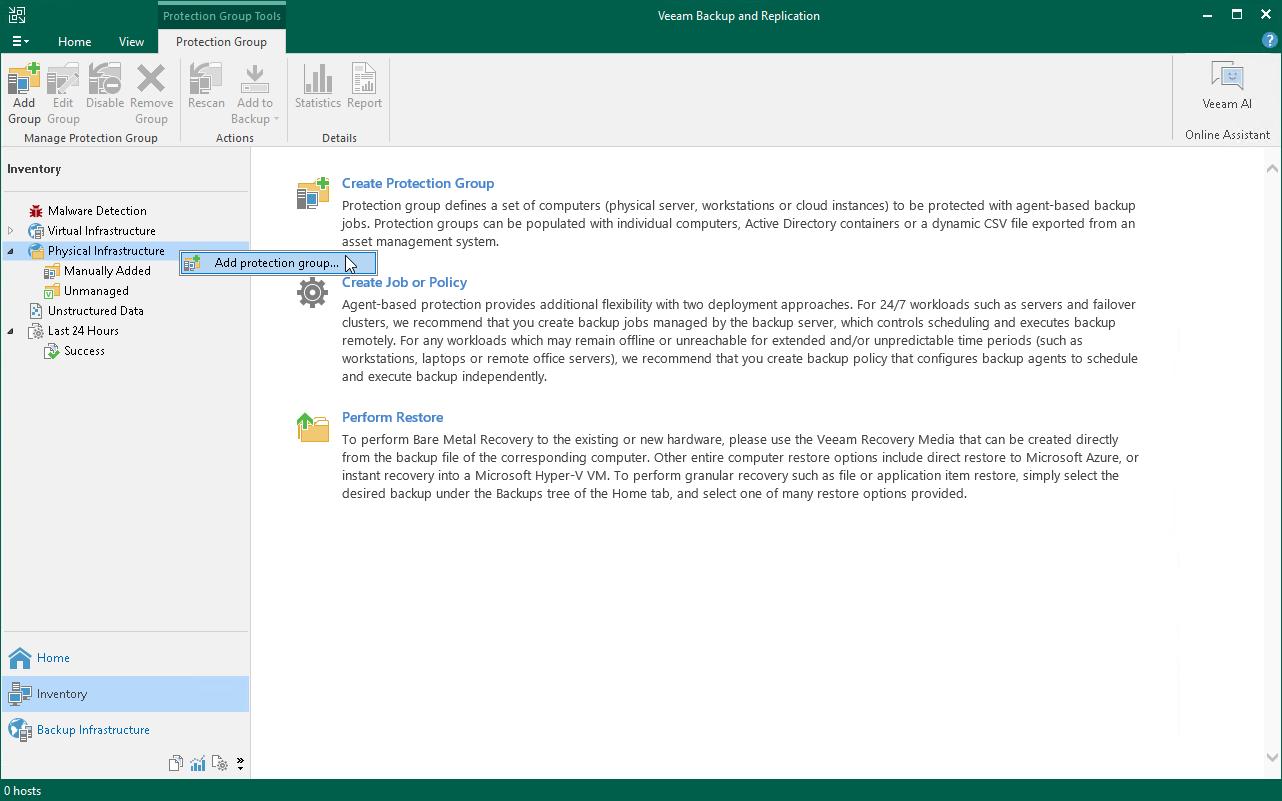
- In the inventory pane of the Inventory view, right-click the Physical Infrastructure node and select Add protection group.
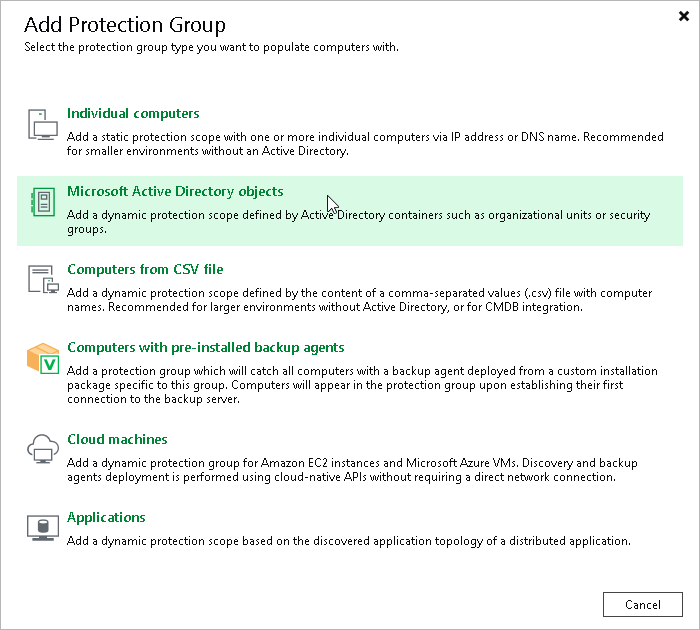
- In the Add Protection Group window, select the Microsoft Active Directory objects option.
Active Directory objects can be the following: entire domain, container, organization unit, group, computer or cluster. Protection groups that include Active Directory objects are dynamic. Veeam Backup & Replication discovers these computers and deploy Veeam Agent on them during the next rescan session.
- At the Name step of the wizard, specify a name and description for the protection group.

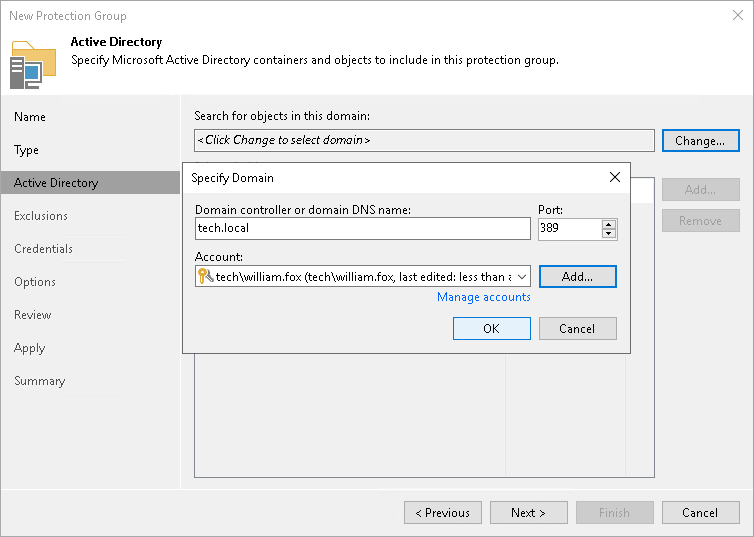
- At the Active Directory step of the wizard, click Change near the Search for objects in this domain field. In the opened window, do the following:
- In the Domain controller or domain DNS name field, type a name of the domain controller or domain whose objects you want to include in the protection group.
- In the Port field, leave the default value.
- Near the Account field, click Add and specify user credentials. This user must have read access permissions to all hosts with the required AD objects.
- Click OK.

- Click Add near the Selected objects field. In the Add Objects window, select the necessary Active Directory object and click OK.
- At the Exclusions step of the wizard, clear the selection of All virtual machines.
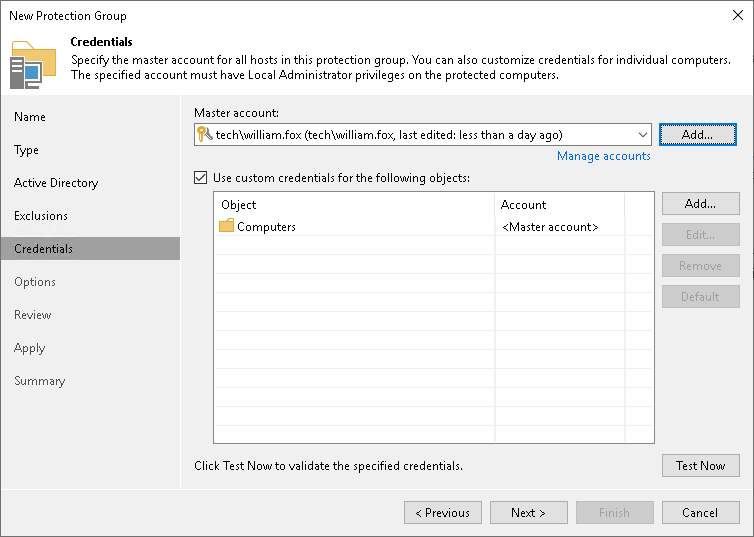
- At the Credentials step of the wizard, specify credentials to connect to computers included in the protection group.
If you want to use the same credentials for all computers in the protection group, select the necessary user account from the Master account list. The account must have administrative permissions on all computers that you have added to the protection group.
You can also specify credentials for individual computes. For details, see the Specify Credentials section in the Veeam Backup & Replication User Guide.

- At the Options step of the wizard, leave the default settings.
- At the Review step of the wizard, review the components that will be installed. Click Apply.
- At the Apply step of the wizard, Veeam Backup & Replication creates the configured protection group. Wait for the operation to complete and click Next.
- At the Summary step of the wizard, select the Run discovery when I click Finish check box and click Finish.
Reference
For more information on creating protection groups, see the Creating Protection Groups section in the Veeam Backup & Replication User Guide.

