 This is an archive version of the document. To get the most up-to-date information, see the current version.
Step 1. Install and Configure Master Agent
Before you start discovery and installation, you must install and configure a master agent on a Windows machine in the company infrastructure.
Prerequisites
Before you install and configure a master agent:
- Obtain the management agent setup file.
For details, see How to Obtain Management Agent Setup File.
- Make sure that the machine that will host the master agent has access to the Internet, and network access to all computers that you want to discover in the managed infrastructure.
- If you plan to discover computers using an Active Directory discovery method, make sure the machine that will host the master agent is part of a domain within which computers will be discovered.
- Make sure you have an account with local Administrator permissions on all computers that you want to discover.
Required Details
Obtain the following data from the service provider:
- FQDN or IP address of a cloud gateway
- Port on the cloud gateway used to transfer backup data to and from cloud repositories
- User credentials for connecting to the service provider (Company Owner credentials)
- Thumbprint of a certificate that is installed on the Veeam Availability Console server
Installing and Configuring Master Agent
To install a master agent:
- Copy the agent setup file to a location accessible from the machine where you want to install the master agent.
- Log on to the machine as an Administrator.
- Double-click the agent setup file to launch the Veeam Availability Console Communication Agent wizard.
- Follow steps of the wizard.
- At the last step of the wizard, click Install.
- When installation completes, click Finish to close the wizard.
The agent will be installed by the following path: %ProgramFiles%\Veeam\Availability Console\CommunicationAgent.
To configure a master agent:
- In the icon tray, right-click the master agent icon and choose Agent Settings.
If the icon is hidden, display hidden icons, find Veeam.MBP.Agent.Configurator in the list of notification area icons, and choose to show the icon and notifications for it.
- In the Management Agent Settings window, specify settings that the agent must use to connect to Veeam Availability Console.
- In the Cloud Gateway field, type FQDN or IP address of a cloud gateway.
- In the Port field, specify the port on the cloud gateway that is used to transfer data to Veeam Availability Console.
- In the Username and Password fields, type user credentials of a Company Owner.
The user name must be provided in the <Company Name\User> format.

- In the Management Agent Settings window, click Apply.
Management agent will connect to Veeam Availability Console server and verify the security certificate.
In case of errors during certificate verification you will be prompted the Security Certificate Preview window:
- To view error details, at the top of the window, click the Learn more link.
- To ignore the error and continue agent configuration, click Save.
- In the Management Agent window, click Restart to restart the management agent and apply connection settings.
- Wait for the agent to connect to Veeam Availability Console.
When the agent connects to Veeam Availability Console, the status in the Management Agent Settings window will be displayed as Connected. The agent icon in the icon tray will turn blue.
- [Optional] Specify an account that will be used for computer discovery and installation of Veeam backup agents.
If you do not specify an account at this stage, you will need to specify it when configuring discovery rules.
- In the Management Agent Settings window, click the Remote computer discovery user account link.
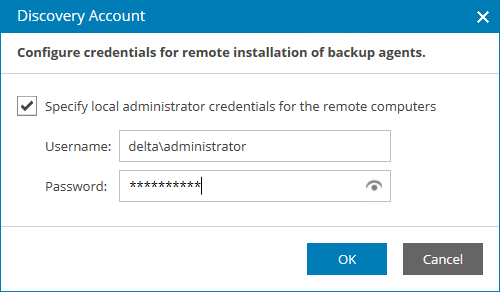
- In the Discovery Account window, select the Specify local administrator credentials for remote installation of backup agents check box.
- In the Username and Password fields, specify credentials of an account that will be used to discover client computers and install Veeam backup agents.
The account must have local Administrator permissions on all computers that you want to discover in the client infrastructure.
- Click OK.
- In the Management Agent Settings window, click Close.
What You Can Do Next
If a company has more than one location, you must set a location for the master agent.
By default, all new master agents you install belong to the default company location. If the master agent belongs to a non-default location, you must explicitly set this location for the agent.
For details on setting locations, see Setting Locations.