Creating Universal CDP Policies
To protect workloads with universal CDP, you must configure a CDP policy. The CDP policy defines which workloads to protect, where to store replicas, how often create short-term and long-term restore points, and so on. One CDP policy can process one or multiple workloads.
With universal CDP, you can protect Microsoft Windows and Linux workloads.
|
Note |
|
This section describes only basic steps that you must take to create a universal CDP policy targeted at the cloud host. To get a detailed description of all universal CDP policy settings, see the Creating Universal CDP Policies section in the Veeam Backup & Replication User Guide. |
To create a universal CDP policy:
- On the Home tab, click CDP Policy and select Universal CDP.
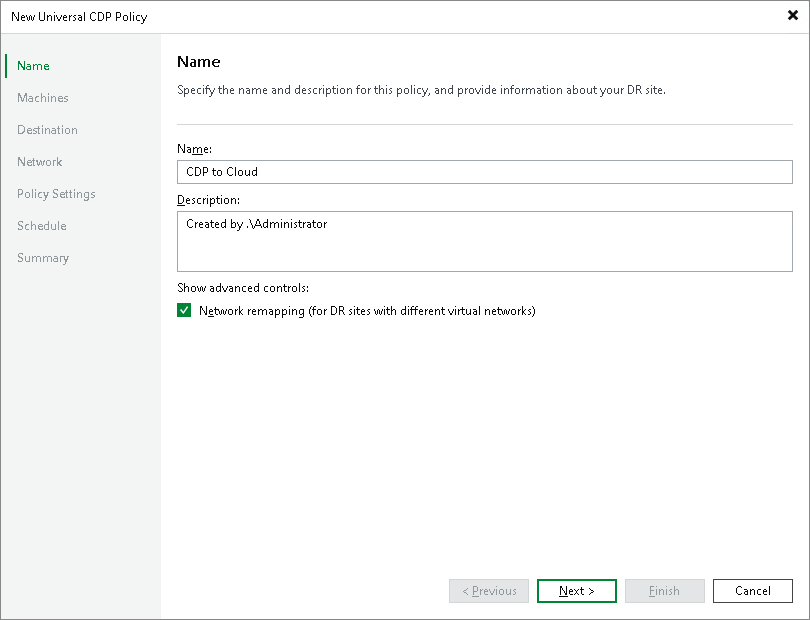
- At the Name step of the wizard, specify a name and description for the CDP policy.
To avoid problems with long paths, it is recommended to create policy names not longer than 50 characters.
- At the Machines step of the wizard, click Add and select workloads or protection groups that contain workloads you want to replicate. To quickly find the necessary object, use the search field at the bottom of the Select Objects window.
|
Important |
|
Consider the following:
|
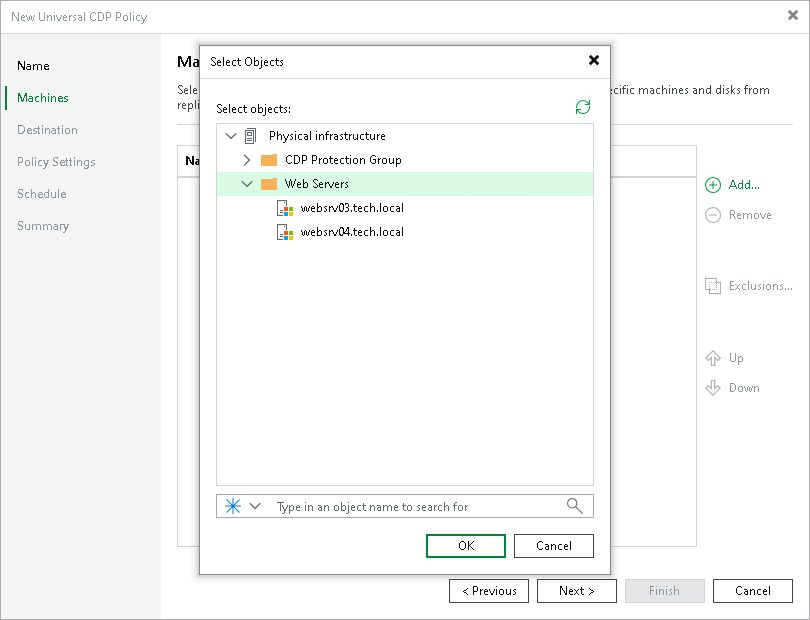
- If you want to exclude workloads from the CDP policy, click Exclusions and specify what objects you want to exclude.
- If you want to define the order in which the CDP policy must process workloads or protection groups, select a workload or protection group added to the policy and use the Up and Down buttons on the right to move the object up or down in the list.
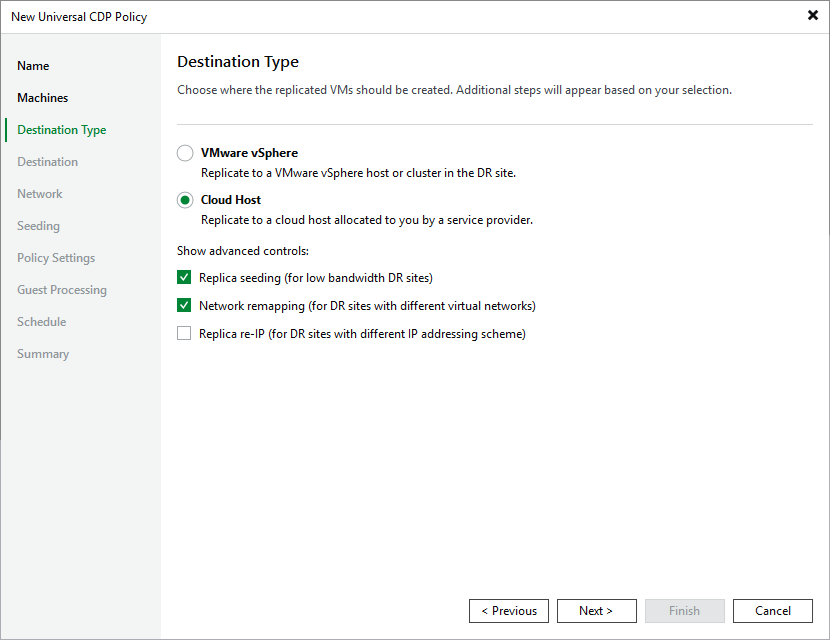
- At the Destination Type step of the wizard, select Cloud Host. If you want to use advanced settings for the CDP policy:
- Select the Replica seeding check box to enable the Seeding step in the wizard.
- Select the Network remapping check box to enable the Network step in the wizard. Veeam Backup & Replication does not currently support automatic connection of a Linux-based VM replica to the network on the cloud host. You must use the Network step of the wizard to manually select source and target networks for such replicas.
- Veeam Backup & Replication does not support re-IP rules for VM replicas on the cloud host. Do not select the Replica re-IP check box for the CDP policy targeted at the cloud host. If you select the Replica re-IP option, this option will be disabled when you select the cloud host at the Destination step of the wizard.
- At the Destination step of the wizard, in the Host or cluster section, click Choose and select Cloud host. Then select the cloud host allocated to you by the SP:
- If the SP allocated to you replication resources on a VMware vSphere host, select the cloud host provided to you through a hardware plan.
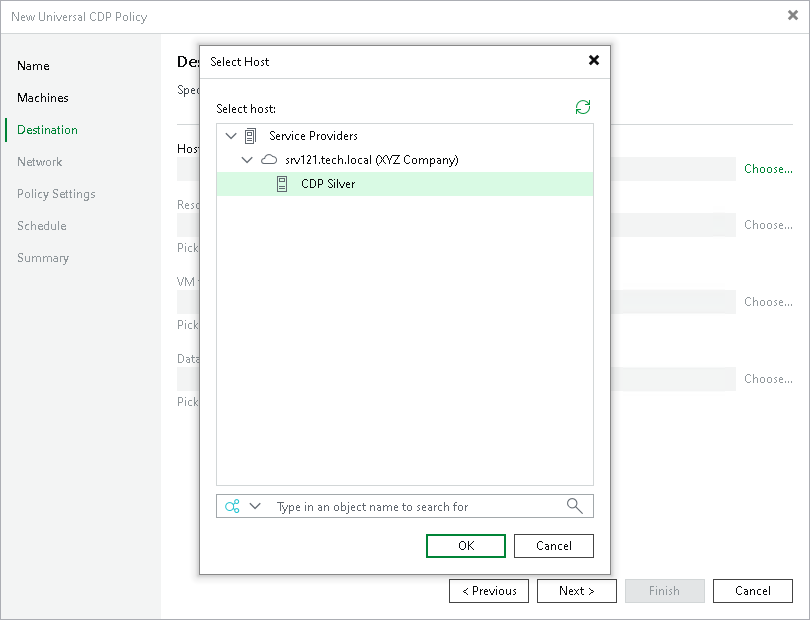
- If the SP allocated to you replication resources in VMware Cloud Director, select the cloud host provided to you through an organization VDC.
|
Note |
|
After you select an organization VDC, the name of the Host or cluster section will change to Organization VDC. |
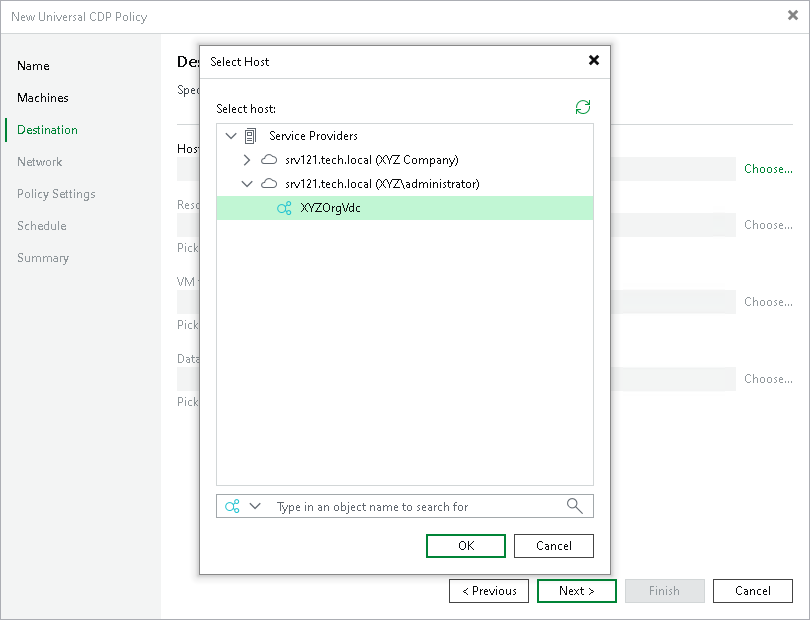
Note that after the CDP policy is performed for the first time, you will not be able to change the target host for the CDP policy.
- At the Destination step of the wizard, select storage resources allocated to you by the SP:
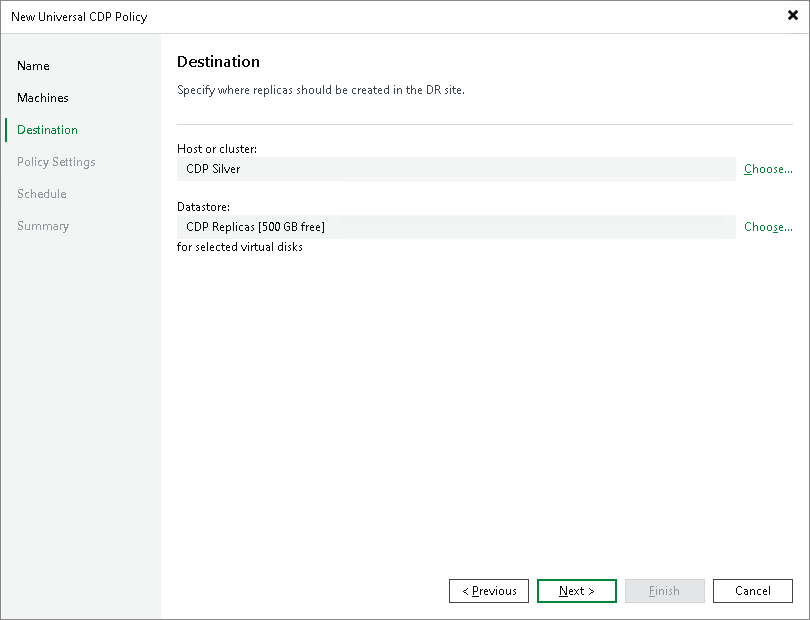
- [For a CDP policy targeted at VMware vSphere] If you want to specify a datastore on which to store VM replicas, in the Datastore section, click Choose and select the necessary datastore.
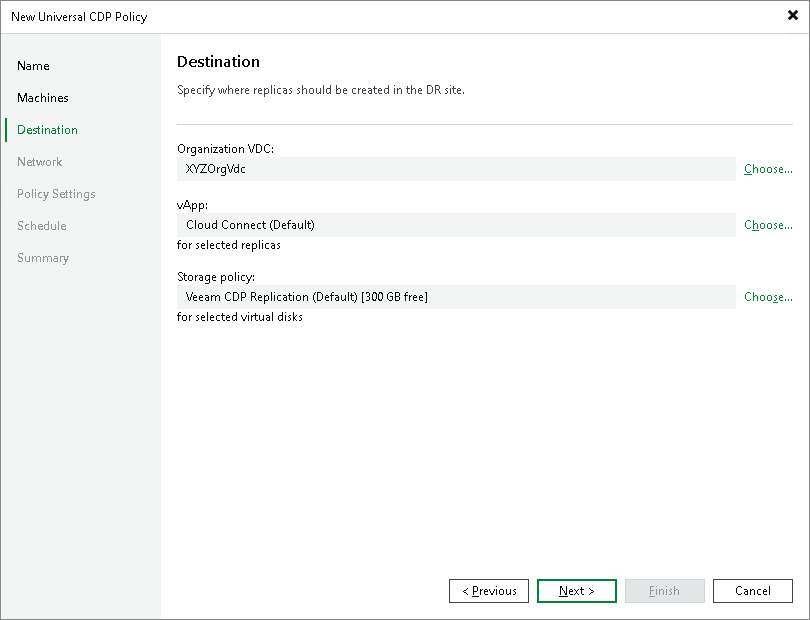
- [For a CDP policy targeted at VMware Cloud Director] If you want to specify a vApp or storage policy for VM replicas, do the following:
- In the vApp section, click Choose and select the necessary vApp.
Note that you must not use the same vApp as a target for both a CDP policy and a snapshot-based replication job.
- In the Storage policy section, click Choose and select the necessary storage policy.
- At the Network step of the wizard, click Network and select the network on the cloud host to which CDP replicas must be connected.
|
Note |
|
[For a CDP policy targeted at VMware Cloud Director] You cannot map a production network to an isolated vApp network in VMware Cloud Director. |
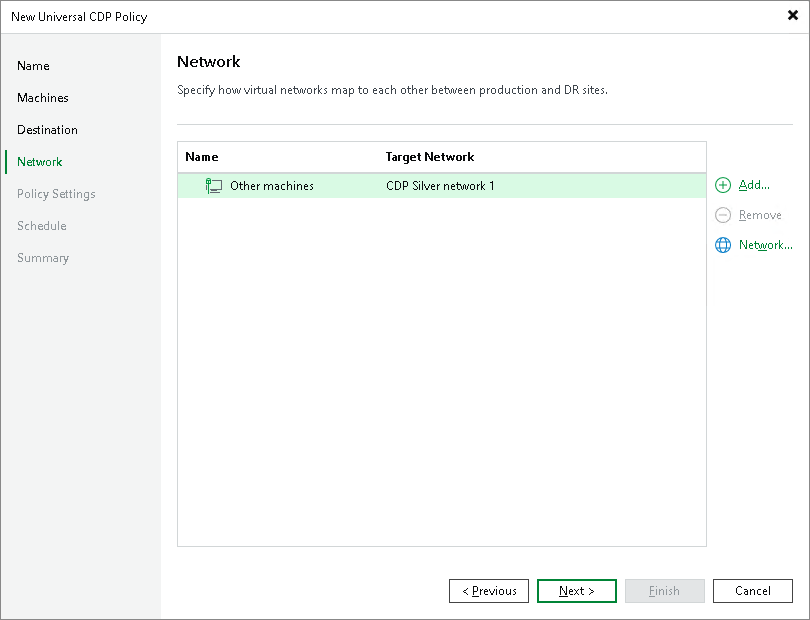
- At the Seeding step of the wizard, configure replica seeding and mapping.
If you want to use initial seeding, select the Get seed from the following backup repository check box and from the list of available backup repositories, select the repository where your replica seeds are stored.
If you want to use replica mapping, select the Map replica to existing Machines check box and select the copy of the necessary machines.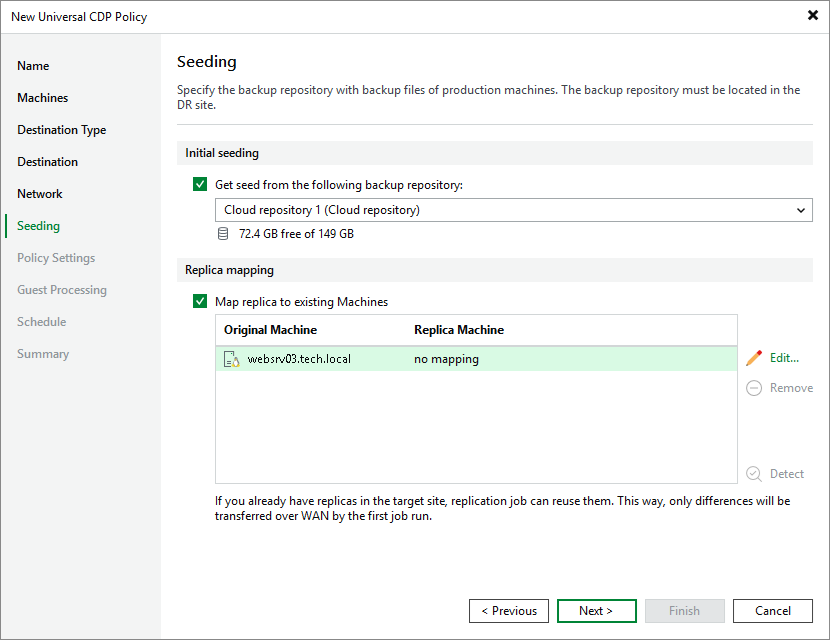
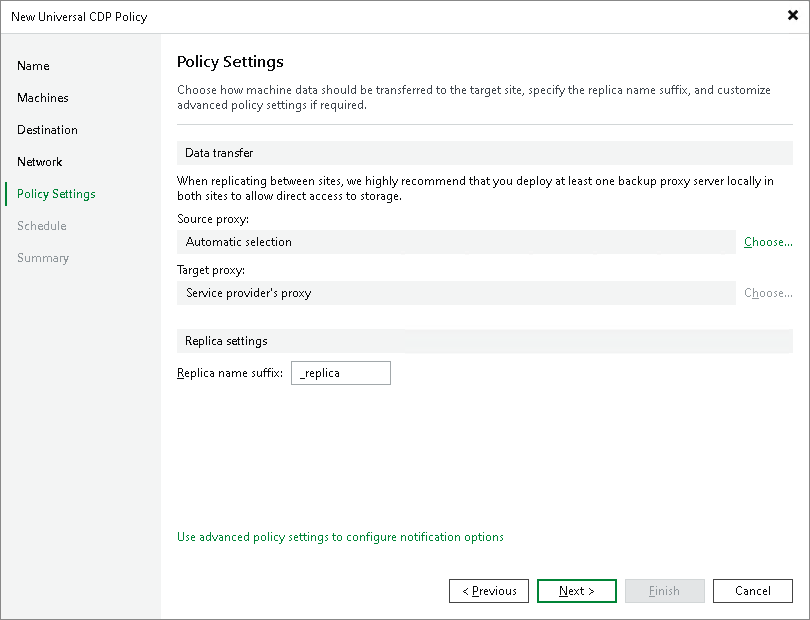
- At the Policy Settings step of the wizard, click Choose next to the Source proxy field to select a source CDP proxy for the CDP policy. You can choose automatic proxy selection or assign the source proxy explicitly.
You cannot specify a target proxy for the CDP policy targeted at the cloud host. During the CDP policy run, Veeam Backup & Replication will automatically select the target CDP proxy configured by the SP in the SP backup infrastructure.
- In the Replica name suffix field, enter a suffix for the name of CDP replicas. To register a CDP replica on the target host in the SP site, Veeam Backup & Replication appends the specified suffix to the name of the source workload.
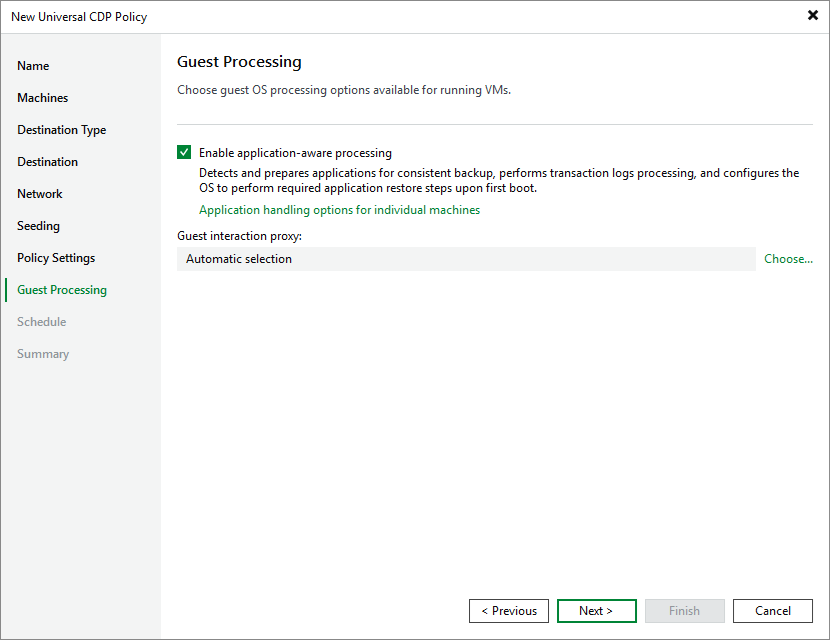
- At the Guest Processing step of the wizard, select the Enable application-aware processing check box to create transactionally consistent VM replicas. With application-aware processing enabled, Veeam Backup & Replication can detect network settings of replicated VMs in the most efficient way and use the detected settings for configuring network extension appliances. To learn more, see Network Mapping for Cloud Replicas.
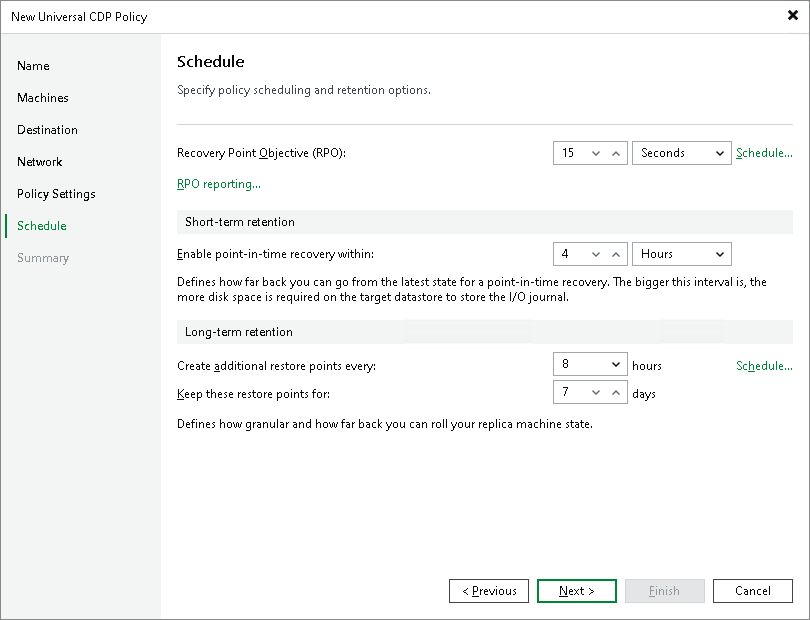
- At the Schedule step of the wizard, configure schedule and retention policy settings for the CDP policy:
- In the Recovery Point Objective field, specify the necessary RPO in seconds or minutes, that is, how often to create short-term restore points. The minimum RPO is 2 seconds, however it can be not optimal if your CDP policy contains many machines with high workload. The optimal RPO is not less than 15 seconds. The maximum RPO is 60 minutes.
During every specified period, Veeam Backup & Replication will prepare data for short-term restore points for CDP replicas and send this data to the target destination. Note that short-term restore points are crash-consistent.
- To instruct the CDP policy to display a warning or error if a newly created restore points are not transferred to the target within the set RPO, click RPO reporting. Then specify when the policy must display error and warning. If you configured email notification settings, Veeam Backup & Replication will mark the policy with the Warning or Error status and will also send email notifications.
- In the Short-term retention section, configure the short-term retention policy, that is, specify for how long to store short-term restore points.
- In the Long-term retention section, specify when to create long-term restore points and for how long to store them.
- To specify time periods when Veeam Backup & Replication must create crash-consistent long-term restore points, click Schedule, then select the necessary time area for crash-consistent long-term restore points.
For Universal CDP policies, application-consistent restore points are not supported, and those time periods cannot be specified. Crash-consistent is selected by default.
|
Note |
|
For Linux-based machines, universal CDP creates crash-consistent short-term and long-term restore points. Application-consistent restore points are not supported. |
- At the Summary step of the wizard, select the Enable the policy when I click Finish check box if you want to start the created CDP policy right after you complete working with the wizard.
- Click Finish.