
This scenario allows you to recover your database to specific point in time (which may differ from current restore point). Database will be recovered to the closest VM restore point before the moment you specify, and then log replay will be performed on the target server to bring the database to the necessary state. So, to implement this scenario, ensure the following:
- ARCHIVELOG mode is turned on for the Oracle database.
- Log handling in the Oracle Server VM backup job settings had been configured properly to keep log backups at hand, as described in the Required Oracle Backup Job Settings section.
- You have an Oracle Server image-level backup created successfully.
Restore to Original Server
To restore a database to the certain point in time to the original server, do the following:
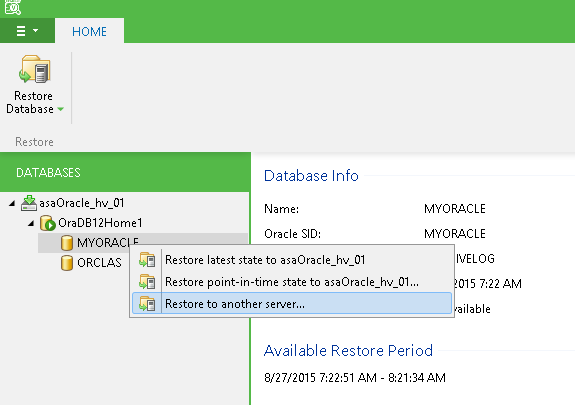
- In Veeam Explorer for Oracle main window, select the required database in the navigation tree on the left.
- Select Restore Database > Restore <point_in_time> or latest state to <server_name>... on the toolbar, or use the same database's shortcut menu command.
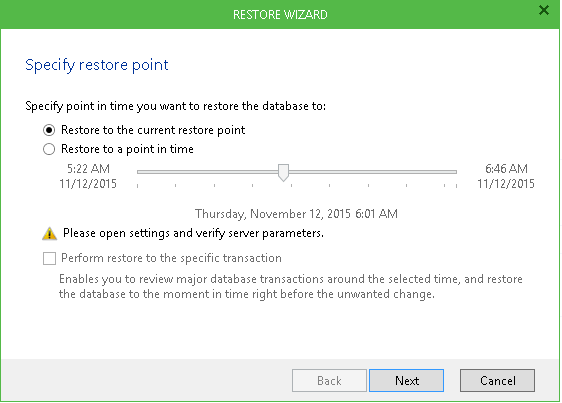
- On the Restore wizard step, select Restore to a point in time.
Use the slider to specify the point in time to which you want the database to be restored. Database will be recovered to the closest VM restore point before the moment you specify on the timeline, and then log replay will bring the database to the necessary state.
The timeline includes the following timestamps (relatively to current Oracle Server restore point):
- Beginning – refers to the previous restore point of Oracle Server VM which contains selected database backup
- End – refers to the next restore point which contains selected database backup
|
Consider the following:
|
- Click Restore. Veeam Explorer for Oracle will display a confirmation dialog. To start the restore process, click Proceed. Wait for the process to complete.
Restore to Another Server
To restore database to specified point in time to another Oracle Server, do the following:
- In Veeam Explorer for Oracle main window, select the required database in the navigation tree on the left.
- Select Restore Database>Restore to another server... on the toolbar, or use the same database's shortcut menu command.
- After the Restore wizard is launched, select Restore to a point in time option and use the slider to specify the necessary point, as described above. Leave the Perform restore to specific transaction check box cleared.
- You will be taken to the Specify Oracle Server step of the wizard. Go through the remaining steps and wait for restore operation to complete.
Related Topics
