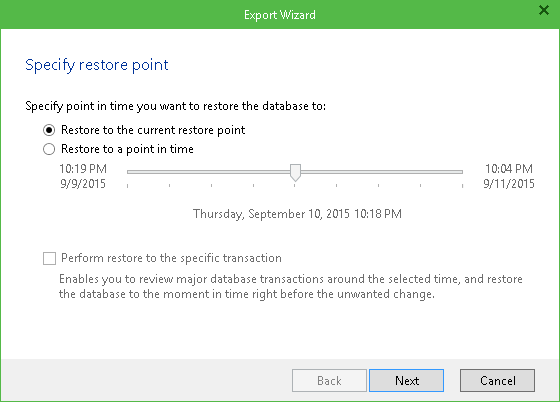
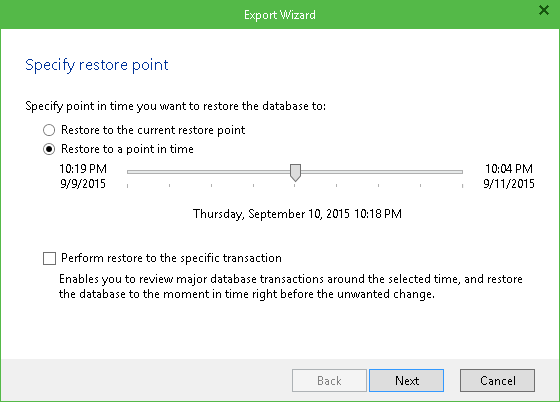
Step 1. Specify Restore Point
Select the state to which the database should be exported:
- The Restore to the current restore point scenario allows you to obtain database files as for the moment when the VM’s current restore point was created by backup or replication job.
With this option selected, you will then be taken to step 5 of the wizard (see below).

- The Restore to a point in time scenario allows you to obtain selected database files as for the selected moment (point) in the time interval around the current restore point, generally, from the previous to the next restore point (for details on the timescale, refer to the Restoring to Specific Point in Time section above). Use the slider control to choose the point you need. Remember that restore to specific point in time is available under the certain conditions listed in the Restoring to Specific Point in Time.
With this option selected, you will then be taken to step 3 of the wizard.

- You can select Perform restore to specific transaction checkbox to review major database transactions around the selected time. Then you can pick the necessary operation and obtain database files as for the moment right before the unwanted change.
With this option selected, you will then be taken to step 2.
|
For the last two options, Veeam Explorer for Microsoft SQL Server will need a staging SQL Server to replay the logs and to present the list of transactions, so make sure your staging server is configured properly. By default, local server will be used as a staging system. See Prerequisites for details. |
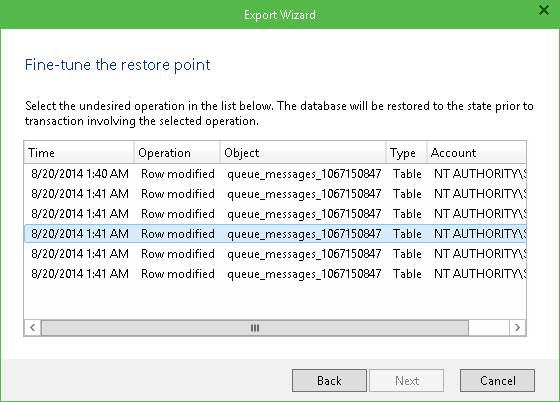
Step 2. Fine-tune the Restore Point
On this step, the list of database operations is displayed. Here you can select the undesired operation, and the database files will be obtained as for the state prior to transaction involving the specified operation.
|
Veeam Explorer for Microsoft SQL Server database operations as listed in the Appendix. |

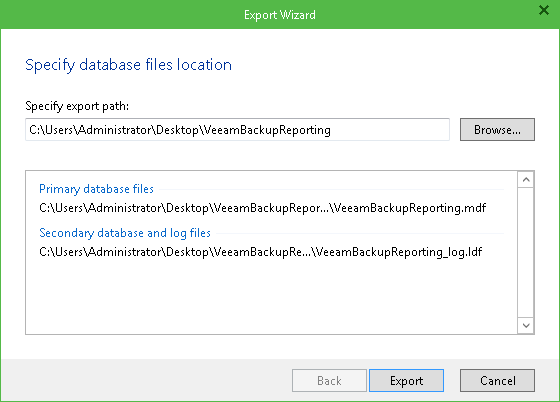
Step 3. Specify Database Files Location
Next, specify path to the destination folder. Note that the current account (used to run Veeam Explorer for Microsoft SQL Server) should have sufficient permissions for the selected folder (Read and Write as minimal recommended).

Finally, click Export and wait for the operation to complete.


