 This is an archive version of the document. To get the most up-to-date information, see the current version.
Upload Proxy Appliance Virtual Disk Image
In this article
To deploy the proxy appliance, do the following.
- Go to the Previous Versions Download page and download the Veeam Availability for Nutanix AHV 1.0 virtual disk image.
- Log in to the Nutanix Prism web console (Prism Element console).
|
If you use Nutanix Prism Central, image configuration instructions will be different. For details, see the Adding an Image section of the Prism Central Guide. |
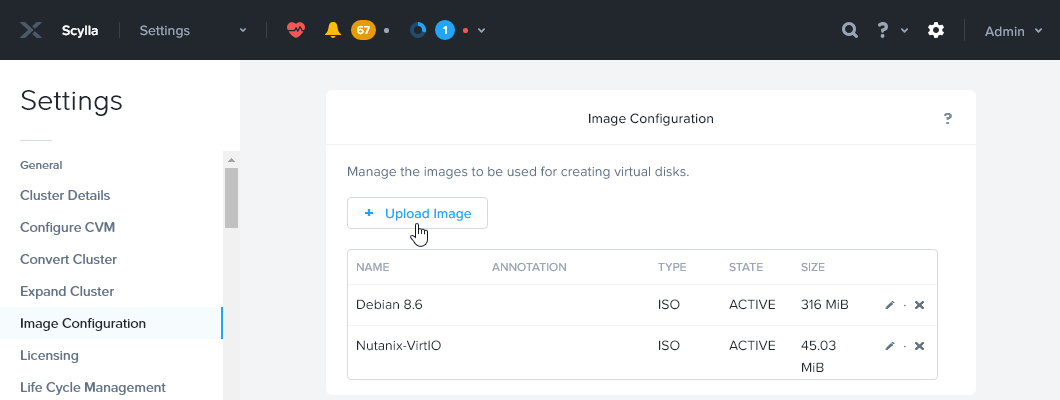
- In the main menu of Nutanix Prism web console, click the gear icon and select Image Configuration.
- Click Upload Image.
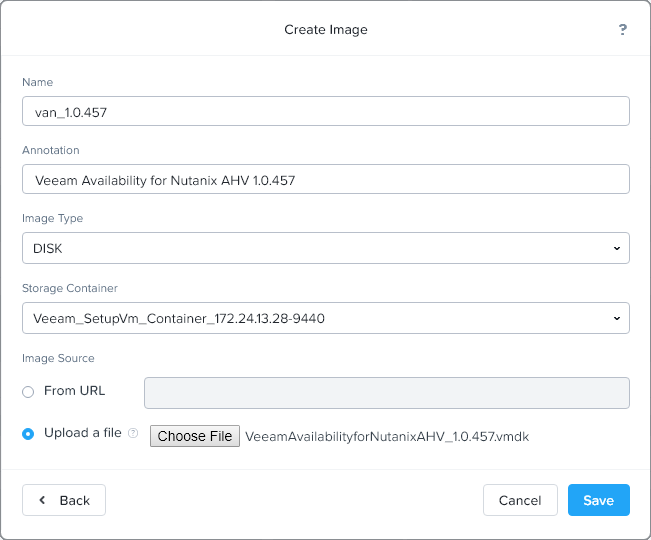
- In the Create Image window, specify the image parameters:
- In the Name field, enter a name for the image.
- In the Image Type list, select DISK.
- In the Storage Container list, select the storage container where you want to store the image.
- Select the Upload a file option and click Choose File.
- In the file browser, select the required image and click Open.
- In the Create Image window, click Save.
Reference
For details on how to upload images on Nutanix Prism web console, see the Configuring Images section of the Prism Web Console Guide.