This is an archive version of the document. To get the most up-to-date information, see the current version.
Step 3. Specify VM Configuration
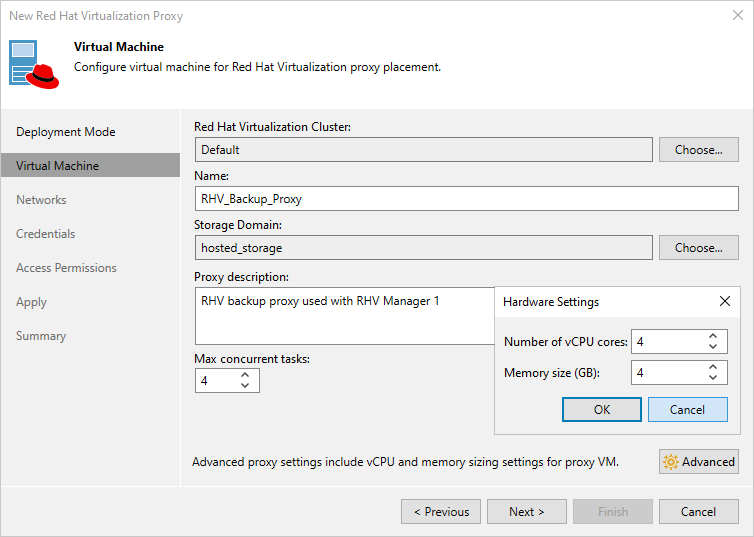
At the Virtual Machine step of the wizard, do the following:
- Click Choose next to the Red Hat Virtualization Cluster field, and specify an RHV cluster where the RHV backup proxy will be deployed in the Select Red Hat Virtualization Cluster window.
For a cluster to be displayed in the list of the available clusters, it must be added to the RHV environment as described in Red Hat Virtualization documentation.
- In the Name field, specify a name for the RHV backup proxy.
- Click Choose next to the Storage Domain field, and specify a storage domain where RHV backup proxy system files will be stored in the Select Storage Domain window.
For a domain to be displayed in the list of the available domains, it must be configured in the RHV environment as described in Red Hat Virtualization documentation.
- In the Proxy description field, provide a description for future reference. The field already contains a default description with information about the user who added the proxy, date and time when the proxy was added.
- In the Max concurrent tasks field, specify the number of tasks that the RHV backup proxy will be able to handle in parallel. If this value is exceeded, the backup proxy will not start a new task until one of the currently running tasks finishes.
The default number of concurrent tasks is set to 4. When you change this value, the wizard automatically adjusts the amount of resources that will be allocated to the VM running as the RHV backup proxy. If you want to specify the amount of resources manually, click Advanced. Note that you must take into account the RHV backup proxy system requirements.
Tip |
After you deploy the RHV backup proxy, you will be not able to change the number of vCPU cores and the amount of RAM allocated to the RHV backup proxy using the Veeam Backup & Replication console. However, you can change the VM hardware configuration in the RHV Administration Portal. For more information, see Red Hat Virtualization documentation. |