This is an archive version of the document. To get the most up-to-date information, see the current version.
Step 4. Specify Network Settings
At the Networks step of the wizard, do the following:
- Click Browse to select a network adapter to which the RHV backup proxy will be connected.
For a network to be displayed in the list of the available networks, it must be configured in the RHV environment as described in Red Hat Virtualization documentation.
- In the Hostname field, specify a hostname (with domain name excluded) that will be assigned to the RHV backup proxy.
The maximum length of the hostname is 64 characters. The hyphen-minus character (-) is supported, but you cannot use it as the first or the last character of the name.
- If DHCP is enabled for the selected network adapter, the IP address and DNS settings of the RHV backup proxy can be obtained automatically.
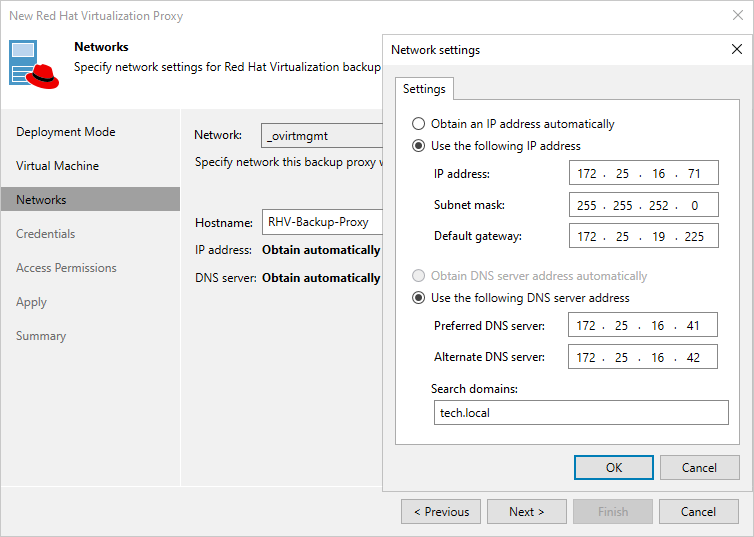
If DHCP is disabled for the selected network adapter, or you want to specify an IP address and configure DNS settings manually, click Configure and do the following in the Network settings window:
- To specify an IP address, select the Use the following IP address option and enter the RHV backup proxy IP address, subnet mask and default gateway.
- To configure DNS settings, select the Use the following DNS server address option and enter the IP addresses of the preferred and alternate DNS servers.
If you select this option, you must also specify search domains that the RHV backup proxy will use to resolve the hostnames of the backup server, the RHV manager and RHV hosts. Use commas to separate multiple search domains.
Tip |
After you deploy the RHV backup proxy, you will be able to change the configured network settings in the web console as described in section Configuring General Settings. |