 This is an archive version of the document. To get the most up-to-date information, see the current version.
Step 2. Add Widgets to Dashboard
After you create a new dashboard, you must add widgets to it.
Veeam ONE Reporter comes with a set of widgets packs for Veeam Backup & Replication, VMware vSphere and Microsoft Hyper-V. Widget packs include ready-to-use widgets that portray various aspects of the managed environment. You can add widgets from widget packs to custom dashboards.
To add a widget to a dashboard:
- Open Veeam ONE Reporter.
- Open the Dashboards section.
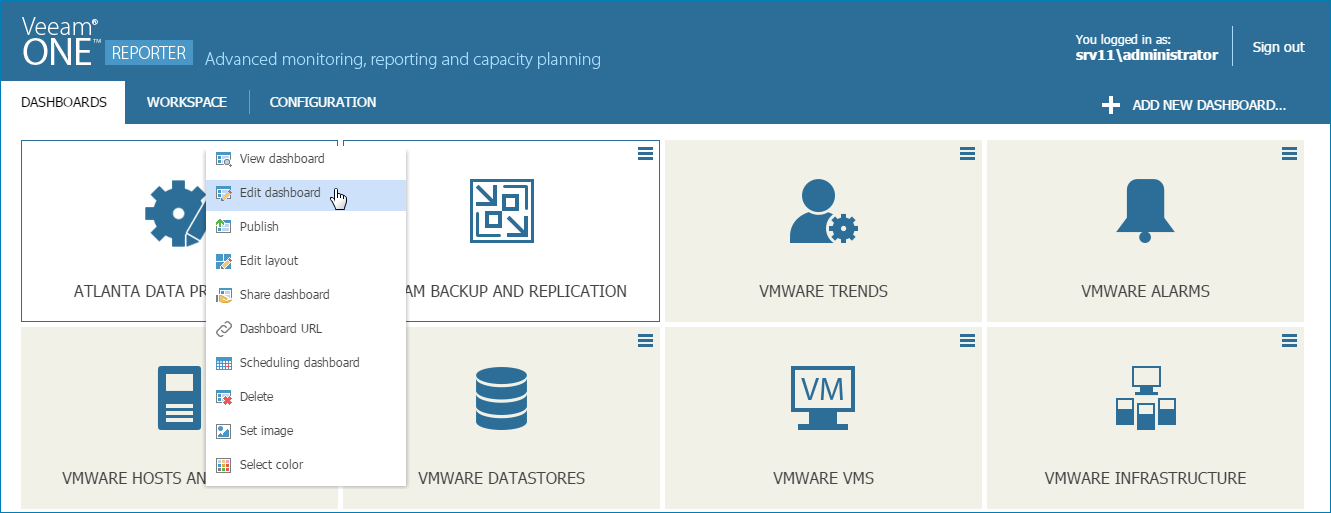
- At the top right corner of the dashboard preview image, expand the menu and click Edit dashboard.
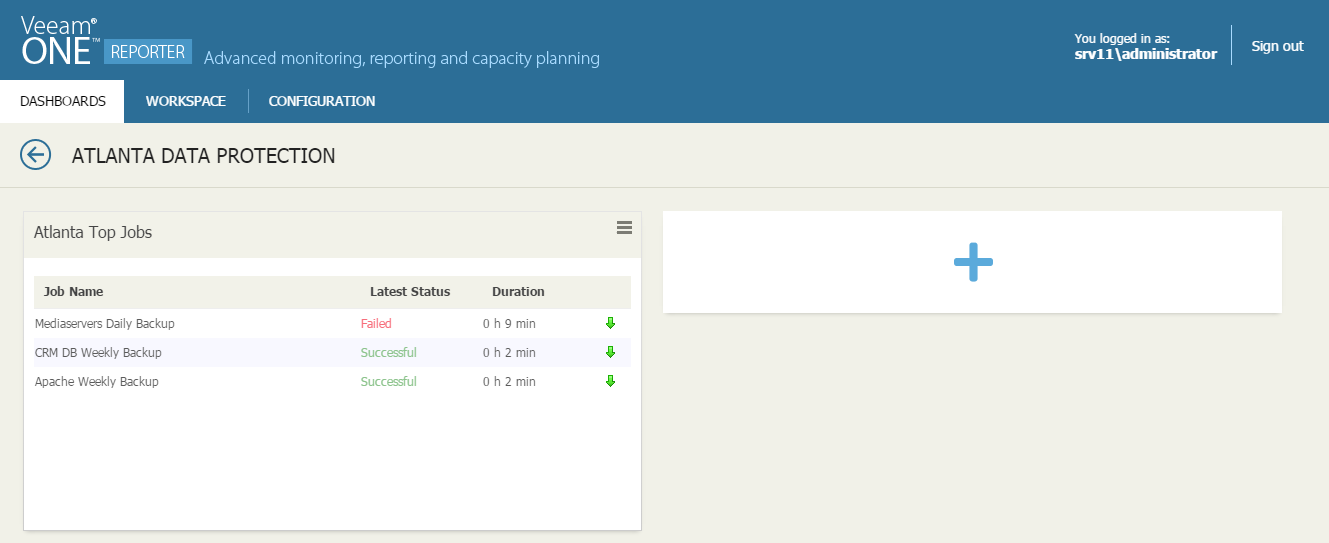
- Click the plus icon in one of the dashboard cells to launch the Add widget wizard.
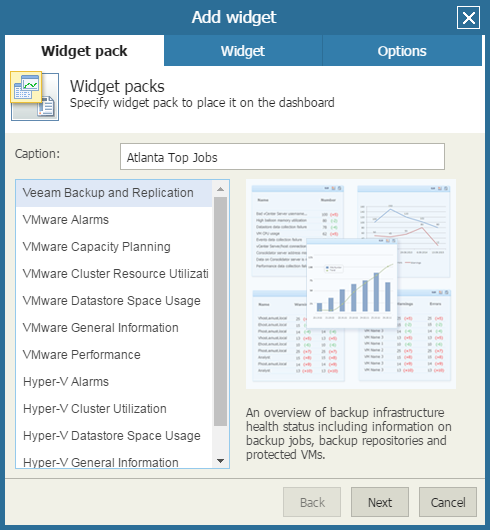
- At the Widget pack step of the wizard, specify the widget name and choose the widget pack:
- In the Caption field, specify the widget name.
The widget name will be displayed at the top of the widget on the dashboard. You can leave the field empty if you do not want to display the widget caption.
- Choose the necessary widget pack. Double-click the necessary pack or select a pack and click Next.
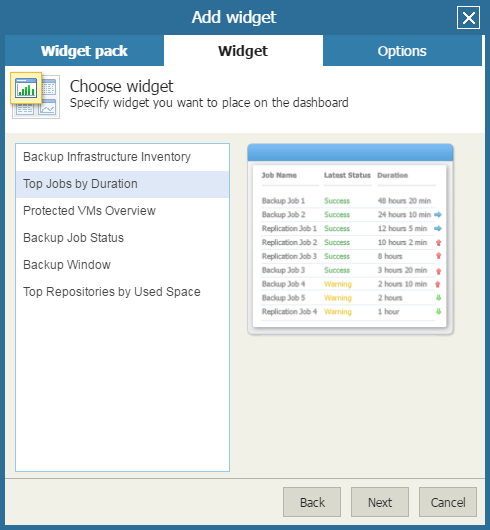
- At the Widget step of the wizard, choose a widget to add on the dashboard. Double-click the necessary widget or select the widget in the list and click Next.
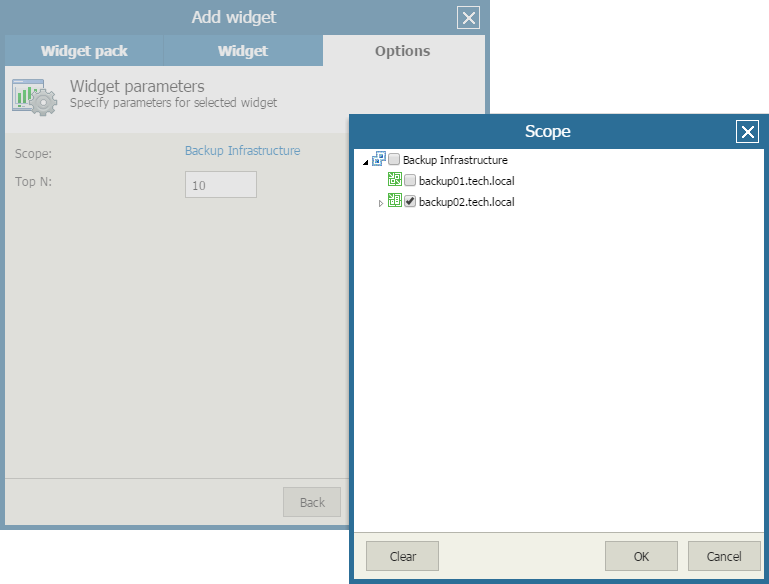
- At the Options step of the wizard, define widget options, such as the scope, time interval, number of objects to display in the widget and so on.
Availability of widget options depends on the type of the selected widget.
- Click Finish to add the widget to the dashboard.
- Repeat steps 3–8 for each new widget you want to add to the dashboard.
