Aligning Images with Text
As a general rule, every image must be aligned with the text it follows so that readers do not have to "hop" from the text to the image.
Important |
If there is only one image in a topic, place the image at the end of the topic and do not leave important details and notes after the image — users tend to skip such information, especially when they read documents online and have to scroll further to notice it. |
Paragraphs
In regular paragraphs, align images to the left.
Lists
If you add images to illustrate items in a list (typically, steps in a procedure), align these images according to the following rules:
- If there is only one image that illustrates the entire procedure, place the image at the end of the procedure and align it with the lead-in paragraph.
- If you need to provide an image for each step in the procedure, place each image at the end of each step it follows. For List L1 steps, align images with List L1 Paragraph; for List L2 steps, align images with List L2 Paragraph; for List L3 steps, align images with List L3 Paragraph.
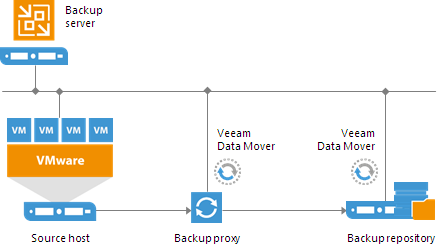
![]() Example 1 (Paragraph)
Example 1 (Paragraph)
To back up to a Microsoft Windows or Linux backup repository in a local site, you must deploy a backup proxy on a machine that has access to the source datastore and point the backup job to this backup proxy. In this scenario, the source-side Veeam Data Mover is started on the backup proxy, and the target-side Veeam Data Mover is started on the Microsoft Windows or Linux repository. The VM data is sent from the backup proxy to the backup repository over the LAN.
|
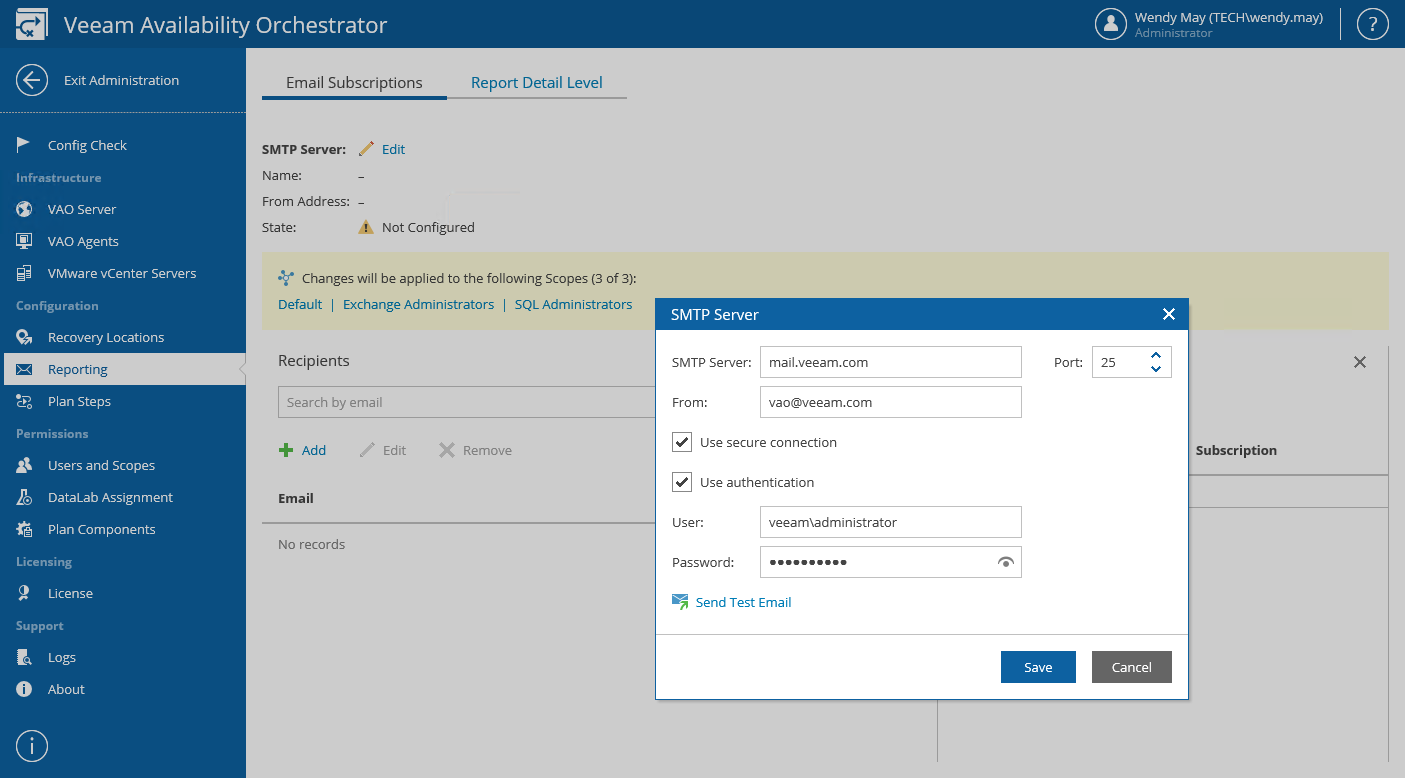
![]() Example 2 (Procedure)
Example 2 (Procedure)
To connect an SMTP server that will be used for sending email notifications, take the following steps:
|
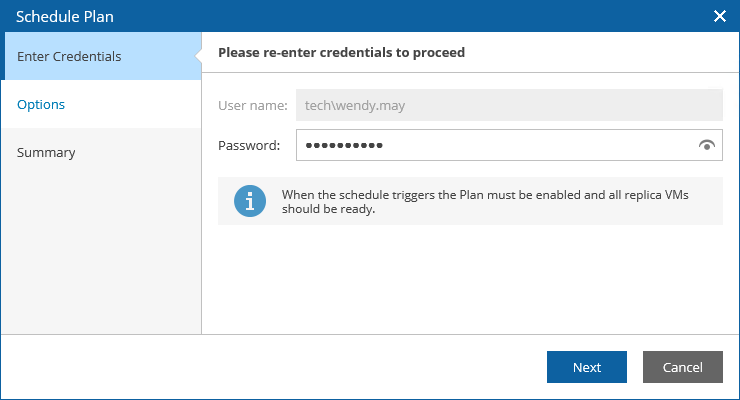
![]() Example 3 (Steps)
Example 3 (Steps)
To schedule a failover plan:
If you want to run the plan at a specific time, select the Schedule on option and choose the date and time. If you want to run the plan after another plan, select the Schedule after option and choose the preceding plan.
|