This document is not maintained any longer.
Registering Clients
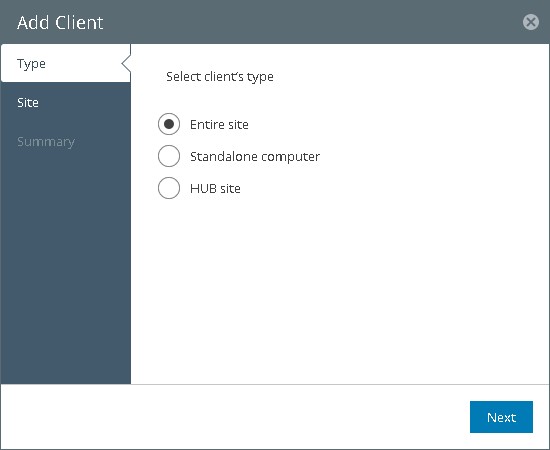
You can register 3 types of clients in the network hub portal:
- Standalone computers
- Hub site (only for on-premises deployment)
To register an entire site:
- Log in to the network hub portal as a Portal Administrator.
- In the configuration menu on the left, click Clients.
- At the top of the clients list, click Add.
- At the Type step of the wizard, select Entire site.
- At the Site step of the wizard, enter details for the on-premises site:
- In the Name field, enter a name for the site. The site name will be displayed in the list of clients.
- In the Network address field, enter the address of the remote network using the CIDR notation.
Important |
The site name must not contain space characters. |

- At the Summary step of the wizard, review details of the site and click Finish to close the wizard.
After you click Finish, Veeam PN will generate an XML file with VPN settings for the on-premises site. The XML file will be automatically downloaded to the default downloads folder. Do not delete the downloaded file: you will need it to configure a site gateway in the on-premises network.

Registering Standalone Computers
To register a standalone computer:
- Log in to the network hub portal as a Portal Administrator.
- In the configuration menu on the left, click Clients.
- At the top of the clients list, click Add.
- At the Type step of the wizard, select Standalone computer.
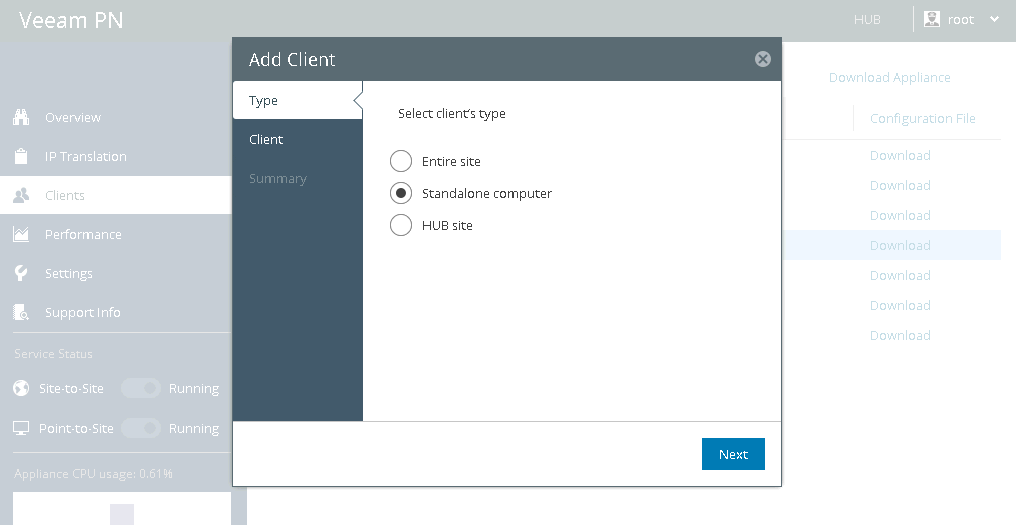
- At the Client step of the wizard, enter a name for the standalone computer. The computer name will be displayed in the list of clients.
Important |
The client name must not contain space characters. |
- Select the Use HUB server as a default gateway check box. With this option enabled, Veeam PN will use the network hub as a default gateway and route all Internet traffic for the client over the network hub.

- At the Summary step of the wizard, review details of the client and click Finish to close the wizard.
After you click Finish, Veeam PN will generate an OVPN file with VPN settings for the registered client. The OVPN file will be automatically downloaded to the default downloads folder. Do not delete the downloaded file: you will need it to configure VPN connection settings on the standalone computer.

If you set up the network hub in a local site and want to make machines in this site accessible over the VPN, you must register this local site as a client in the network hub portal.
For example, you want to unite 3 sites over the VPN: Site A, Site B and Site C. In Site A, you deploy the network hub. If you do not add Site A as a client to the network hub portal, machines from Site B and Site C will not be able to communicate with machines in Site A; they will only be able to communicate with each other, routing traffic over the network hub deployed in Site A. If you add Site A as a client, machines from Site A, Site B and Site C will be able to communicate with each other, routing traffic over the network hub in Site A.
Important |
After you register a hub site as a client, you do not need to perform additional configuration actions: download a configuration file and set it up (as for entire site and standalone computer clients). Bear in mind that the hub site client always remains in the Disconnected state, which is an expected behaviour. |
To register a hub site client:
- Log in to the network hub portal as a Portal Administrator.
- In the configuration menu on the left, click Clients.
- At the top of the clients list, click Add.
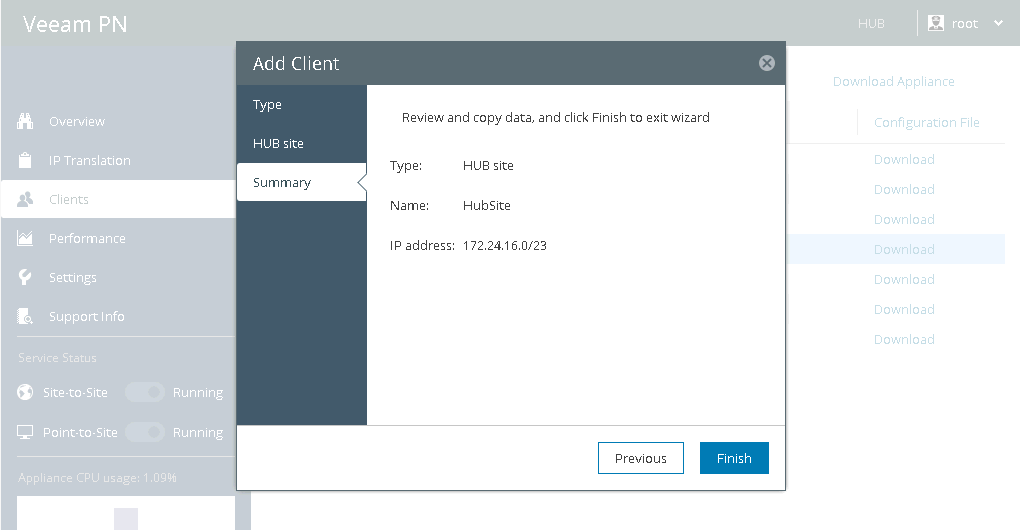
- At the Type step of the wizard, select HUB site.
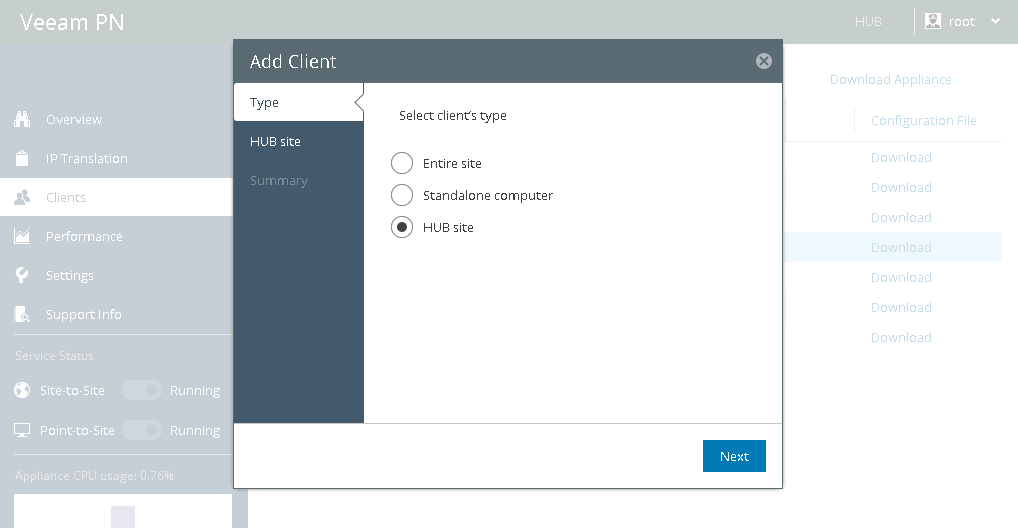
- At the Site step of the wizard, enter details for the site where the network hub is deployed:
- In the Name field, enter a name for the site. The site name will be displayed in the list of clients.
- In the Network address field, enter the address of the network where the network hub is deployed using the CIDR notation.
Important |
The site name must not contain space characters. |
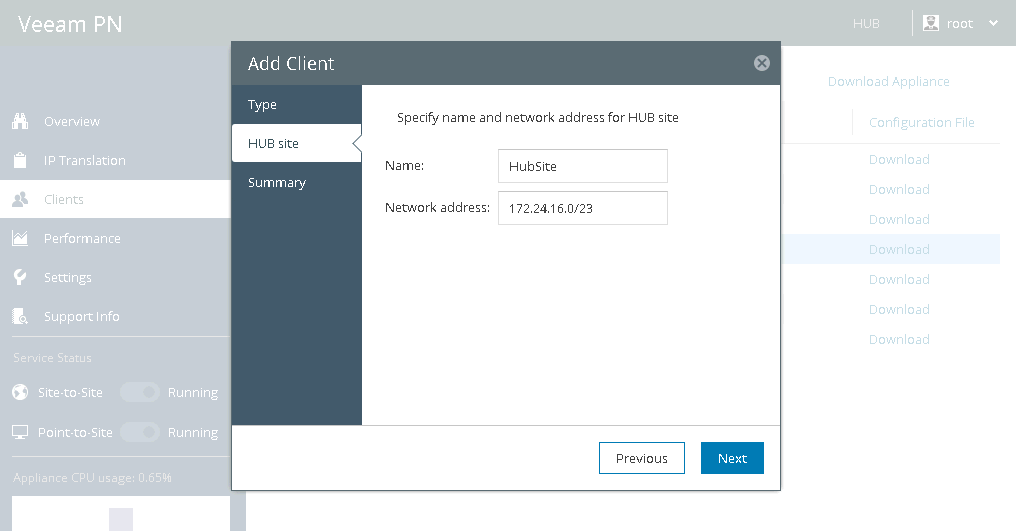
- At the Summary step of the wizard, review details of the site and click Finish to close the wizard.