This is an archive version of the document. To get the most up-to-date information, see the current version.
Using Restore List
If you want to select items located in different folders in the hierarchy of folders with backed-up data displayed in the navigation pane, you can add them to the restore list. For example, you can add to the restore list one by one items of different types: mailbox items, OneDrive and SharePoint files, and proceed to their restore.
To add items to the restore list, do the following:
- Open the Explore tab.
- In the navigation pane, browse through the hierarchy of folders with backed-up data.
- Select a folder that contains data you want to restore.
- In the preview pane, select check boxes next to the necessary items.
For documents and files, you can select which version of an item you want to restore. To do this, in the Version column, click the most recent version number, and in the displayed window, select the earlier version to restore.
Note |
Consider the following:
|
- Click Add to Restore List.
- Repeat steps 2–5 to add more items to the restore list.
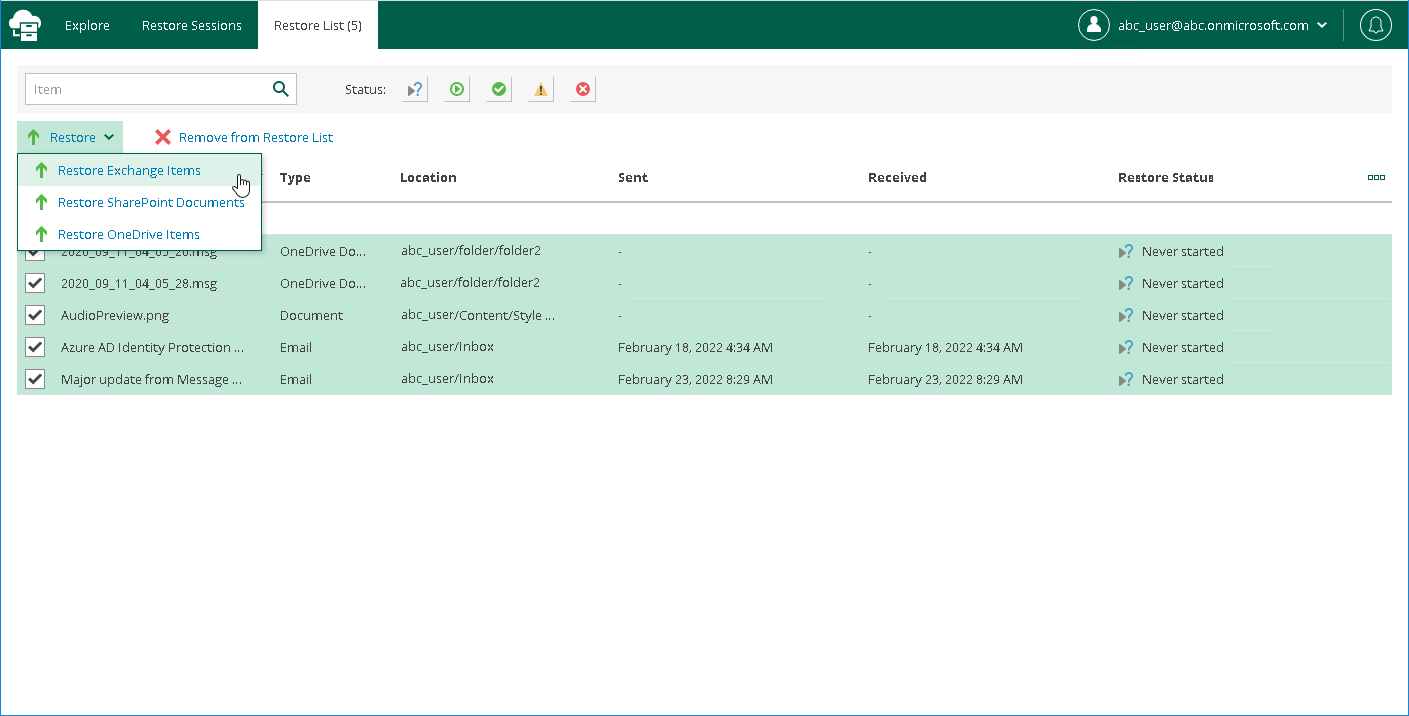
- On the Restore List tab, review the list of items that you added to the restore list.
- To restore items, select check boxes next to the necessary items and click Restore and then select one of the following options:
- Restore Exchange Items. This option runs the Exchange Restore wizard.
- Restore OneDrive Items. This option runs the OneDrive Restore wizard.
- Restore SharePoint Items. This option runs the SharePoint Restore wizard.
- Restore SharePoint Documents. This option runs the SharePoint Restore wizard.
Tip |
To remove items from the restore list, select check boxes next to the necessary items and click Remove from Restore List. |
- Follow the steps of the wizard that you ran and configure restore operation options. Mind that you must run wizards manually one after another.