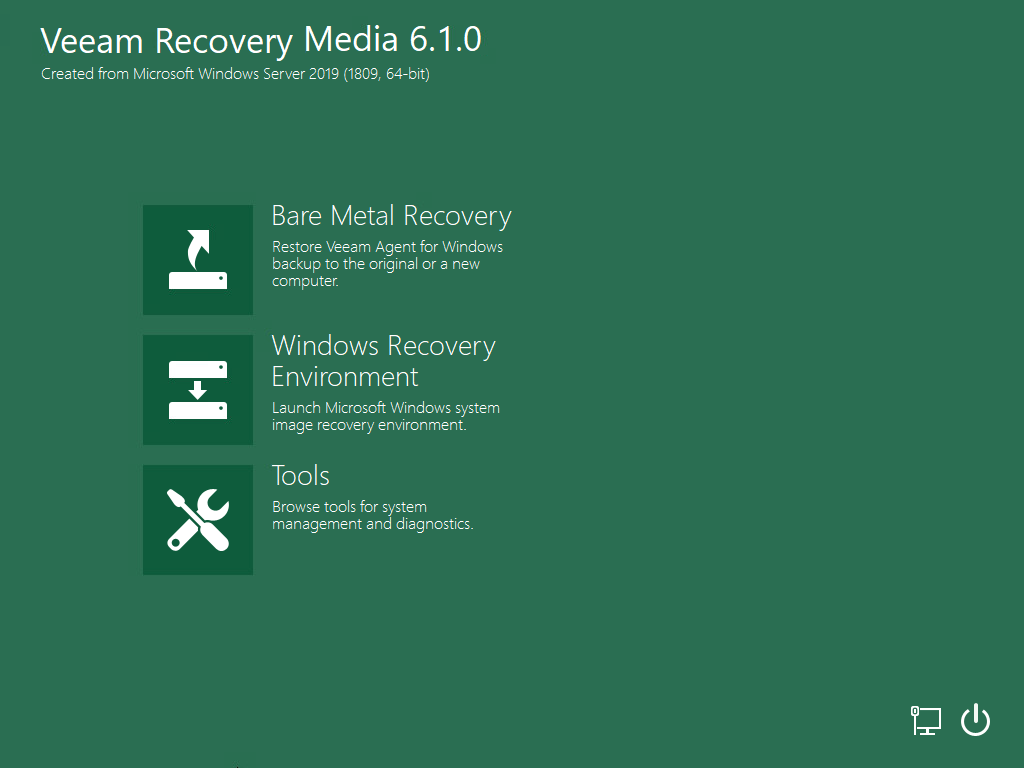
To boot from the Veeam Recovery Media:
- [For CD/DVD/BD] Power on your computer. Insert the media with the recovery image to the drive and power off the computer.
[For removable storage device] Attach the removable storage device with the recovery image to your computer.
- Start your computer.
- You will be offered to boot the OS from the CD/DVD/BD or attached removable storage. Press any key on the keyboard to continue.
- Wait for Veeam Agent for Microsoft Windows to load files from the Veeam Recovery Media. Loading the OS from the Veeam Recovery Media usually takes more time than loading the OS from the local computer drive.
- After the OS has loaded, make sure network settings are specified correctly and configure network if necessary. To learn more, see Select Network Adapter or Wireless Network.
- Choose the necessary recovery tool to use. Veeam Agent for Microsoft Windows offers the following tools:
- Bare Metal Recovery — the Veeam Recovery Media wizard to recover data on the original computer or perform bare-metal recovery.
- Windows Recovery Environment — built-in Microsoft Windows tools to recover the computer system image.
- Tools — Veeam Agent for Microsoft Windows and Microsoft Windows utilities for advanced computer administration.
|
To shut down or restart your computer, click the Power Options button at the bottom right corner of the Veeam Recovery Media screen and select the necessary option: Shut down or Restart. |
Send feedback | Updated on 9/24/2018


