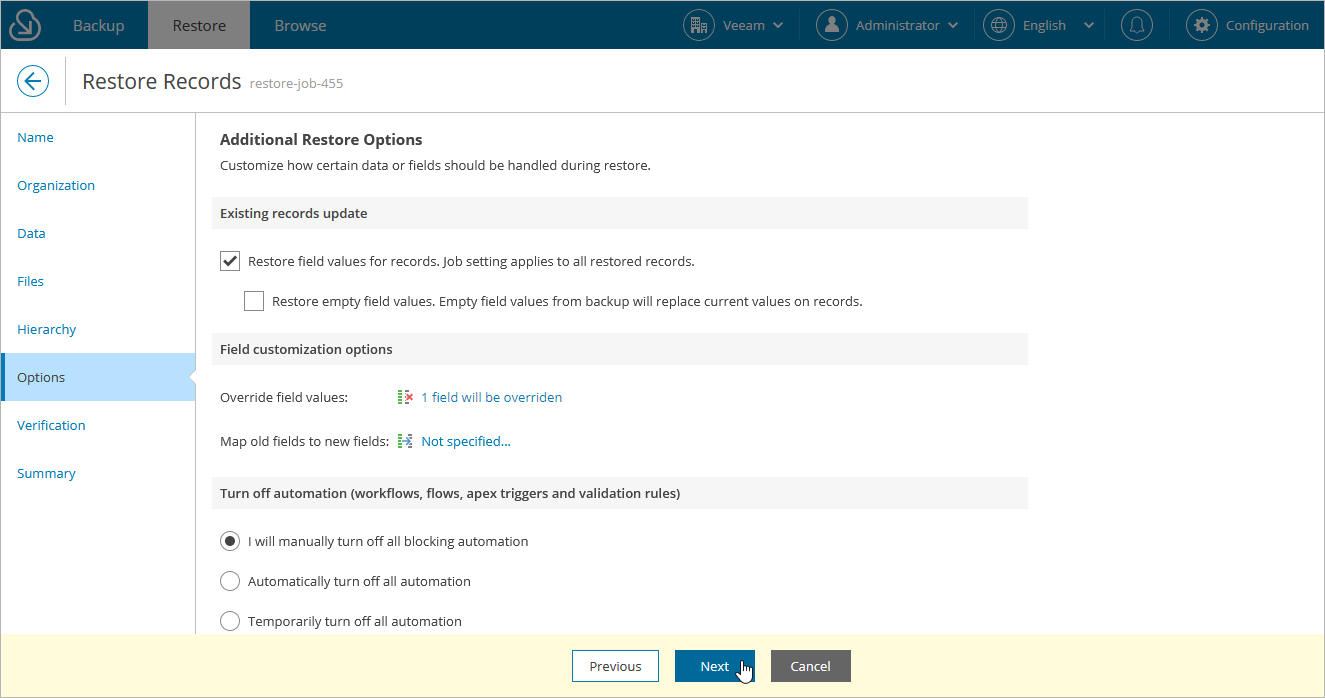
Step 7. Configure Additional Restore Settings
At the Options step of the wizard, you can instruct Veeam Backup for Salesforce to automatically replace current field values in Salesforce with null, overwrite field values manually, map fields of backed-up records to specific fields in Salesforce, and choose the way you want to deactivate blocking automation in Salesforce.
Automatic Field Overriding Settings
In the Data consistency section, you can choose whether you want Veeam Backup for Salesforce to update all existing records and overwrite field values, or to restore only those records that have been deleted from Salesforce without updating the existing records. If you select the Restore deleted records. Overwrite existing records option, you can also decide whether you want to replace non-empty field values of the existing object records in Salesforce with empty (null) values of the backed-up records.
Manual Field Overriding Settings
In the Field values section, you can choose whether you want to override specific field values in the restored records (for example, in case of sandbox seeding when you need to mask sensitive data). To do that, click the link in the Override field values field, choose a field whose value you want to override and provide a new value.
For a record field to be displayed in the list of available fields, this record must be added to the restore job as described at step 4. Keep in mind that if you restore an object record that contains encrypted fields to the same organization, these fields will be grayed out.
TipS |
|
In the Field values section, you can choose whether you want Veeam Backup for Salesforce to populate fields of a restored record with values of a specific backed-up record. To do that, click the link in the Map old fields to new fields field, choose an object whose field values you want to overwrite, and map the necessary backed-up record fields to fields in the target Salesforce organization. For an object or a field to be displayed in the list of available items, it must have a backup.
To export the list that contains all mapped fields as a single .CSV file, click Export to CSV. Veeam Backup for Salesforce will save the file with the exported data to the default download folder on the local machine.
Important |
|
Blocking Automation Settings
Business logic and automated rules configured in Salesforce can block Veeam Backup for Salesforce restore operations or trigger undesirable side processes. You can choose either to manually deactivate Flows, Validation Rules, Workflow Rules, Lookup Filters, Process Builders and Apex Triggers in Salesforce or to instruct the product to bypass all blocking automation while performing a restore operation. To do that, select one of the options in the Turn off automation section:
- Select the I will manually turn off all blocking automation option, if you are a Salesforce Administrator and want to deactivate Flows, Validation Rules, Workflow Rules, Lookup Filters, Process Builders and Apex Triggers in Salesforce manually.
- Select the Automatically turn off all automation option to automatically update Flows, Validation Rules, Workflow Rules, Lookup Filters, Process Builders and Apex Triggers so that they are bypassed while the product performs the restore operation without impacting the Salesforce functionality. When you choose this option for a restore job for the first time, updating blocking automation will take significant time to complete. However, as the updates will be kept in Salesforce, all further restore operations will run faster.
- Select the Temporarily turn off all automation option to automatically update Flows, Validation Rules, Workflow Rules, Lookup Filters, Process Builders and Apex Triggers so that they are bypassed while the product performs the current restore operation only without impacting the Salesforce functionality. All changes made by the product will be reverted after the restore operation is over. Note that updating blocking automation and reverting the changes may take significant time to complete.
