Before You Begin: Initial Configuration
Before you start walking through the example scenarios, you must perform initial configuration of Veeam Service Provider Console. As part of this configuration, you must provide basic settings that will be used for all scenarios. These include notification settings, company profile details and a custom branding scheme.
- Navigate to the Veeam Service Provider Console website.
The URL consists of a FQDN or IP address of the machine where Veeam Service Provider Console is installed, and the website port specified during installation. Note that the website is available over HTTPS.
The website URL must look like this one:
https://vspc.mycompany.com:1280
- Specify credentials of a Portal Administrator and click Login.
If you log in for the first time, use credentials of the local Administrator account on the machine where Veeam Service Provider Console is installed.
- At the top right corner of the Veeam Service Provider Console window, click Configuration.
- In the configuration menu on the left, click Notifications.
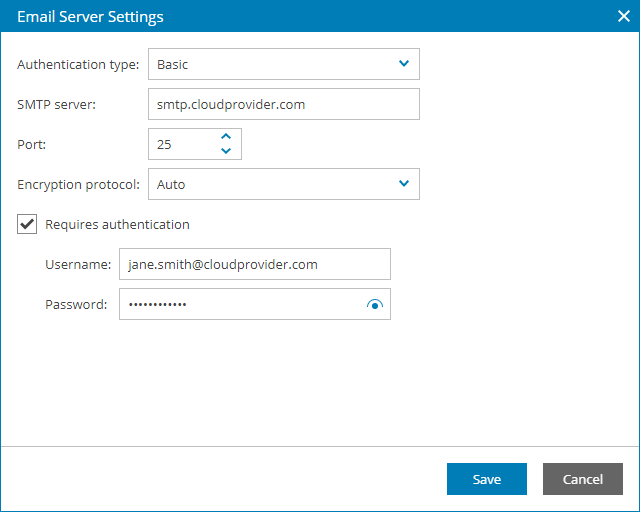
Specify email notification settings that Veeam Service Provider Console will use to send all types of email messages, including welcome email message, billing notifications, alarm notifications.
- Click the SMTP Server status link to access the Email Server Settings window. In the window, specify SMTP server settings.
- In the Alarms section, specify settings that will be used for notifications about triggered alarms.
- In the Discovery Rules section, specify settings that will be used for discovery emails.
- In the Billing section, specify settings that will be used to send out notifications with invoices.

- In the configuration menu on the left, click Company Info.
In the Company Info form, provide information about your company, that is, the company that provides managed backup services. This information makes up your company profile, and will be displayed in invoices and email notifications. Before you move to the next step, make sure to click Save to save changes made to the profile information

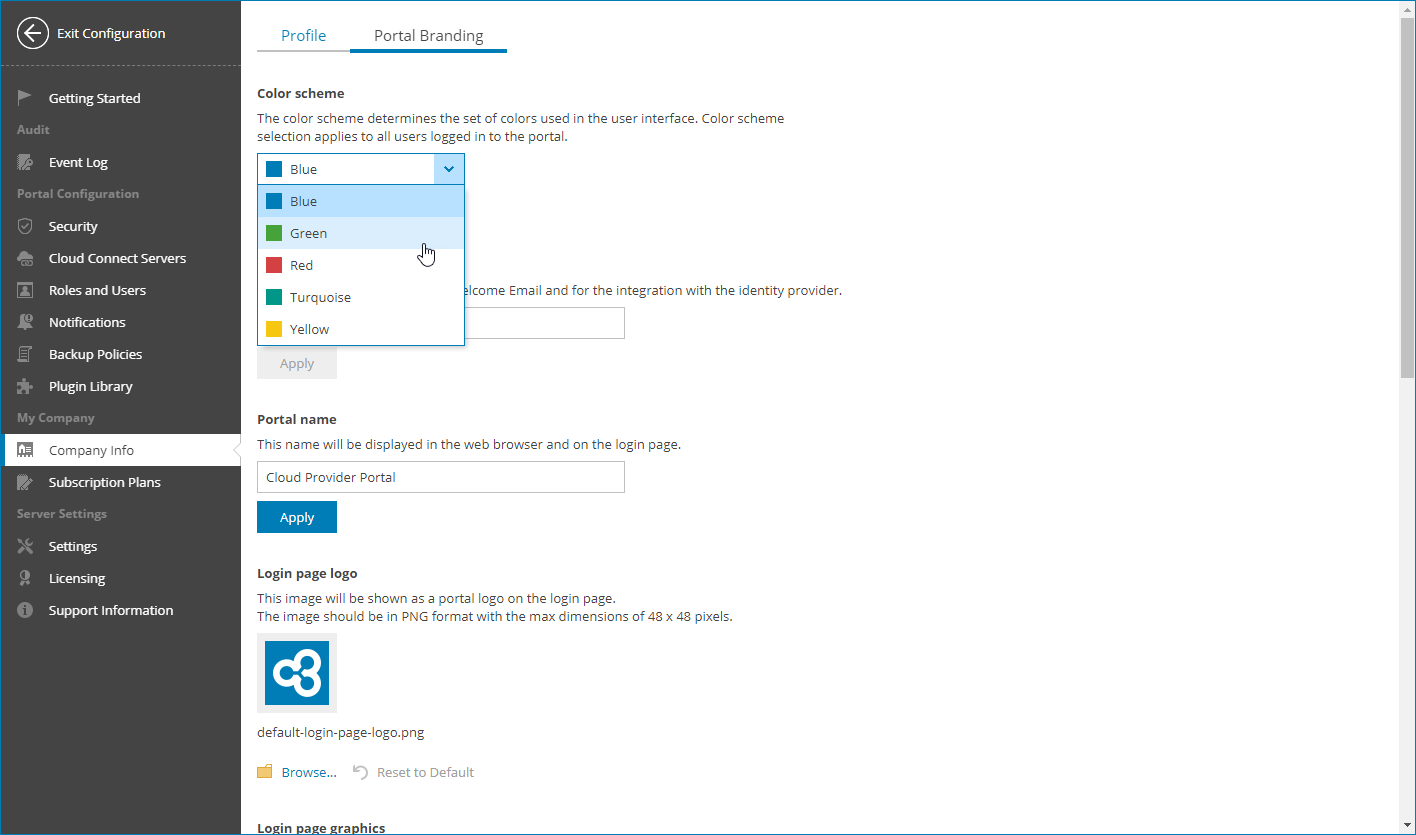
- At the top, open the Portal Branding tab.
Customize appearance of the Veeam Service Provider Console portal, invoices and e-mail notifications in accordance with your company branding.
- In the Color scheme list, select a set of colors that must be used in the Veeam Service Provider Console user interface.
- In the Portal web address field, check and customize the URL of the Veeam Service Provider Console website if necessary.
This website address will be displayed in email notifications and used for configuring integration with identity providers.
- In the Portal name section, specify a portal name that must be displayed in the web browser and on the login page.
- In the Login page logo section, click Browse and specify a path to the image that must be displayed as a portal logo on the login page.
- In the Login page graphics section, click Browse and specify a path to the image that must be displayed in the lower right corner of the login page.
- In the Portal logo section, click Browse and specify a path to the image that must be displayed at the top left corner of the Veeam Service Provider Console window.
- In the Report logo section, click Browse and specify a path to the image that must be displayed in invoices and email notifications.
- In the Web site icon section, click Browse and specify a path to the image that must be displayed as a website icon (favicon) for Veeam Service Provider Console.
More Information
For more information and detailed instructions, use the following resources:
- Configuring notification settings: section Configuring Notification Settings of the Guide for Service Providers.
- Creating a company profile: section Filling Company Profile of the Guide for Service Providers.
- Changing the default portal branding: section Customizing Portal Branding of the Guide for Service Providers.