Configuring Advanced Settings
In the Advanced settings window, you can schedule full backups, configure backup job maintenance settings, enable Nutanix Guest Tools quiescence, specify backup file storage settings and customize email notifications.
Backup Settings
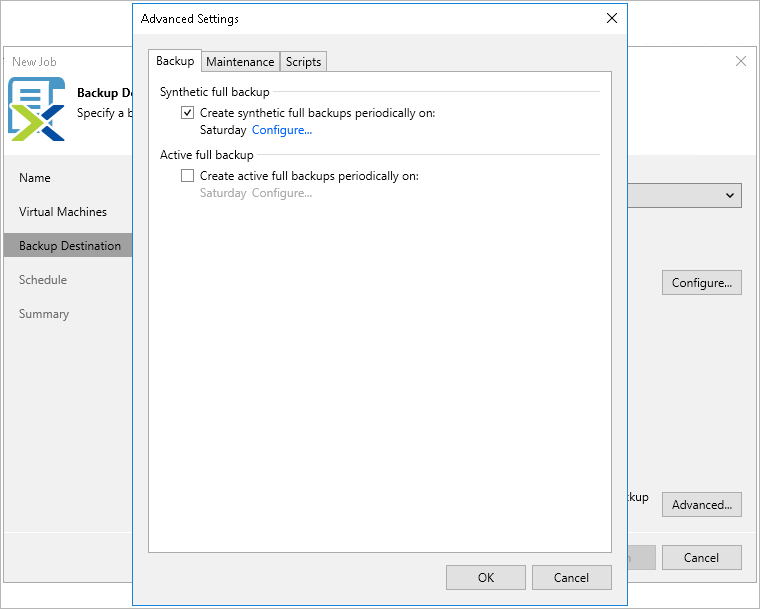
To instruct Veeam Backup & Replication to create full backups according to a specific schedule, switch to the Backup tab and do the following:
- To schedule synthetic full backups, select the Create synthetic full backups periodically check box, click Configure and choose whether you want to create these backups on specific days on a weekly or monthly basis.
- To schedule active full backups, select the Create active full backups periodically check box, click Configure and choose whether you want to create these backups on specific days on a weekly or monthly basis.
Alternatively, you can create active full backups manually when needed. For more information, see Creating Active Full Backup.
Important |
|
Maintenance Settings
To specify how Veeam Backup & Replication will maintain backups created by the backup job, switch to the Maintenance tab and do the following:
- To instruct Veeam Backup & Replication to periodically perform a health check for the backups, select the Perform backup files health check (detects and auto-heals corruption) check box, click Configure and specify a schedule for the health check to run.
- To configure retention settings for backups of VMs that are no longer processed by the backup job, select the Remove deleted items data after check box, and specify the number of days during which Veeam Backup & Replication will keep these backups.
Important |
|
Storage Settings
To specify storage settings for backup files created by the backup job, switch to the Storage tab and do the following:
- To decrease the size of the files, select a compression level from the Compression level drop-down list (None, Dedupe-friendly, Optimal, High or Extreme). For more information on data compression, see the Veeam Backup & Replication User Guide, section Compression and Deduplication.
- To optimize job performance and storage usage, select a block size from the Storage optimization drop-down list. Veeam Backup & Replication will use this size to "split" VM images into separate data blocks when processing VMs — the more data blocks there are, the more time is required to process the VM images. For more information on how data block sizes affect performance, see the Veeam Backup & Replication User Guide, section Storage Optimization.
Guest Quiescence Settings
To instruct Nutanix AHV to freeze applications running on VMs while snapshots are taken, switch to the Nutanix AHV tab, select the Enable Nutanix Guest Tools quiescence check box and choose whether you want to truncate transaction logs. Keep in mind that if you select the Never truncate transaction logs (VSS_BT_COPY) option, it may significantly increase the amount of storage space consumed by VMs running as Microsoft Exchange Mail Servers.
Note |
Veeam Backup & Replication prioritizes guest processing settings over guest quiescence settings. If you enable application-aware processing for a backup job, Veeam Backup & Replication will ignore the configured guest quiescence settings. |
Notification Settings
To instruct Veeam Backup & Replication to send email notifications on the backup job results, switch to the Notifications tab, select the Send email notifications check box and specify an email address of a recipient; use a semicolon to separate multiple recipient addresses. For Veeam Backup & Replication to be able to send email notifications, you must configure a mail server as described in section Configuring Email Notification Settings.
Note |
Email notifications on the backup job results will be also sent to recipients configured in the global notification settings. |
