This guide is for customers who continue to use the original platform for Veeam Data Cloud for Microsoft 365 until migration to the new unified experience platform is complete. If you use Veeam Data Cloud for Microsoft 365 in the unified experience platform, click here to go to the correct user guide.
Scheduling Reports
You can schedule reports in Veeam Data Cloud for Microsoft 365. When you schedule a report, you specify the frequency and email recipients. Once a scheduled report runs, the recipients receive an email from Veeam Data Cloud for Microsoft 365 with a link to download the report. The report is valid for 7 days.
To schedule a report, do the following:
- Log in to Veeam Data Cloud for Microsoft 365 with an administrator account or an account with the permission to view reports.
- In the main menu, click Reports.
- In the Schedule Reports section, click Add Report.
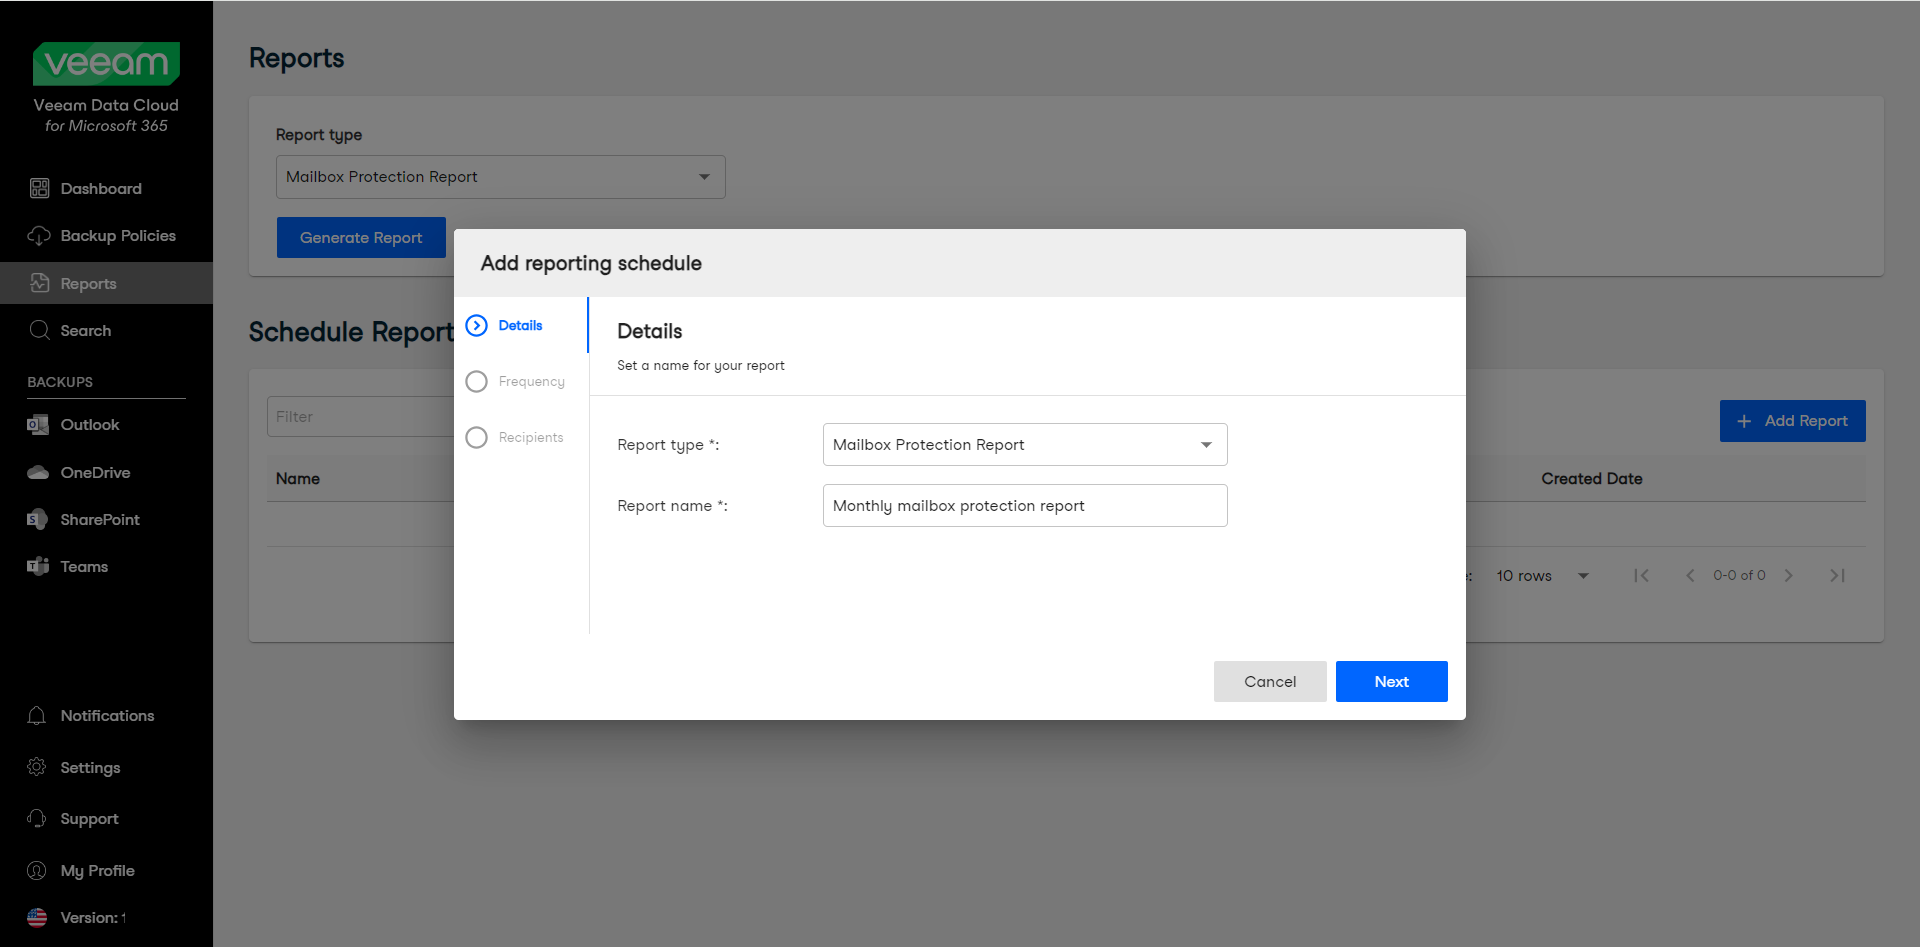
- In the Add reporting schedule window, do the following:
- In the Details tab, in the Report type drop-down list, select the report you want to schedule.
- In the Report name field, type a name for the new scheduled report.
- [For the Backup Summary Report and the Restore Activity Report] In the Period field, select the period from the drop-down list.
- Click Next.
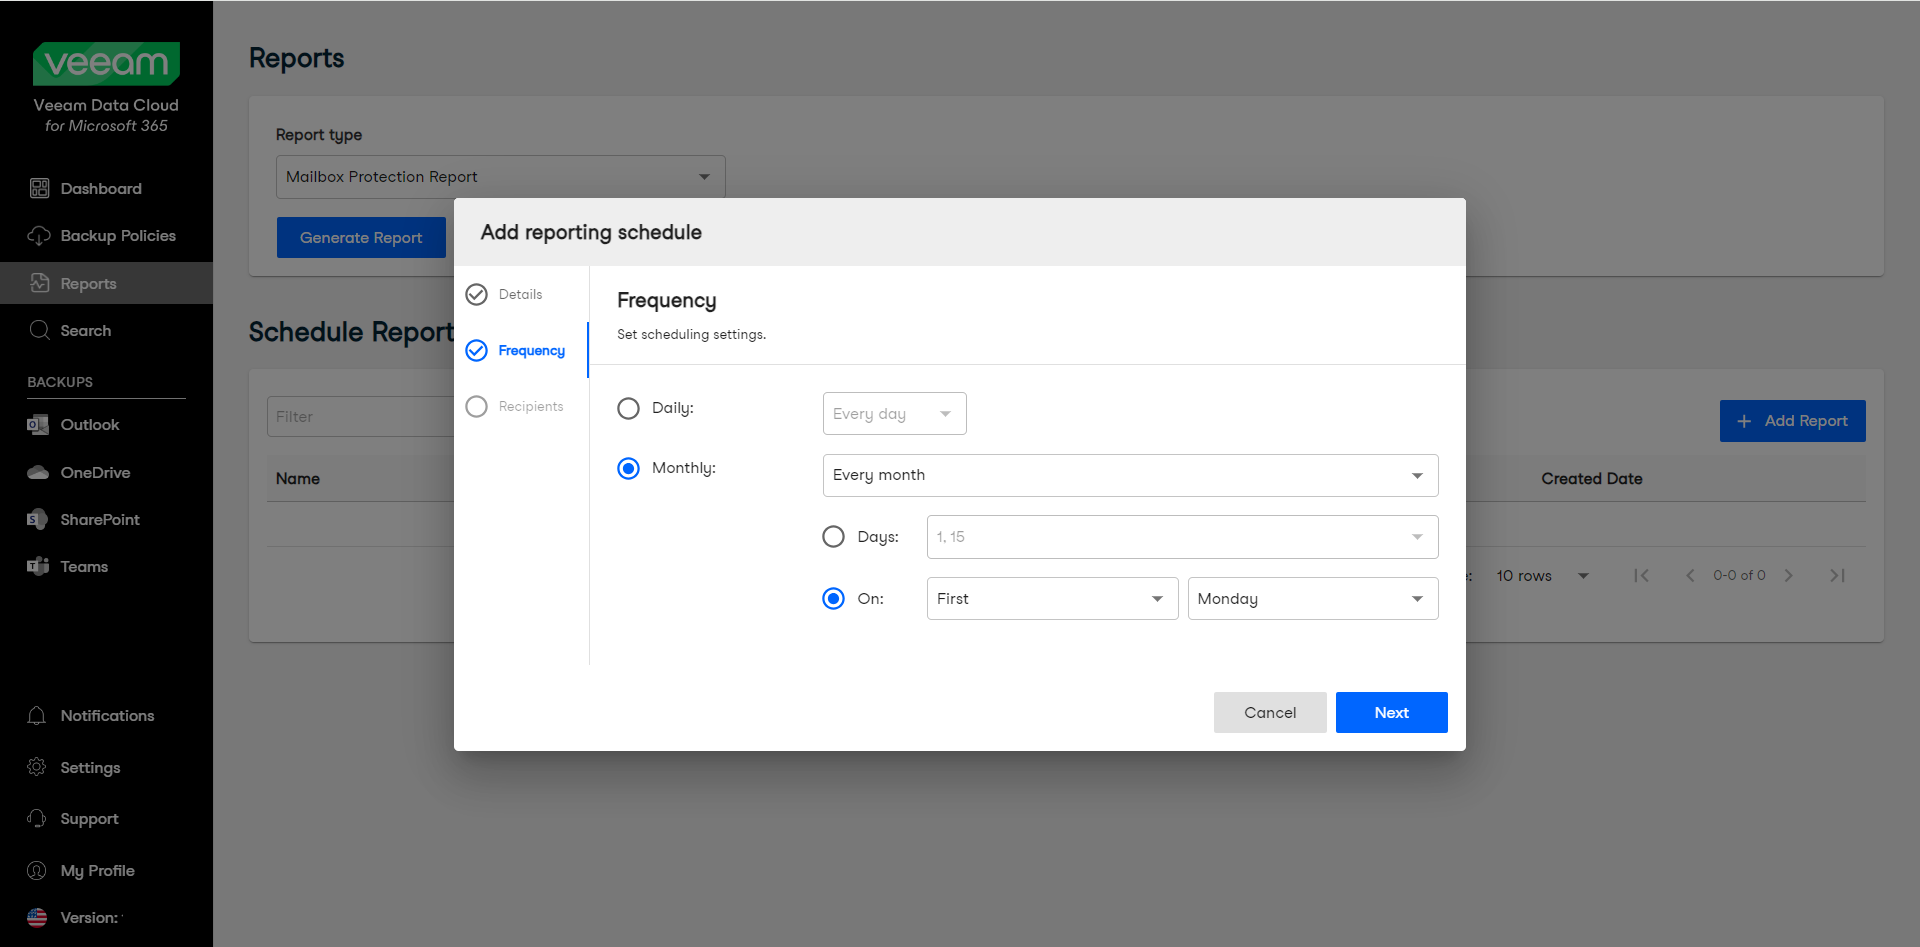
- In the Frequency tab, select whether you want to receive the scheduled report Daily or Monthly:
Daily. Select Every day or a day of the week from the drop-down list.
Monthly. Select the months you want to receive the report from the drop-down. Then you can either select the days from the 1st to the 31st from the drop-down list, or select on which day of the month you want to receive the report. For example, when you select First Monday, you will receive the report on the first Monday of the month you chose.
- Click Next.
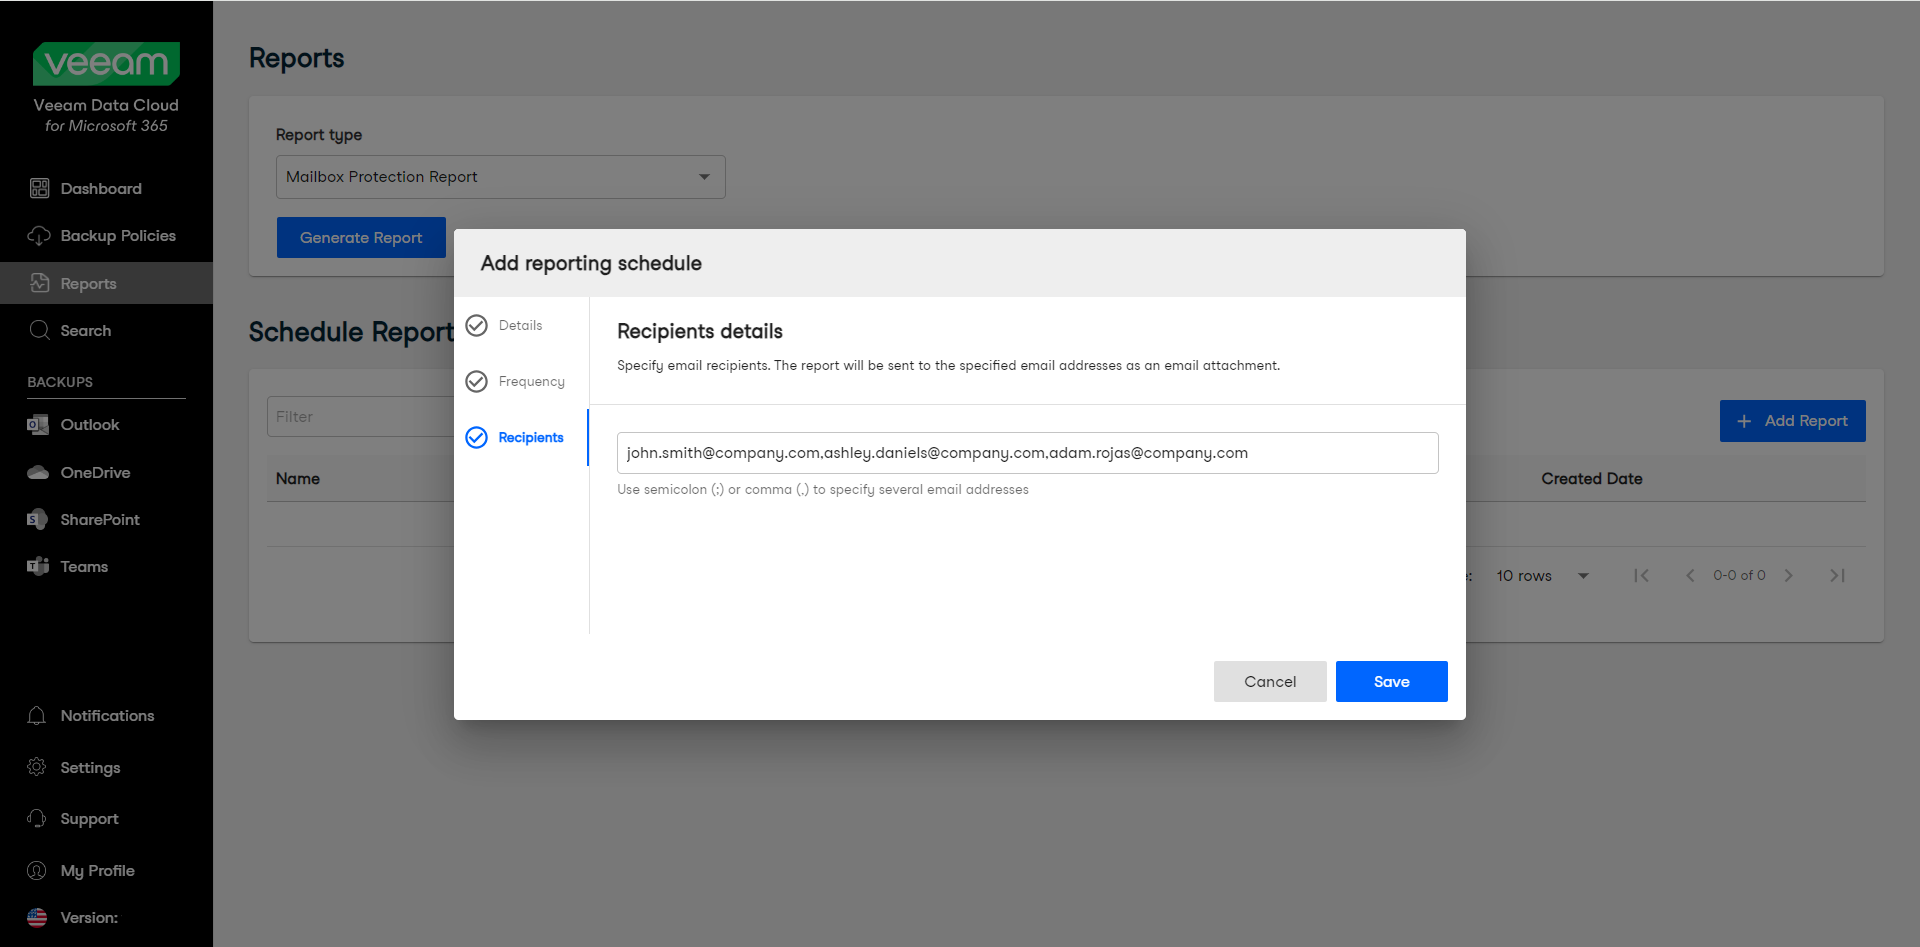
- In the Recipients tab, specify the email addresses of the report recipients, separated by a semicolon (;) or a comma (,). Your own email address is added by default.
|
NOTE |
|
You can also specify email addresses outside of your organization. The recipients must be able to log in to Veeam Data Cloud to download the reports. |
|
Tip |
|
To receive the scheduled report email, make sure to include no-reply@veeamdatacloud.com in your allowed, approved or safe senders list in your email client. |
- Click Save.
- The new scheduled report is now enabled and appears on the list.
Managing Scheduled Reports
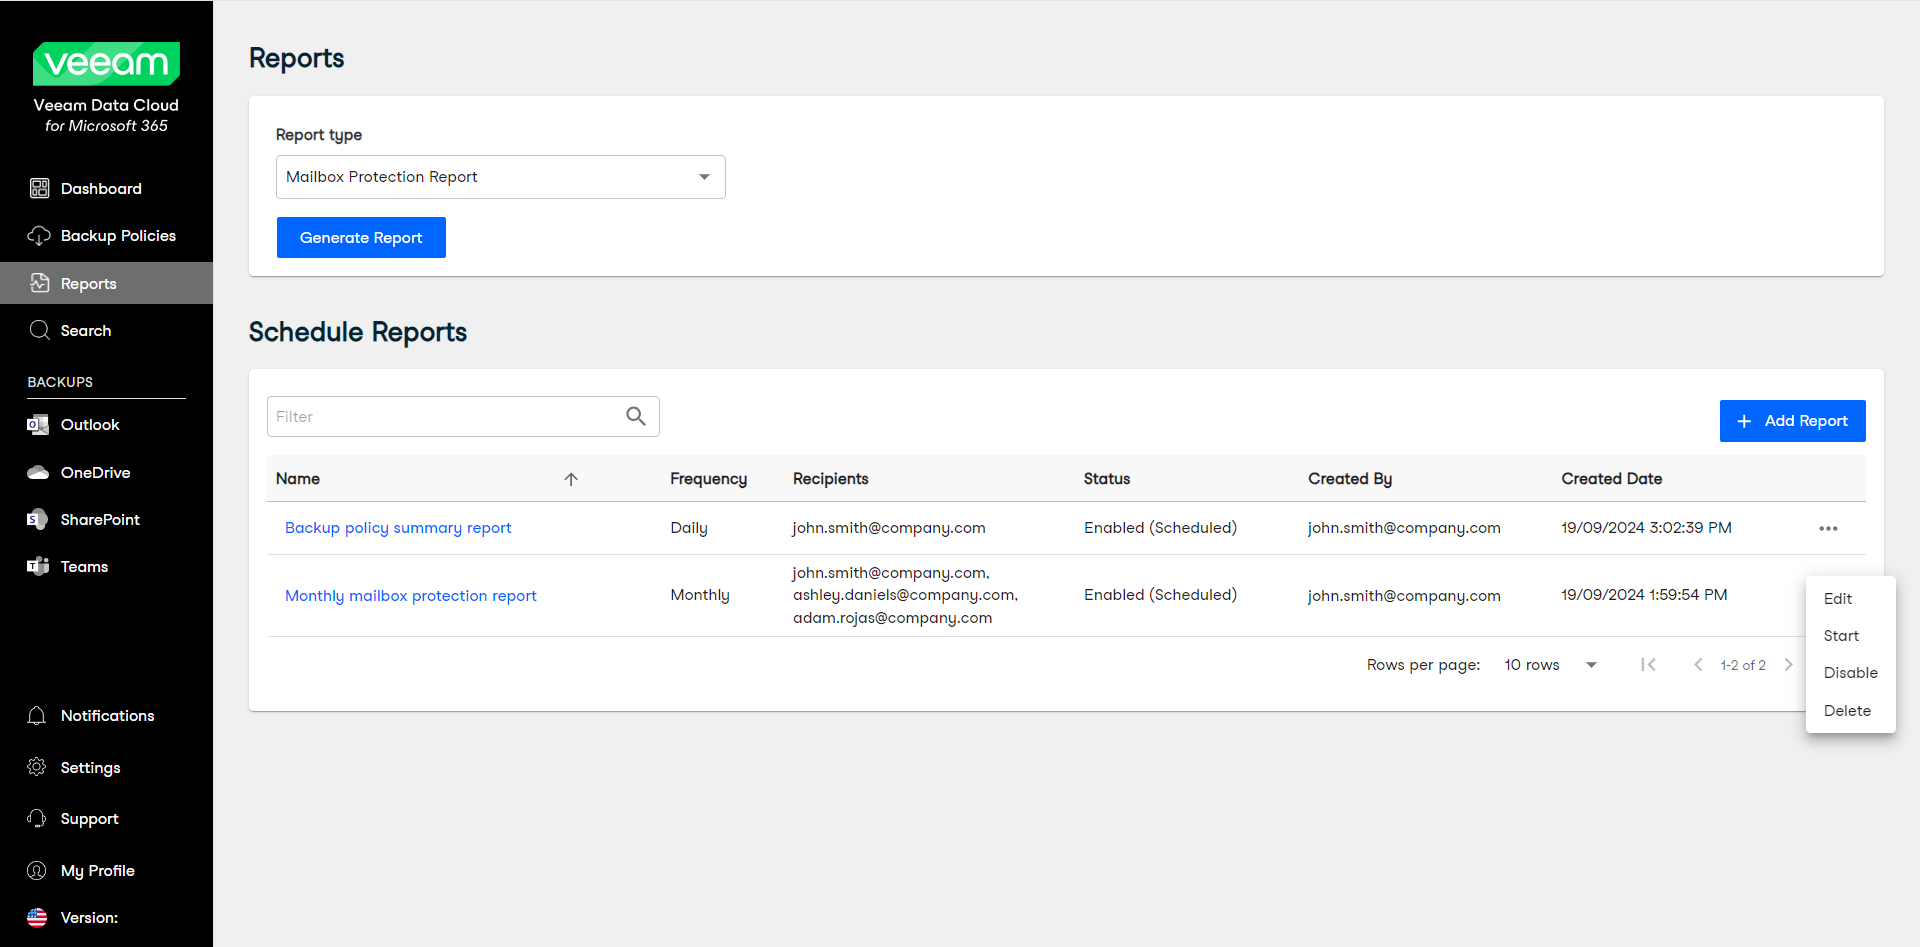
In the Schedule Reports section, you can see a list of all your scheduled reports with information about the name, frequency, recipients, status, who created the report, and the date it was created.
To manage a scheduled report, click the menu next to the report you want to manage and select one of the following actions:
- Select Edit to update the details, frequency and recipients of your scheduled report.
- Select Start to run the scheduled report now.
- Select Disable (or Enable if the report is disabled) to disable (or enable) the scheduled report.
- Select Delete to delete the scheduled report.
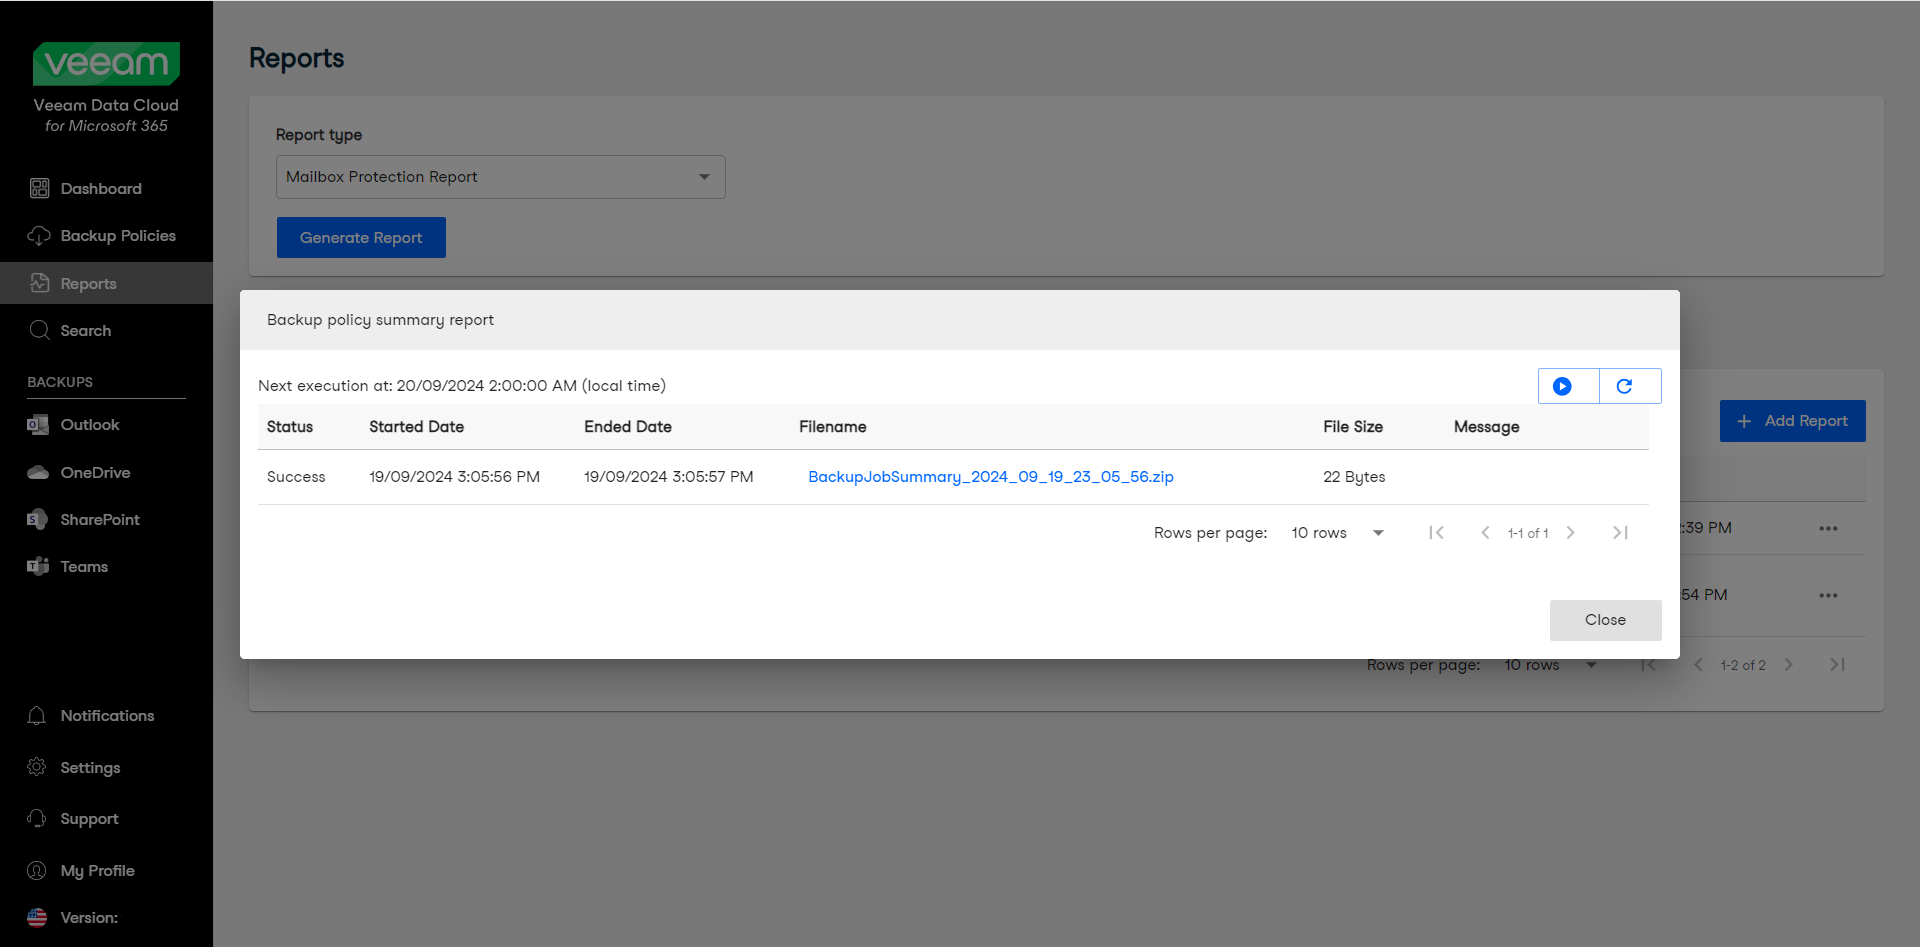
You can also see an overview of the report execution. To do this, click on the name of a report. In the overview, Veeam Data Cloud displays the following information:
- The time and date of the next scheduled execution
- A button to run the scheduled report now
- A button to refresh the overview
- The status of the executed report
- The start and end date and time of the executed report
- A link to download the report
- The file size of the report
- A message with information related to the report