This is an archive version of the document. To get the most up-to-date information, see the current version.
Step 3. Select Objects to Back Up
At this step of the wizard, select objects that you want to back up.
In Veeam Backup for Microsoft Office 365, you can select to back up an entire organization or specify users, groups, sites, teams and organizations.
Consider the following:
- You can create only one entire organization backup job per organization.
- Objects that are already added to the scope of any of your backup jobs will be skipped from the entire organization processing list.
- Due to possible access limitations some Sites objects may be unavailable.
- Due to Microsoft limitations, you cannot add the following objects for Microsoft Office 365 organizations with enabled security defaults: Discovery Search Mailboxes, Public Folder Mailboxes and Dynamic Distribution Groups.
- When you add an Organization object, processing options are applied to all users, groups and sites in the selected organization.
To specify objects to back up, do the following:
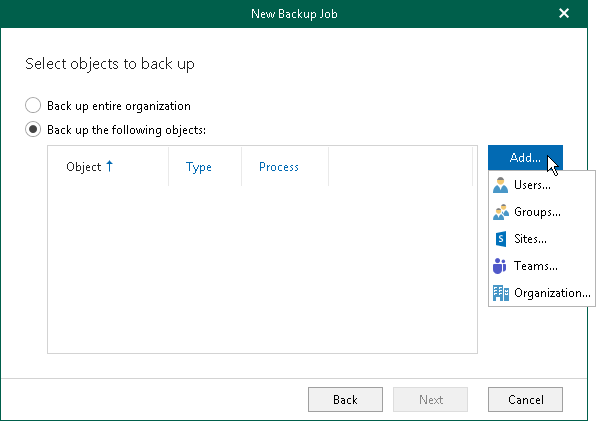
- Select the Back up the following objects option.
- Click Add and select one of the following options: Users, Groups, Sites, Teams or Organization.
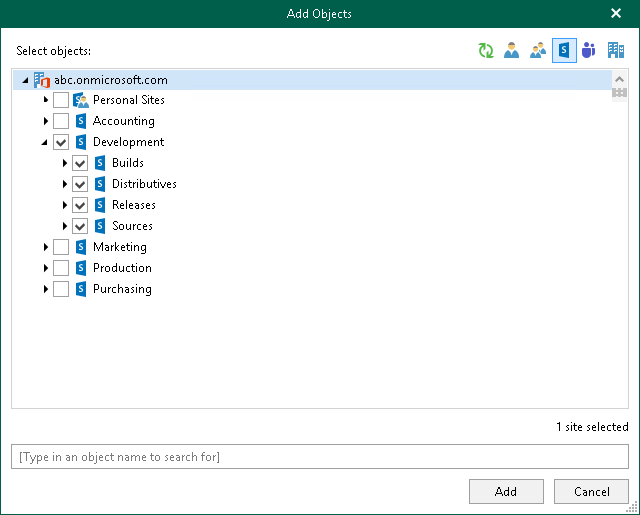
- In the Add Objects window, select users, groups, sites, teams and organizations that you want to back up.
To add objects of different types, use the switch group in the upper-right corner.
To quickly find necessary objects, use the search field at the bottom.
Note |
If you select a group, site or team as an individual object for backup (and not as a part of a user account, group or organization), this object does not consume a unit in the license. |
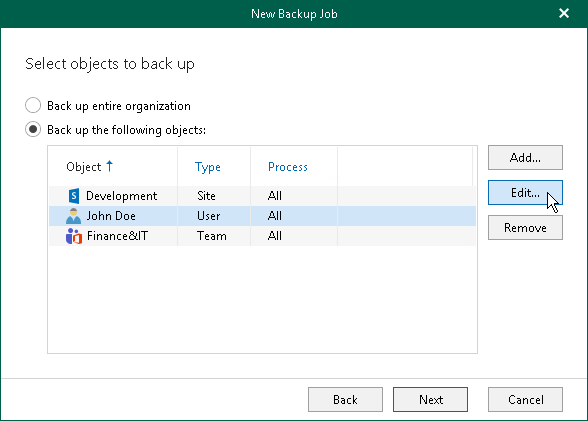
- Click Add.
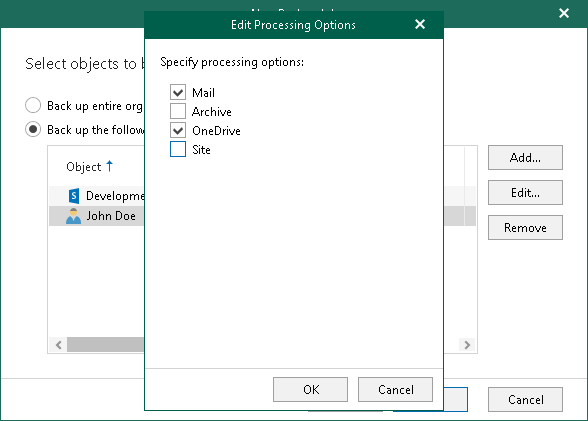
- In the list of objects to back up, select the necessary object and click Edit.
Mind that you cannot edit processing options for the Sites, Teams and Public Mailbox objects.
- In the Edit Processing Options window, select processing options and click OK.
For more information about available object types and their processing options, see Organization Object Types.