 This is an archive version of the document. To get the most up-to-date information, see the current version.
Add AHV Cluster to AHV Backup Proxy Infrastructure
After you install AHV Backup Proxy, you must add the Nutanix AHV cluster to the AHV Backup Proxy infrastructure.
Limitations
- You can add only one Nutanix AHV cluster per AHV Backup Proxy.
- You cannot use Prism Central IP addresses to define the AHV cluster in the AHV Backup Proxy settings.
- [For Nutanix Community Edition 2017.07.20] When you add a cluster to the AHV Backup Proxy infrastructure, use the built-in admin account for authentication.
Procedure
To add a Nutanix cluster to the AHV Backup Proxy infrastructure, do the following.
- Log in to the AHV Backup Proxy web UI.
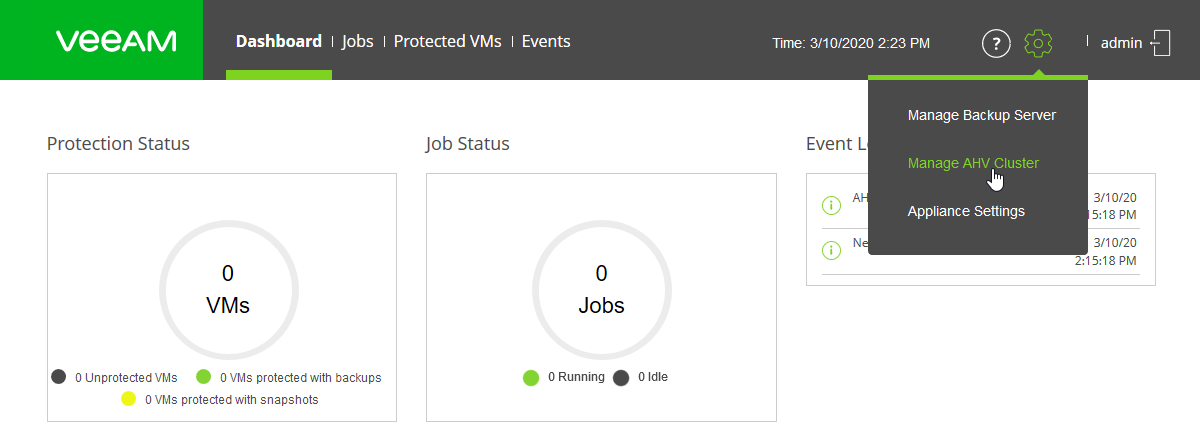
- At the main panel, click the settings icon and select Manage AHV Cluster.
- Click the Add button on the toolbar.
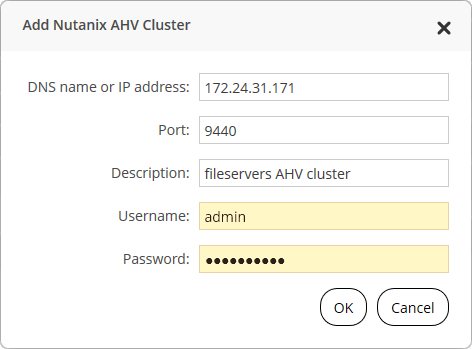
- Specify the Nutanix AHV cluster settings:
- In the DNS name or IP address field, specify the IP address or FQDN of the AHV server.
- In the Port field, specify a port which will be used by AHV Backup Proxy to communicate with the AHV cluster (default port: 9440).
- [Optional] In the Description field, specify a description of the AHV cluster for further reference.
- In the Username and Password fields, specify credentials to connect to the AHV cluster.
The account which you want to use to connect to the AHV cluster must have the Cluster Admin role permissions.
- Click OK.
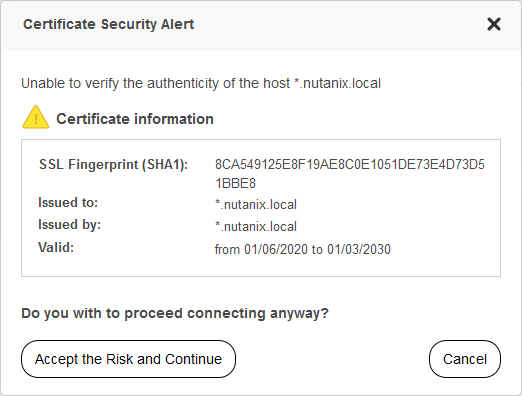
- AHV Backup Proxy checks the authenticity of the TLS certificate on the AHV cluster. If you trust the legitimacy of the certificate, click Accept the Risk and Continue to connect to the AHV cluster.


