 This is an archive version of the document. To get the most up-to-date information, see the current version.
Upload AHV Backup Proxy Virtual Disk Image
To deploy AHV Backup Proxy manually, you must upload the proxy installation virtual disk image to the target AHV cluster. You can find the installation image (NutanixAHVPluginProxy_X.X.XX.vmdk) in the C:\Program Files\Veeam\Plugins\Nutanix AHV\Service\PlatformPlugins\AhvProxyManagement\Images folder of the server where Nutanix AHV Plug-in is installed.
To deploy AHV Backup Proxy, do the following.
- Log in to the Nutanix Prism web console (Prism Element console).
Note |
For details on how to upload images on Nutanix Prism web console, see the Configuring Images section of the Prism Web Console Guide. If you use Nutanix Prism Central, image configuration instructions will be different. For details, see the Adding an Image section of the Prism Central Guide. |
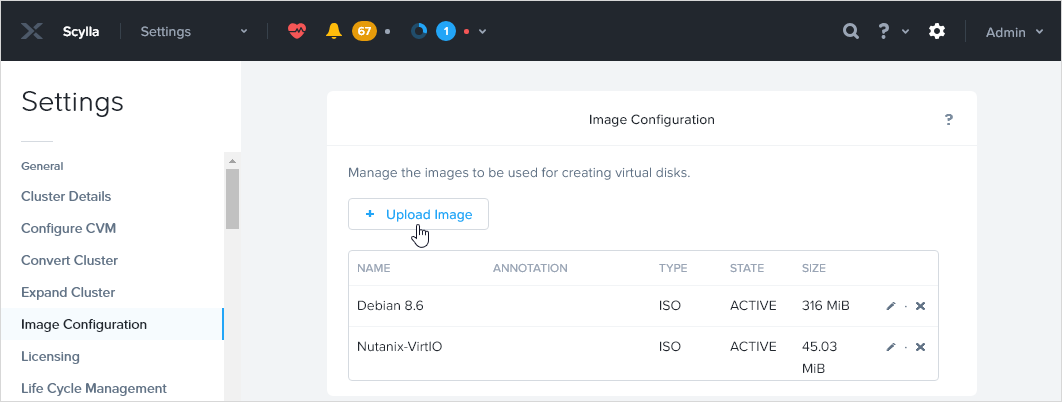
- In the main menu of Nutanix Prism web console, click the gear icon and select Image Configuration.
- Click Upload Image.
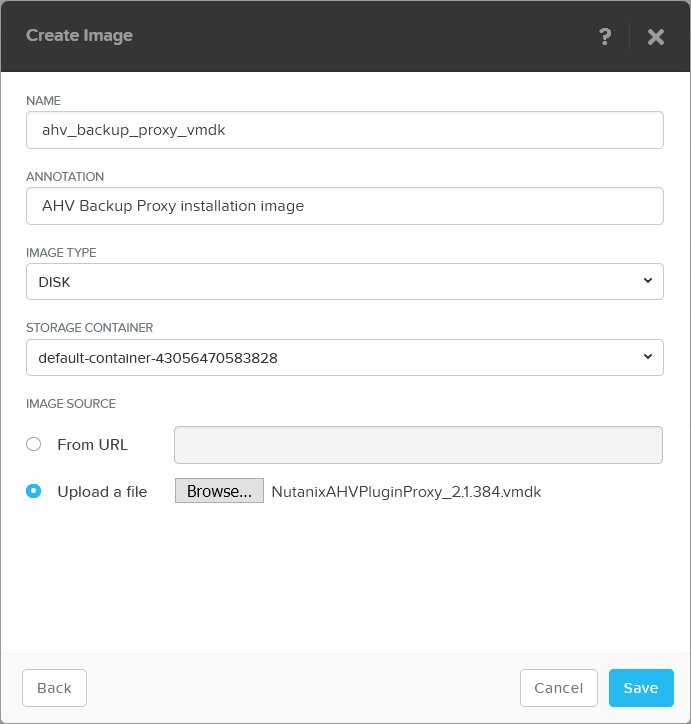
- In the Create Image window, specify the image parameters:
- In the Name field, enter a name for the image.
- In the Image Type list, select DISK.
- In the Storage Container list, select the storage container where you want to store the image.
- Select the Upload a file option and click Choose File.
You can copy the installation image (NutanixAHVPluginProxy_X.X.XX.vmdk) from the C:\Program Files\Veeam\Plugins\Nutanix AHV\Service\PlatformPlugins\AhvProxyManagement\Images folder of the server where Nutanix AHV Plug-in is installed.
- In the file browser, select the required image and click Open.
- In the Create Image window, click Save.
What To Do Next
After you upload the AHV Backup Proxy disk image, you must create a VM for the AHV Backup Proxy appliance.