 This is an archive version of the document. To get the most up-to-date information, see the current version.
Create VM for AHV Backup Proxy
Once you upload the AHV Backup Proxy image, you must create a VM where the AHV Backup Proxy will be deployed.
Note |
If you use Nutanix Prism Central, the VM management console will be on a different location. For details, see the Creating a VM section of the Prism Central Guide. |
To create a VM for the AHV Backup Proxy, do the following:
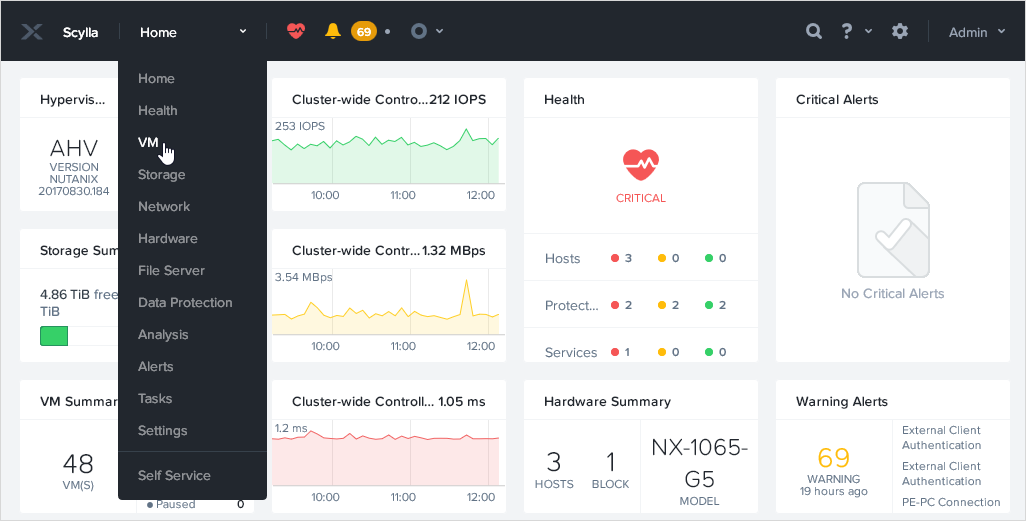
- On the main menu of Nutanix Prism web console, click Home and select VM.
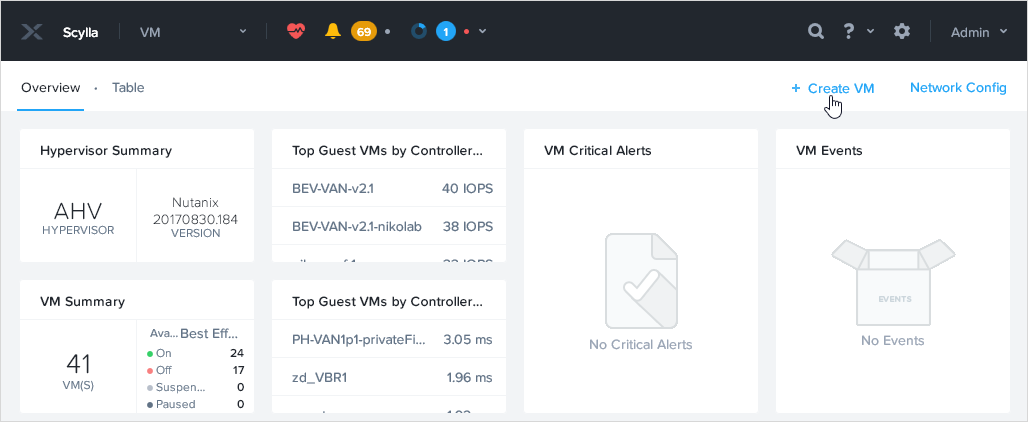
- Click Create VM.
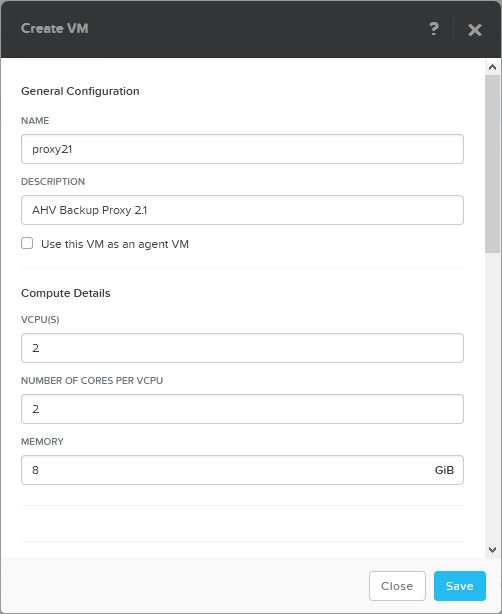
- In the Create VM window, assign a VM name and specify the compute details. Note that the VM must meet the following requirements:
- 2 CPUs, 2 cores per CPU plus 1 CPU core for each additional concurrent task (default concurrency level: 3 VMs at a time).
- 4GB RAM plus 1 GB for each concurrent task.
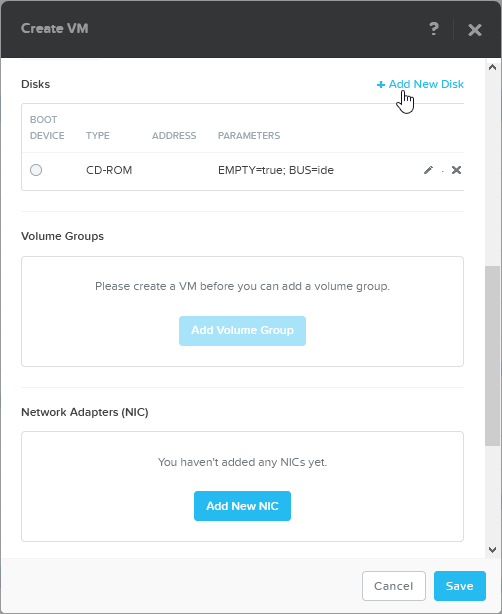
- At the Disks section, click Add New Disk to add the AHV Backup Proxy installation disk.
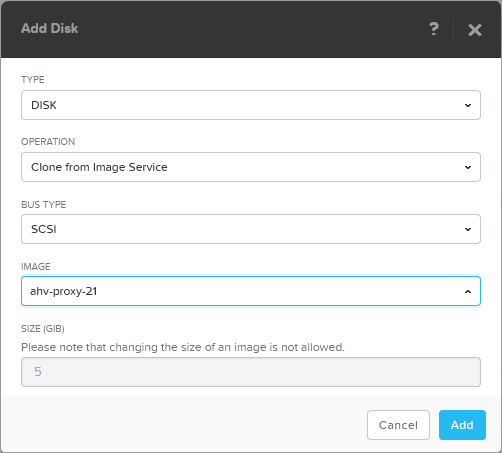
- In the Add Disk window, configure the disk characteristics:
- In the TYPE drop-down list, select DISK.
- In the OPERATION drop-down list, select Clone form Image Service.
- In the IMAGE drop-down list, select the AHV Backup Proxy VMDK disk which you have uploaded in the previous step.
- Click Add.
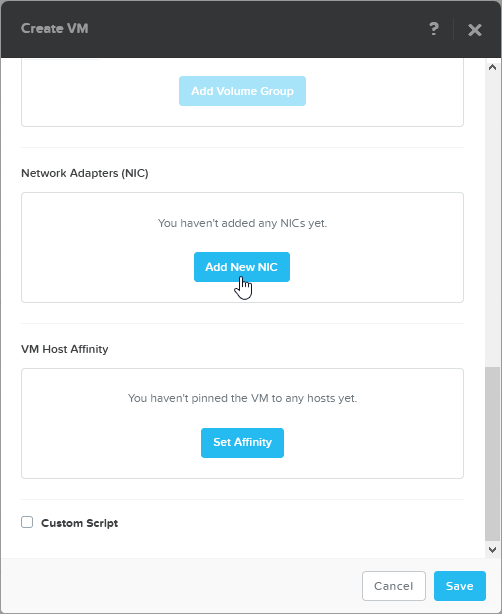
- At the Network Adapters (NIC) section, click Add New NIC.
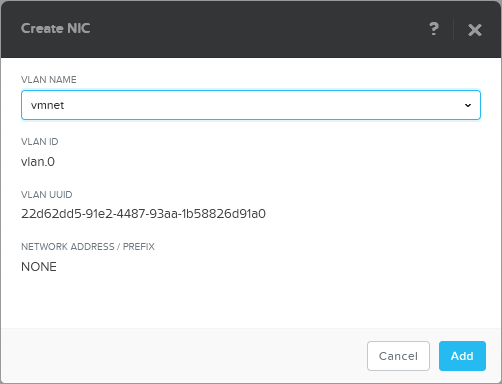
In the Create NIC window:
- Select the required VLAN from the VLAN Name drop-down list.
- Click Add.
Important |
Make sure the specified virtual network has access to your DHCP server, Veeam Backup & Replication Server and Nutanix Cluster. |
- AHV Backup Proxy version 2.0 and later has cloud-init integration. For this reason, AHV Backup Proxy VM takes 4-5 minutes to start. To avoid this, do the following.
- At the bottom of the Create VM window, select the Custom Script check box.
- Select the Type or paste script check box and copy the following script:
#cloud-config growpart: mode: auto devices: / ignore_growroot_disabled: true write_files: - path: /etc/cloud/cloud.cfg.d/90_dpkg.cfg content: | [ None ] |
- Click Save to apply settings.
- After saving the VM settings, you must resize the added image disk to 50GiB. To resize the disk, perform the following:
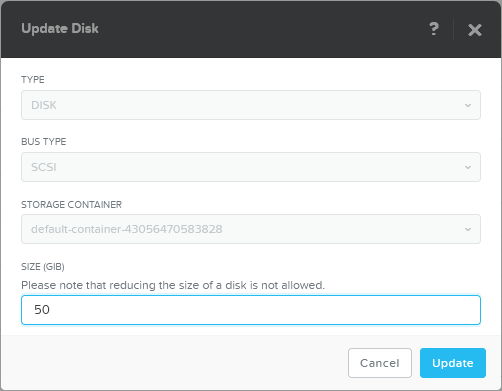
- In the VM view of the Prism web console, click the newly created VM and click Update.
- Open the AHV Backup Proxy disk settings and at the Size (GIB) field type 50.
- Click Update.
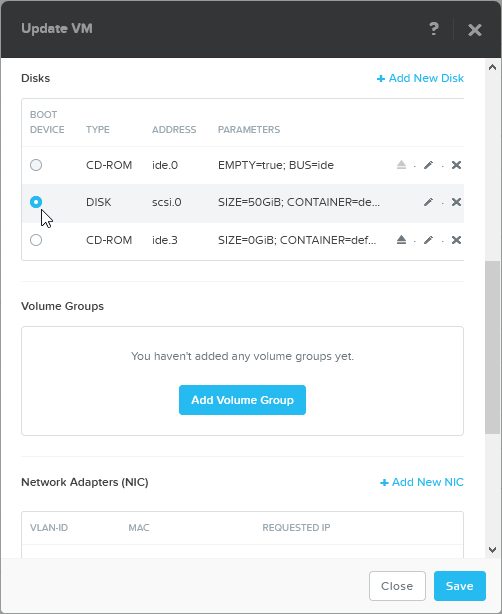
- In the Update VM window, select the added disk as a boot device.
- Click Save to apply settings.
Important |
You must resize the disk only at the end of configuration. If you resize the disk before saving initial settings of the VM, the disk resize will not be applied correctly. |
Reference
For details on how to create a VM, see the Creating a VM (AHV) section of the Prism Web Console Guide.
What To Do Next
After you create a VM for AHV Backup Proxy, log in to the AHV Backup Proxy web console.
