This is an archive version of the document. To get the most up-to-date information, see the current version.
Specifying Destination for Multiple VMs
The following steps are available if you restore multiple workloads.
If you restore multiple workloads, specify the following settings for the destination:
- At the Host step of the wizard, select a target host.
- At the Folder step of the wizard, specify VM settings.
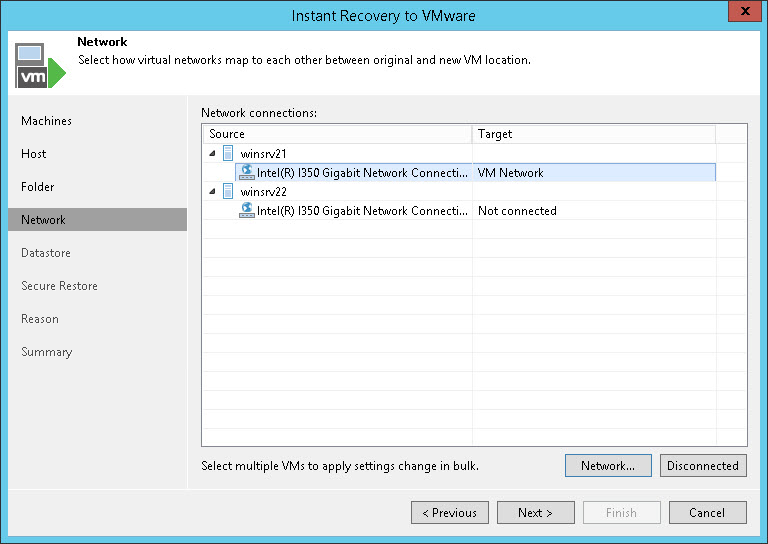
- At the Network step of the wizard, specify network settings.
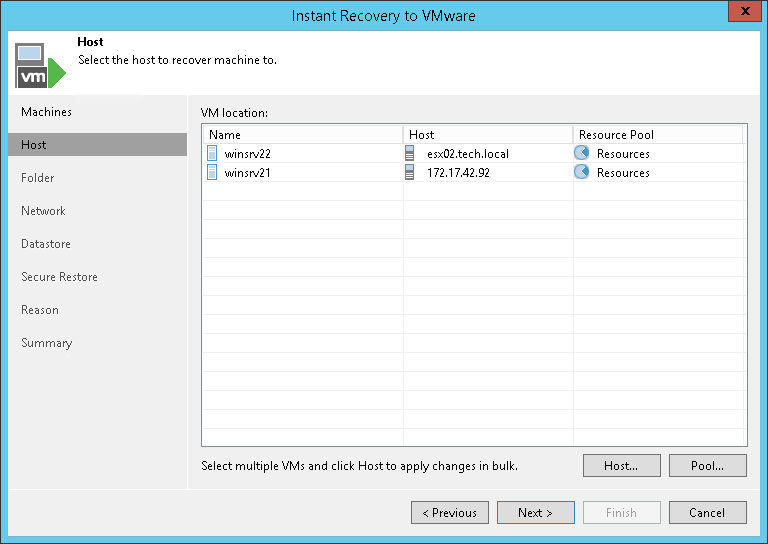
At the Host step of the wizard, specify a target host and resource pool for the restored VMs:
- In the list, select one or more VMs and click the Host button.
- From the virtual environment, select a standalone or clustered host where the selected VMs must be registered.
- Select one or more VMs and click the Pool button.
- In the list, select a resource pool where the VMs must be stored.
To quickly find the necessary object, use the search field at the bottom of the Select Host and Select Resource Pool windows:
- Click the button on the left of the search field to select the type of objects to search for.
- Enter an object name or a part of it in the search field.
- Click the Start search button on the right or press [Enter].
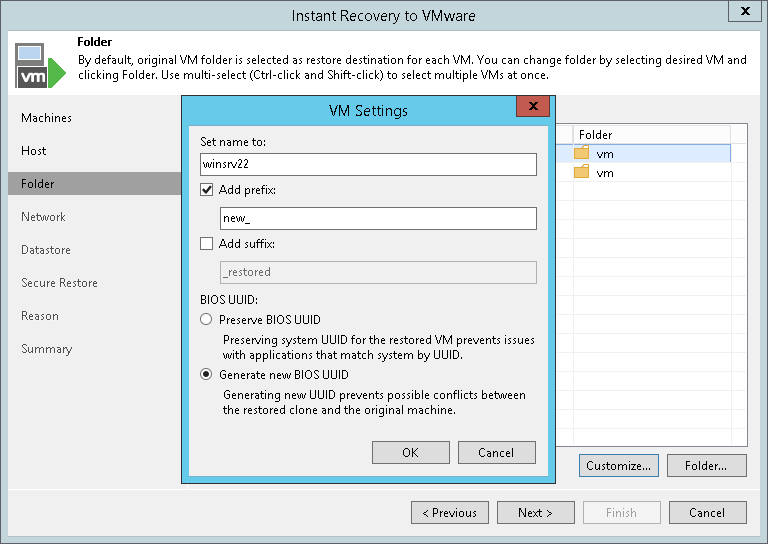
For each restored VM, you can change a VM name, BIOS UUID and folder where VM files must be stored. It is recommended that you specify a new name and generate a new BIOS UUID to prevent conflicts if the original workload still resides in the production environment. The name and BIOS UUID change is not required if the original workload no longer exists, for example, it was permanently deleted.
To specify a folder:
- In the VM settings list, select one or more VMs.
- Click the Folder button.
- Select a folder where VM files must be stored.
To change a restored VM name and BIOS UUID:
- In the VM settings list, select one VM.
- Click the Customize button.
- In the VM Settings window, do the following:
- In the Set name to field, specify a new VM name.
- To add a prefix and suffix to the name specified in the Set name to field, select Add prefix and Add suffix check boxes.
- In the BIOS UUID section, specify whether to preserve or generate a new BIOS UUID.
Veeam Backup & Replication uses the network mapping table to update configuration files of VMs on the fly, during the Instant VM Recovery process.
To change networks to which the restored VMs must be connected:
- In the list, select one or more workloads and click the Network button.
If a workload is connected to multiple networks, you can select a network to map and click Network.
- The Select Network window displays all networks to which the target host or cluster is connected. In the list, select a network to which the restored VM must be connected after restore.
To quickly find a network, enter a name or a part of it in the search field. Then, click the Start search button or press [Enter].
If you do not want to connect a restored VM to any virtual network, select the original workload and click Disconnected.