This is an archive version of the document. To get the most up-to-date information, see the current version.
Step 6. Select Amazon VPC
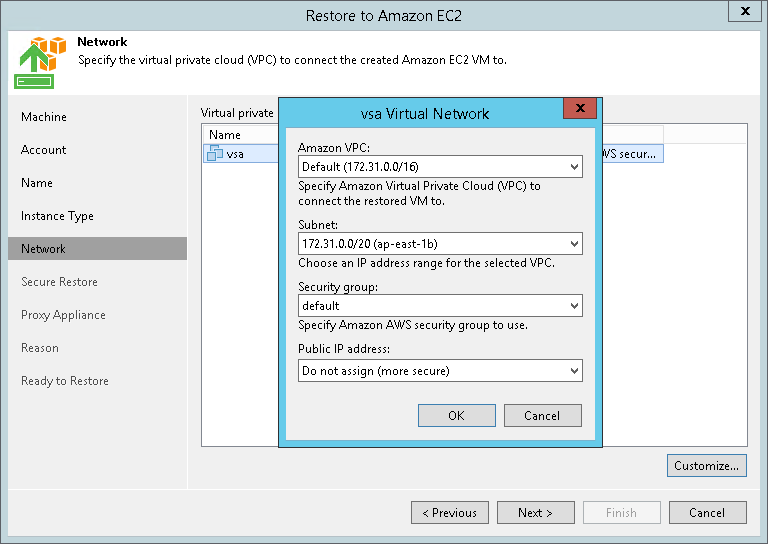
At the Network step of the wizard, you can select to which Amazon Virtual Private Cloud (Amazon VPC) the target Amazon EC2 instance must be connected. You can also specify a subnet, and a security group — a virtual firewall for the target instance. For more information on Amazon VPC, see the AWS Documentation.
To define network settings for the target instance, do the following:
- From the Amazon VPC list, select the Amazon VPC where the target instance will be launched.
- From the Subnet list, select the subnet for the target instance.
- From the Security group list, select a security group that will be associated with your target instance.
- From the Public IP address list, select one of the following:
- Assign (restored VM will be accessible from the Internet) — if you want to assign a public IP to the target instance. For security reasons, make sure traffic filtration rules are properly configured in the security group.
- Do not assign (more secure) — if you do not want to assign a public IP.
- Click OK.