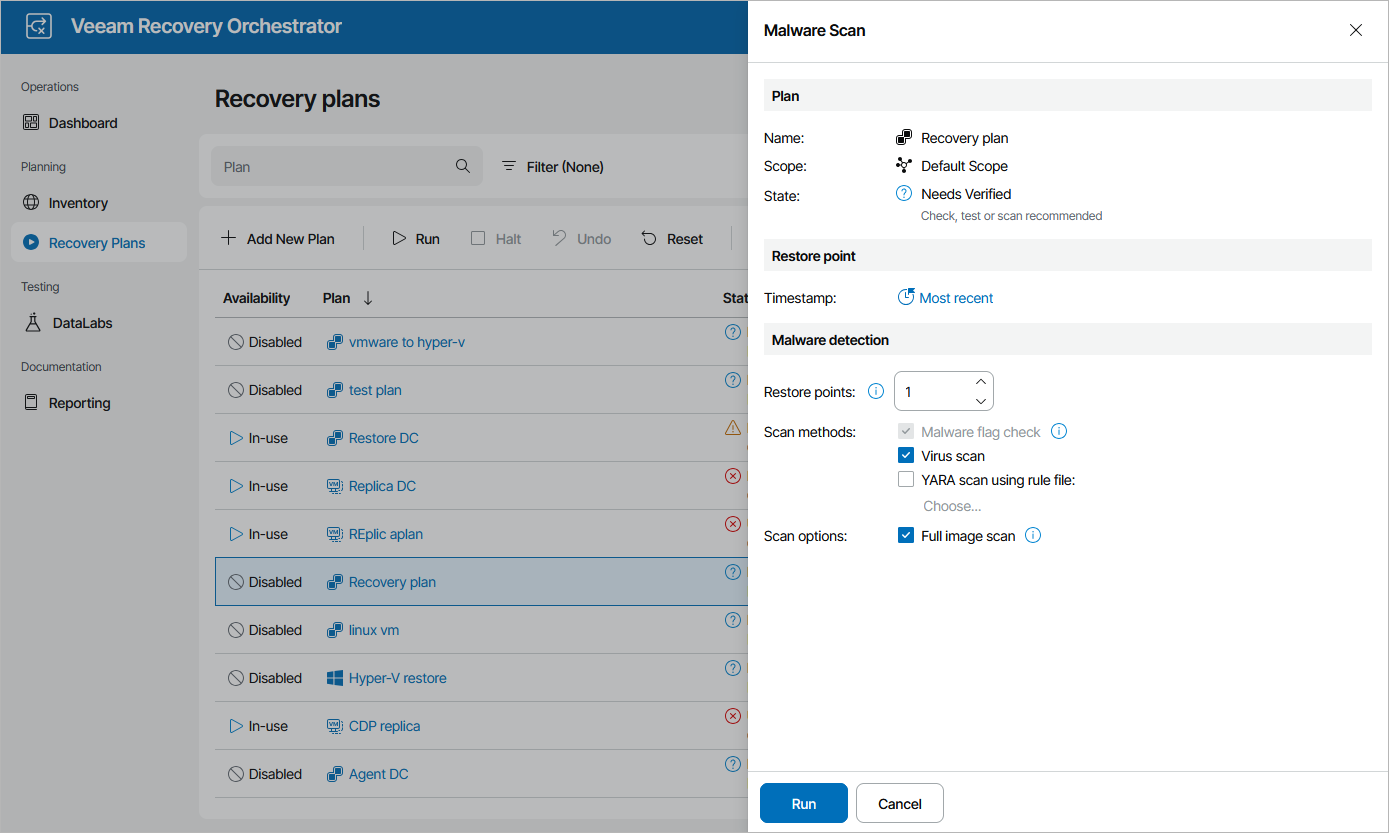
Starting On-Demand Plan Scan
Scanning for malware may be started on-demand for a recovery plan in the ENABLED or DISABLED state. To start scanning for a plan, perform the following steps:
- Navigate to Recovery Plans.
- Select the necessary plan and click Scan.
- In the Malware Scan window, do the following:
- In the Restore point section, click the link in the Timestamp field and choose a restore point that you want to scan.
- In the Malware detection section, configure the following settings:
- In the Restore points field, specify the number of restore points on each machine that you want to scan for malware.
By default, Orchestrator checks the most recent restore point. However, if you specify to scan more than 1 restore point, Orchestrator will perform scanning starting from the earliest available restore point to the most recent one. If all of the restore points are infected, the plan will acquire the NOT VERIFIED state after the scan process completes.
For more information on the way Orchestrator chooses restore points for malware scan, How Orchestrator Selects Restore Points During On-Demand Malware Scan.
- [Applies only to restore and cloud plans] Choose whether you want to scan these restore points with antivirus software, YARA rules or both.
- [Applies only if you have selected the Antivirus scan check box, YARA scan using rule file check box or both] By design, Orchestrator scans the restore point until a virus or YARA rule match is detected. Then, Orchestrator either completes the scanning session or proceeds to the next restore point in case you have specified multiple restore points in the Restore Points field. However, you can instruct Orchestrator to continue scanning until all possible malware is detected — to do this, select the Full image scan check box.
- In the Restore points field, specify the number of restore points on each machine that you want to scan for malware.
- Review configuration information and click Run.