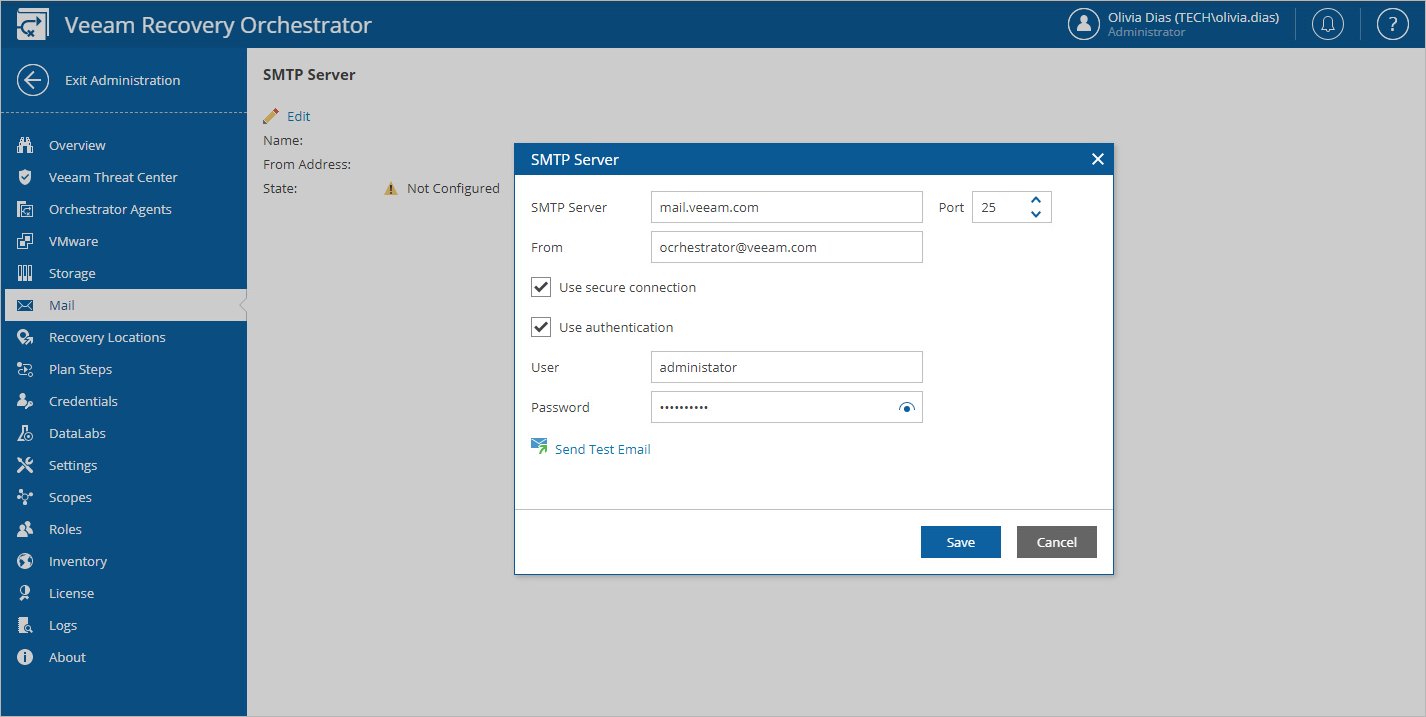
Step 1. Specify Email Server Settings
To connect an SMTP server that will be used for sending email notifications:
- Switch to the Administration page.
- Navigate to Mail.
- Click the link next to the Mail service field and configure email server settings.
- In the From field, enter an email address of the notification sender. This email address will be displayed in the From field of notifications.
- In the Sender name field, specify the name of the notification sender.
- Click Save.
Tip |
|
Orchestrator allows you to send a test message to check whether you have configured all settings correctly. To do that, click Send test email. A test message will be sent to the specified email address. |
Configuring Email Server Settings
To configure email server settings, choose whether you want to employ Basic (SMTP) or Modern (OAuth 2.0) authentication for your email service.
Using Basic Authentication
To employ the Basic authentication to connect to your email server, in the Email Server Settings window:
- From the Authentication type drop-down list, select Basic.
- In the SMTP server field, enter a DNS name or an IPv4 address of the SMTP server. All email notifications (including test messages) will be sent by this SMTP server.
- In the Port field, change the SMTP communication port if required. The default SMTP port is 25.
- From the Encryption protocol drop-down list, select a protocol that will be used for data transfer.
- If your SMTP server requires authentication, select the Requires authentication check box, and specify authentication credentials in the Username and Password fields.
Using Modern Authentication
To employ the Modern authentication to connect to your email service:
- From the Authentication type drop-down list, select Modern.
- In the Email Server Settings window, copy the URL from the Redirect URL field.
- For Orchestrator to be able to use OAuth 2.0 to access Google Cloud or Microsoft Azure APIs, register a new client application either in the Google Cloud Console or in the Microsoft Azure portal.
When registering the application, make sure that the redirect URL specified for the application matches the URL copied from the Orchestrator Web UI.
Important
- Due to Google Cloud technical limitations, the Google email service does not support redirect URLs of backup appliances deployed in the US East (N.Virginia) region.
- If you plan to use a client application registered in a Google Cloud project with a Testing publishing status, keep in mind that authorization will be required every seven days from the time of consent.
- If you plan to use a client application registered in the Microsoft Azure portal, you must grant it the Mail.Send Microsoft Graph application permission and the following Microsoft Graph delegated permissions: email, offline_access, openid, User.Read. For more information on Microsoft Graph permissions, see Microsoft Docs.
- Back to the Orchestrator Web UI, do the following in the Email Server Settings window:
- Use the Mail service drop-down list to choose whether the service that you want to use to send email notifications is a Google Cloud or Microsoft Azure email service.
- In the Application client ID and Client secret fields, provide the Client ID and Client secret created for the application as described in Google Cloud documentation or Microsoft Docs.
- [Applies only if you have selected the Microsoft Azure option] In the Tenant ID field, provide the ID of a Microsoft Entra ID tenant in which the application has been registered.
- Click Authorize. You will be redirected to the authorization page. Sign in using a Google or Microsoft Azure account to validate the configured settings.