Mapping Source UFS Disks
|
Note |
|
Before you start mapping, review the basic principles behind flexible mapping during bare metal recovery. |
To map a UFS disk from the backup to a target disk, do the following:
- In the In backup pane, select the UFS disk in the backup whose data you want to restore and press [Enter].
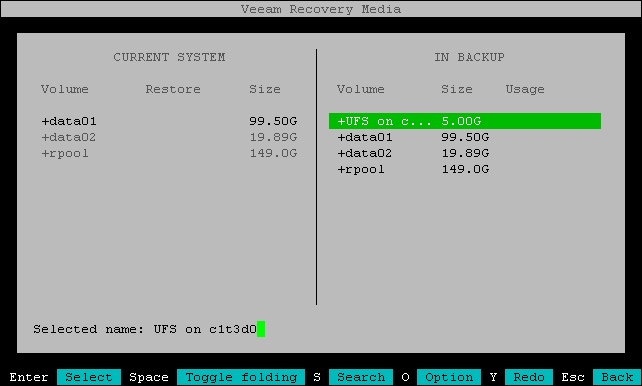
Veeam Agent will display a window with information about the selected UFS disk (disk name and size) and a list of available operations:
- Restore to — select this option if you want to restore the selected UFS disk to a device on the current system.
- Close — select this option if you want to close the window and select another object in the backup.
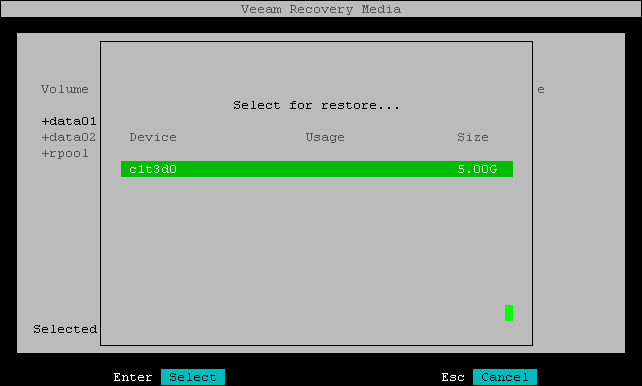
- Select the Restore to option and press [Enter].

- Veeam Agent will display the list of devices on the current system. Select the disk to which you want to restore and press [Enter].
- In the Current system pane, in the Restore column, Veeam Agent will display which UFS disk from the backup will be restored to the selected device.
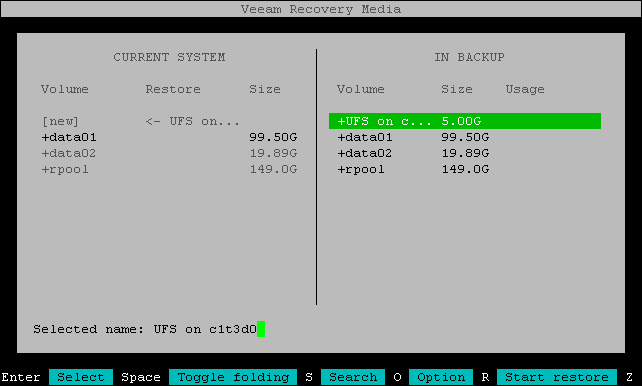
- Repeat Steps 1–4 for each UFS disk that you want to restore.
- Press [R] to review the restore configuration.