Mapping Target Zpools
|
Note |
|
Before you start mapping, review the basic principles behind flexible mapping during bare metal recovery. |
You can map a ZFS pool on the current machine to a ZFS pool in the backup. You can also destroy a ZFS pool on the current system to release the device for mapping; you can then map an object from the backup to this target disk. For more information, see Mapping Source ZFS Pool to Target Disk and Mapping Source UFS Disk to Target Disk.
To map a target ZFS pool to a source ZFS pool, do the following:
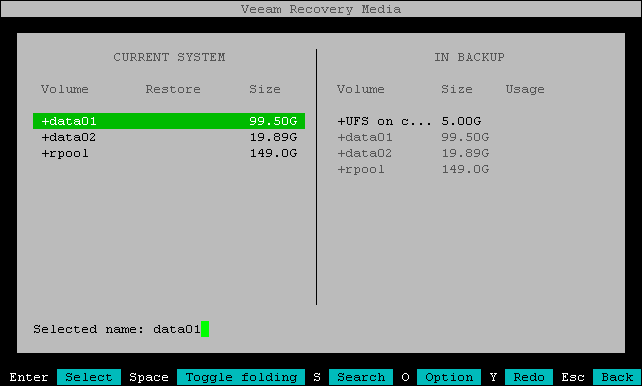
- In the Current system pane, select a ZFS pool and press [Enter].
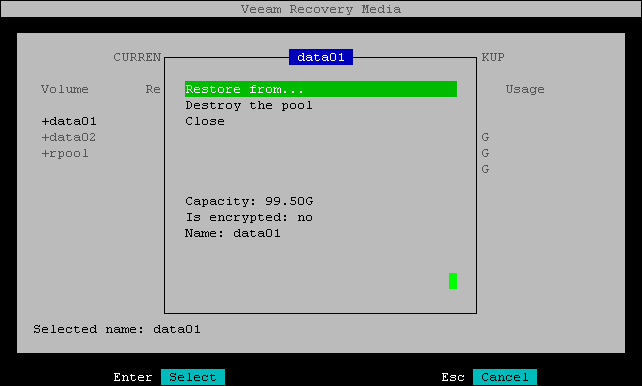
Veeam Agent will display a window with information about the selected ZFS pool (pool size, encryption status and pool name) and a list of available operations:
- Restore from — select this option if you want to use the selected ZFS pool as a restore target.
- Destroy the pool — select this option if you want to destroy the ZFS pool and release the device or devices on which it resides. You can then map a ZFS pool or UFS disk from the backup to the released device on the current system. For more information, see Mapping Source ZFS Pool to Target Disk and Mapping Source UFS Disk to Target Disk.
|
Note |
|
If you select the Destroy the pool option, the pool will not be physically destroyed until you start the restore process. |
- Close — select this option if you want to close the window and select another ZFS pool.
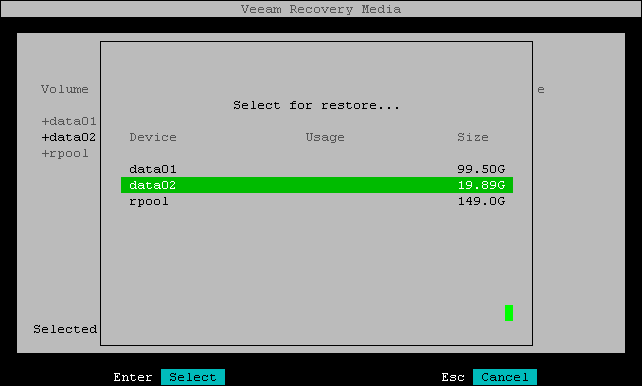
- Select the Restore from option and press [Enter].
- Veeam Agent will display the list of ZFS pools in the backup. Select the ZFS pool that you want to map to the ZFS pool on the current system and press [Enter].
- In the Current system pane, in the Restore column, Veeam Agent will display which ZFS pool from backup will be restored to the target ZFS pool.
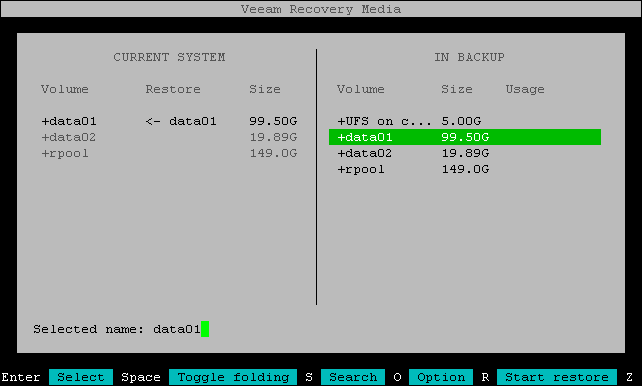
- Repeat Steps 1–4 for each ZFS pool that you want to replace with a ZFS pool from the backup.
- Press [R] to review the restore configuration.