Performing Flexible Mapping
Flexible mapping works at a more granular level of ZFS pools. It allows you to map specific ZFS pools from the backup (source) to the ZFS pools or disks on your machine (target). Flexible mapping allows for partial restore where you do not have to map all ZFS pools and UFS disks from the backup.
Considerations and Limitations
Before you begin flexible disk mapping, consider the following:
- You can manually map ZFS pools and disks only in the Veeam Recovery Media wizard. Flexible disk mapping is not available when you perform bare metal recovery in the command line interface.
- The target ZFS pool must be of the same size as the source ZFS pool, or larger. You cannot map multiple ZFS pools to a target ZFS pool; during restore, the source ZFS pool will replace the target ZFS pool on the current system.
- You can map a ZFS pool to one or multiple disks on the current system. The combined size of the mapped disks must be the same or larger than the size of the source ZFS pool. Note that you cannot map the system rpool to multiple disks.
- You can map a disk with one or multiple UFS file systems from the backup to a disk on the current machine if the size of the disk permits.
- If you map objects from the backup to a disk on the current system, beware that during restore, the data form the backup will replace the content of the target disk on the current system.
- You cannot map ZFS pools that reside on a disk slice.
When you perform flexible mapping during bare metal recovery, Veeam Agent behaves as follows:
- When you select flexible mapping, Veeam Agent compares information about the ZFS pools of the backed up machine and the ZFS pools on the current system. Depending on the result of this check, Veeam Agent works in one of the following ways:
- If the current machine on which you perform bare metal recovery contains ZFS pools with the same IDs as the IDs of the ZFS pools in the backup, Veeam Agent will try to import the ZFS pools with matching IDs. Veeam Agent will display information about the imported ZFS pools in the Current system pane of the Veeam Recovery wizard.
- If the current machine on which you perform bare metal recovery does not contain ZFS pools with the same IDs as the IDs of the ZFS pools in the backup, Veeam Agent will not import any ZFS pools and will simply display the amount of free space on the current system. This can happen, for example, if you perform bare metal recovery using a backup that was created on a different machine. You can press the [O] key to view how the free storage space is allocated among the disks on the current system. For more information on listing disks, see Listing Devices on Current System.
|
Tip |
|
You can manually import any ZFS pools to the current system before you launch flexible mapping. In this case, when you launch flexible mapping in the Recovery wizard, in the Current system pane, Veeam Agent will display the manually imported ZFS pools as well as the ZFS pools that were imported automatically based on matching IDs. |
- After you map objects from the backup to objects on the current system using the available mapping scenarios and press [R] and then [Enter] to start the recovery, Veeam Agent deletes on the current system the objects that have mappings. These can be ZFS pools and their content, as well as the content of the mapped devices (disks).
|
Important |
|
Thoroughly check your mapping before you start the restore. After you press [R] and then [Enter], Veeam Agent immediately proceeds to deleting data on the current system. If you choose to cancel the restore after it has been started, this may result in undesired data loss on the target system. |
- Once the deletion is completed on the current system, Veeam Agent replaces the deleted objects with the previously mapped objects from the backup. After the next system boot from hard drive, the current machine will contain the restored data.
|
Note |
|
After system reboot, you may need to manually import some or all non-system ZFS pools. For more information, see Finish Working with Veeam Recovery Media. |
You can use flexible mapping to map objects from the backup (source objects) to objects on the current system (target objects) in one of the following ways:
- Map a source ZFS pool to a target ZFS pool
- Map a source ZFS pool to a target disk
- Map a source UFS disk to a target disk
- Map a target ZFS pool to a source ZFS pool
|
Note |
|
During bare metal recovery, you can combine different mapping scenarios. If you plan to do so, consider the following:
|
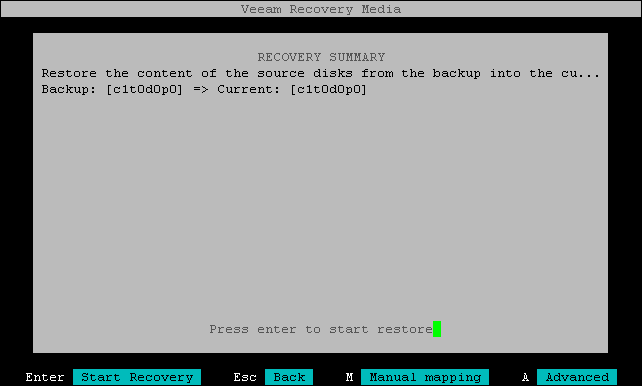
Launching Flexible Mapping
To launch flexible mapping, press the [F] key at the Recovery Summary step of the wizard.