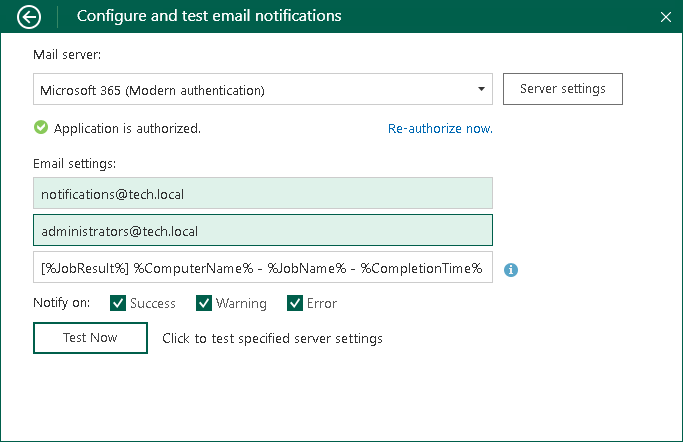
Microsoft 365 Server Settings
To connect to the Microsoft 365 server, specify the following settings in the Configure and test email notifications window:
- In the Mail server section, specify the following:
- Select the Microsoft 365 (Modern authentication) option from the drop-down list.
- Click the Authorize now button and enter your Microsoft 365 account credentials or choose an account from the suggested list.
|
IMPORTANT |
|
When you are prompted to grant Veeam Agent access to your Microsoft 365 profile, accept the permissions listed in the opened window. |
- In the Email settings section, specify the following:
- If necessary, change the email address in the From email address field to its alias.
- If necessary, change the recipient email address in the To email address field. You can specify several recipient email addresses separated with a comma or semicolon.
- In the Email subject filed, specify a subject for the message. You can use the following variables in the subject:
- %JobResult%
- %ComputerName%
- %JobName%
- %CompletionTime%
- In the Notify on section, select the Success, Warning or Error check boxes to receive email notification if a job is run successfully, not successfully or with a warning.
- [Optional] Click Test now to validate the Microsoft 365 server settings and send a test email.
To specify custom authentication options, do the following:
- Click the Server settings button.
- Select the Use custom settings check box.
- Specify the application client ID and the tenant ID.
To learn how to register your custom application, see Registering Application in Microsoft Azure Portal.