Editing Users
Veeam Backup for Salesforce allows you to edit settings of users added to the configuration database, activate and deactivate users.
Important |
If you change IdP settings, all users added to Veeam Backup for Salesforce using these settings will become inactive. If you want to enable access for these users, choose the previously configured identity provider and save the settings. For more information on configuring an identity provider, see Configuring IdP and SSO Settings. |
You can edit permissions assigned to users and user groups in Veeam Backup for Salesforce. To do that:
- Switch to the Configuration page.
- Navigate to Users and Roles > Users.
- Select the necessary user or group of users, and click Edit.
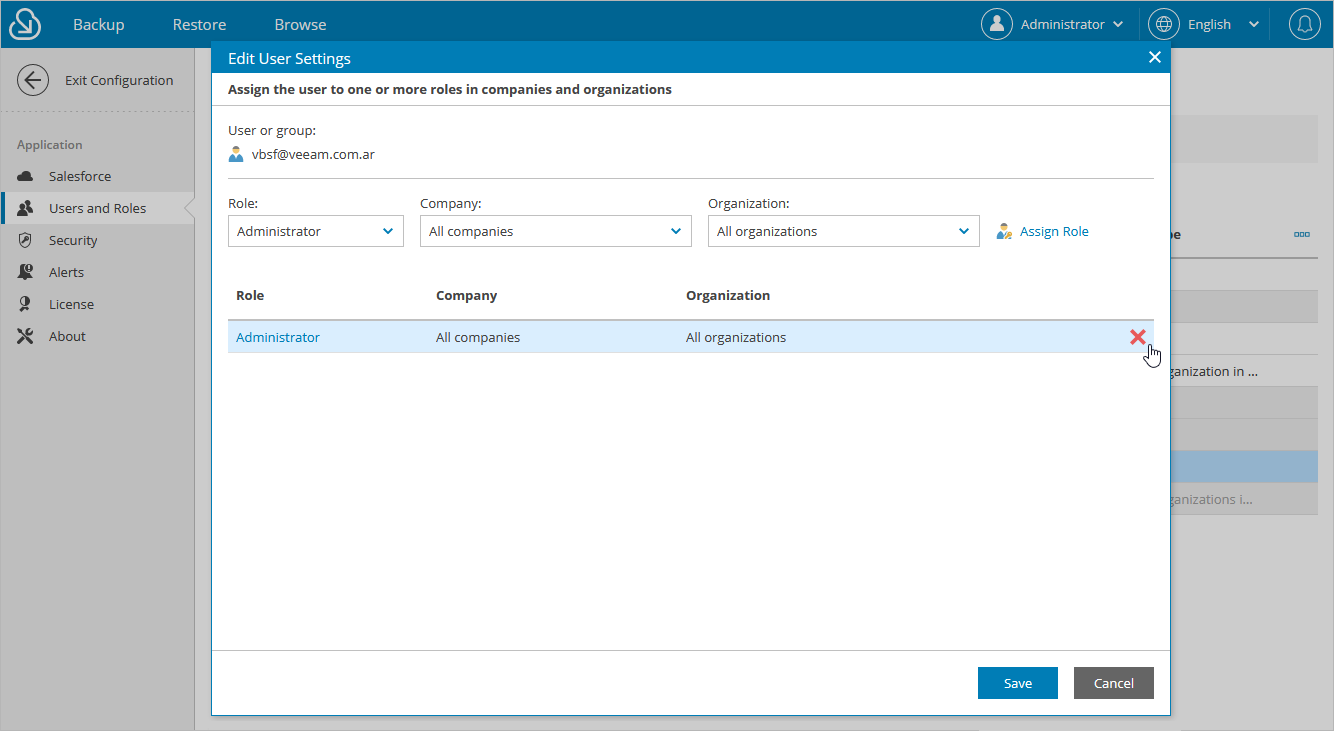
- In the Edit User Settings window, do either of the following:
- To unassign a role from the user or group of users, click the cross button in the necessary row of the user roles table.
- To assign a new role to the user or group of users, follow the instructions provided in Adding Users.
The changes will immediately apply after you finish working with the wizard. This will result on user access to the Veeam Backup for Salesforce functionality. However, all backup policies, archival policies and restore jobs started and scheduled by this user will not be affected.
Note |
If you rename a group of users in Microsoft Azure Entra ID, Veeam Backup for Salesforce does not automatically update the record in the configuration database. To update the group name in the product Web UI, select the group, click Edit and re-save the record. |
